KitchenAid K2TREFFWWH Use & Care Guide - Page 4
Refrigerator Doors
 |
View all KitchenAid K2TREFFWWH manuals
Add to My Manuals
Save this manual to your list of manuals |
Page 4 highlights
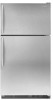
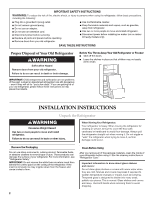
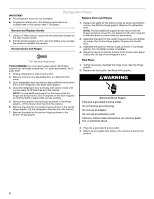
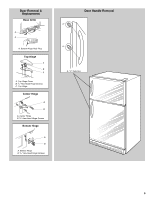
IMPORTANT: ■ The refrigerator doors are not reversible. Refrigerator Doors Replace Doors and Hinges ■ All graphics referenced in the following instructions are included later in this section after "Final Steps." Remove and Replace Handle 1. Using a ¹⁄₈" Allen wrench, loosen the two setscrews located on the side of each handle. 2. Pull the handle straight out from the door. Make sure you keep the screws to reattach the handles. Remove Doors and Hinges 1. Replace the parts for the bottom hinge as shown and tighten screws. See Bottom Hinge graphic. Replace the refrigerator door. NOTE: Provide additional support for the doors while the hinges are being moved. Do not depend on the door magnets to hold the doors in place while you are working. 2. Assemble the parts for the center hinge as shown and tighten all screws. See Center Hinge graphic. Replace the freezer door. 3. Assemble the parts for the top hinge as shown in Top Hinge graphic. Do not tighten screws completely. 4. Adjust the doors so that the bottom of the freezer door aligns evenly with the top of the refrigerator door. Hex Head Hinge Screw TOOLS NEEDED hex head socket wrench, #2 Phillips screwdriver, flat-blade screwdriver open-end wrench, flat 2" putty knife. 1. Unplug refrigerator or disconnect power. 2. Remove food and any adjustable door or utility bins from doors. 3. Open refrigerator door and remove base grille from the bottom front of the refrigerator. See Base Grille graphic. 4. Close the refrigerator door and keep both doors closed until you are ready to lift them free from the cabinet. NOTE: Provide additional support for the doors while the hinges are being moved. Do not depend on the door magnets to hold the doors in place while you are working. 5. Remove the parts for the top hinge as shown in Top Hinge graphic. Lift the freezer door free from the cabinet. 6. Remove the parts for the center hinge as shown in the Center Hinge graphic. Lift the refrigerator door free from the cabinet. 7. Remove the parts for the bottom hinge as shown in the Bottom Hinge graphic. Final Steps 1. Tighten all screws. Reinstall top hinge cover. See Top Hinge graphic. 2. Replace the base grille. See Base Grille graphic. WARNING Electrical Shock Hazard Plug into a grounded 3 prong outlet. Do not remove ground prong. Do not use an adapter. Do not use an extension cord. Failure to follow these instructions can result in death, fire, or electrical shock. 3. Plug into a grounded 3 prong outlet. 4. Return all removable door parts to the doors and food to the product. 4
-
 1
1 -
 2
2 -
 3
3 -
 4
4 -
 5
5 -
 6
6 -
 7
7 -
 8
8 -
 9
9 -
 10
10 -
11
-
12
-
13
-
14
-
15
-
16
-
17
-
18
-
19
-
20
-
21
-
22
-
23
-
24
-
25
-
26
-
27
-
28
-
29
-
30
-
31
-
32
 |
 |