KitchenAid KBFN502ESS Installation Guide - Page 15
Installation, Instructions
 |
View all KitchenAid KBFN502ESS manuals
Add to My Manuals
Save this manual to your list of manuals |
Page 15 highlights
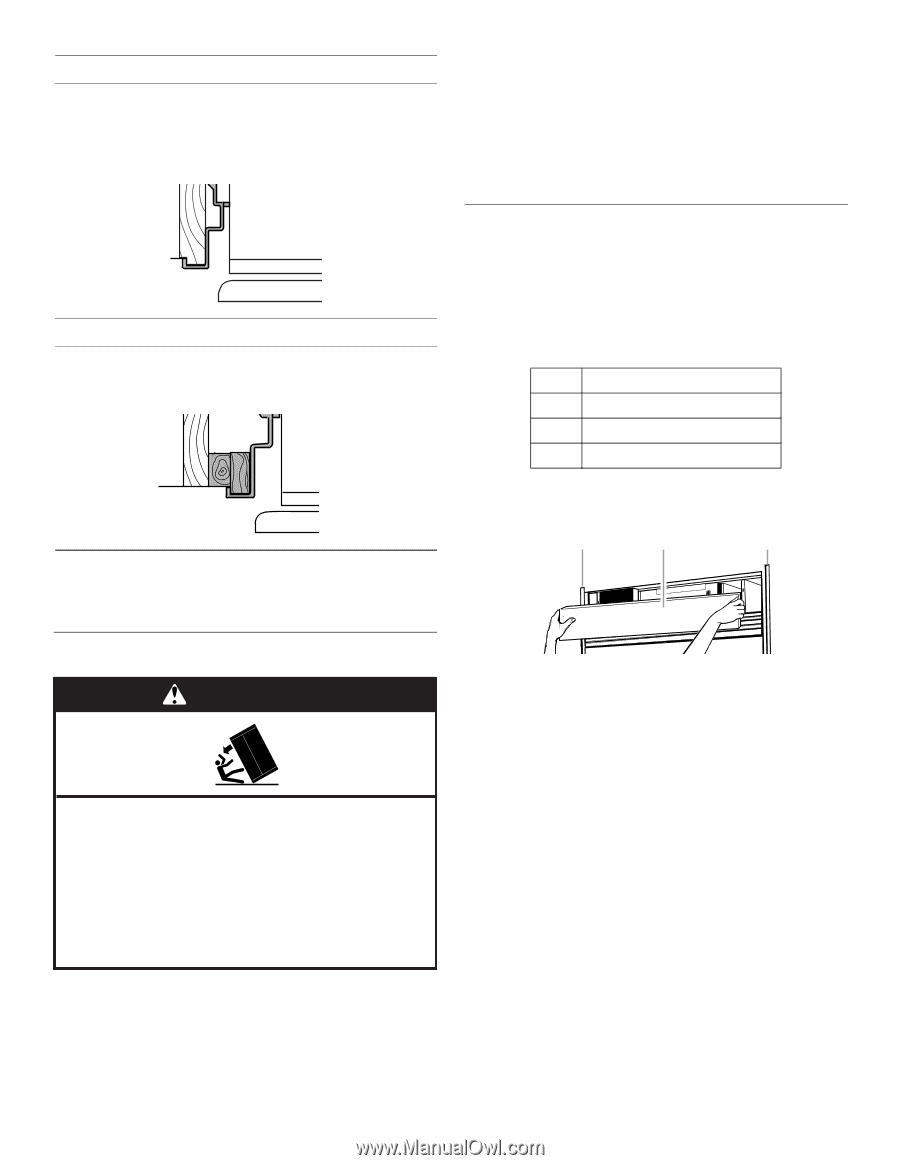
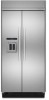
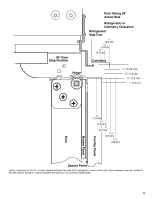
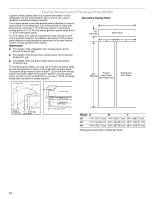
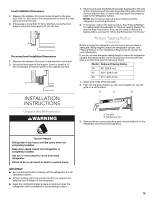
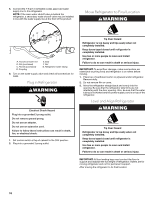
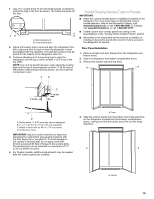
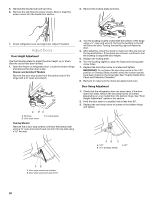
Inset Installation Dimensions 1. Measure the distance from point A (as shown) to the back wall. Add 0.8 mm) to this measurement to allow the side panel to fit into the trim. 2. If the panel is more than ³⁄₈" (9.5 mm) thick, route the front edge to allow the side panel to fit into the trim. A Recessed Inset Installation Dimensions 1. Measure the distance from point A (as shown) to back wall. 2. Route the front edge of the support board or attach a ³⁄₈" (9.5 mm) board to hold the panel in the cabinet side trim. A INSTALLATION INSTRUCTIONS Unpack the Refrigerator WARNING 1. Remove and save the literature package bag taped to the side of the refrigerator and the parts bag behind the grille. Remove the four brackets (two on each side) that attach the shipping base to the refrigerator bottom. NOTE: Do not remove tape and door bracing until the refrigerator is in its final location. 2. If necessary, reduce the tipping radius. See "Tipping Radius" for ceiling height requirements or "Reduce Tipping Radius" for step-by-step instructions. If you do not need to reduce the tipping radius, proceed to "Move the Refrigerator into House." Reduce Tipping Radius (if required) Before bringing the refrigerator into the home, be sure there is adequate ceiling height to stand the refrigerator upright. See "Tipping Radius" in the "Installation Requirements" section for more information. If you do not have adequate ceiling height to stand the refrigerator upright, the tipping radius can be reduced by removing the top grille and side trims (see the following chart). Model Reduced Tipping Radius 36 89" (225.9 cm) 42 90¹⁄₂" (229.9 cm) 48 91¹⁄₄" (231.8 cm) 1. Grasp both ends of the top grille. 2. Push the top grille straight up; then pull straight out. Lay the grille on a soft surface. B A B A. Top grille B. Cabinet side trim 3. Remove the six screws attaching each cabinet side trim to the refrigerator and remove the side trims. Tip Over Hazard Refrigerator is top heavy and tips easily when not completely installed. Keep doors taped closed until refrigerator is completely installed. Use two or more people to move and install refrigerator. Failure to do so can result in death or serious injury. IMPORTANT: ■ Do not remove the film covering until the refrigerator is in its operating location. ■ All four leveling legs must contact the floor to support and stabilize the full weight of the refrigerator. ■ Keep the cardboard shipping piece or plywood under the refrigerator until it is installed in the operating location. 15
-
 1
1 -
2
-
3
-
4
-
5
-
6
-
7
-
8
-
9
-
 10
10 -
 11
11 -
 12
12 -
 13
13 -
 14
14 -
 15
15 -
 16
16 -
 17
17 -
 18
18 -
 19
19 -
 20
20 -
21
-
22
-
23
-
24
-
25
-
26
-
27
-
28
-
29
-
30
-
31
-
32
-
33
-
34
-
35
-
36
-
37
-
38
-
39
-
40
-
41
-
42
-
43
-
44
-
45
-
46
-
47
-
48
-
49
-
50
-
51
-
52
-
53
-
54
-
55
-
56
-
57
-
58
-
59
-
60
-
61
-
62
-
63
-
64
 |
 |