KitchenAid KBRS19KCMS Use & Care Guide - Page 6
Install Custom Overlay Frame
 |
View all KitchenAid KBRS19KCMS manuals
Add to My Manuals
Save this manual to your list of manuals |
Page 6 highlights
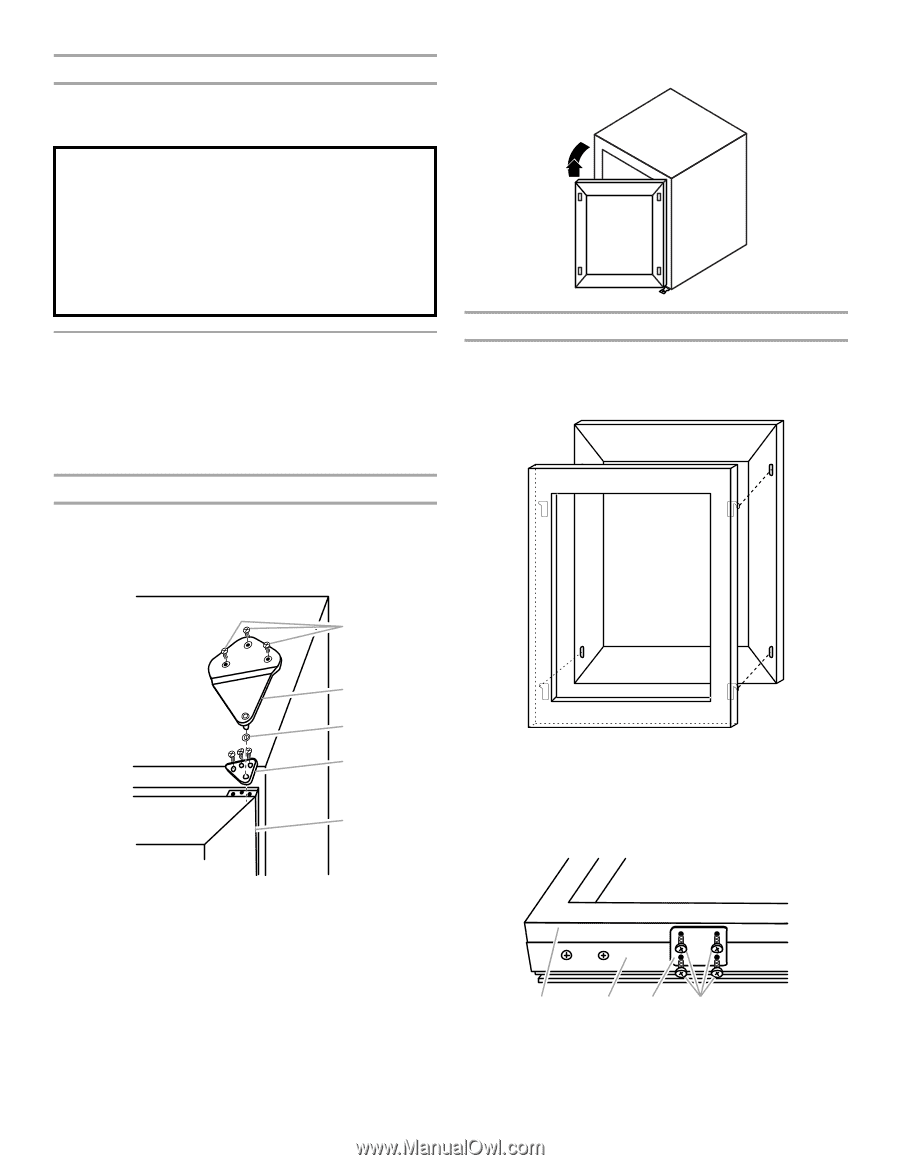
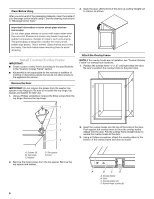
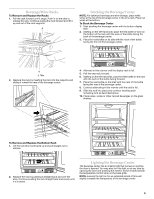
Clean Before Using After you remove all of the packaging materials, clean the inside of your beverage center before using it. See the cleaning instructions in "Beverage Center Care." 3. Open the door. Lift the front of the door up, pulling straight out to remove as shown. Important information to know about glass shelves and covers: Do not clean glass shelves or covers with warm water when they are cold. Shelves and covers may break if exposed to sudden temperature changes or impact, such as bumping. Tempered glass is designed to shatter into many small, pebble-size pieces. This is normal. Glass shelves and covers are heavy. Use both hands when removing them to avoid dropping. Install Custom Overlay Frame IMPORTANT: ■ Create custom overlay frame according to the specifications in the "Custom Overlay Frame" section. ■ KitchenAid is not responsible for the removal or addition of molding or decorative panels that would not allow access to the appliance for service. Remove the Door IMPORTANT: Do not remove the grease from the washer, top spacer or top hinge pin. Be sure to set aside the top hinge, top spacer and washer for later use. 1. Using a Phillips screwdriver, remove the three screws from the top hinge. Remove the top hinge. Attach the Overlay Frame NOTE: If the overlay hooks are not installed, see "Custom Overlay Frame" for overlay hook locations. 1. Position the overlay frame ¹⁄₂" (1.27 cm) higher than the door. Be sure to position the overlay hooks to the pilot holes. A B C 2. Insert the overlay hooks into the top of the holes in the door. D Push against the overlay frame to force the overlay hooks deeper into the door. Pull the overlay frame straight down to secure the overlay hooks to the door. 3. Using a Phillips screwdriver, attach the overlay plates to the E bottom of the overlay frame and door as shown. A. Screws (3) B. Top hinge C. Washer D. Top spacer E. Door 2. Remove the three screws from the top spacer. Remove the top spacer and washer. 6 A B C D A. Overlay frame B. Door C. Overlay plates (2) D. Round-head screws (8)
-
 1
1 -
 2
2 -
 3
3 -
 4
4 -
 5
5 -
 6
6 -
 7
7 -
 8
8 -
 9
9 -
 10
10 -
 11
11 -
 12
12 -
13
-
14
-
15
-
16
-
17
-
18
-
19
-
20
-
21
-
22
-
23
-
24
-
25
-
26
-
27
-
28
-
29
-
30
-
31
-
32
-
33
-
34
-
35
-
36
-
37
-
38
-
39
-
40
 |
 |