KitchenAid KDTE204GPS Installation Guide - Page 18
Final Installation Check
 |
View all KitchenAid KDTE204GPS manuals
Add to My Manuals
Save this manual to your list of manuals |
Page 18 highlights
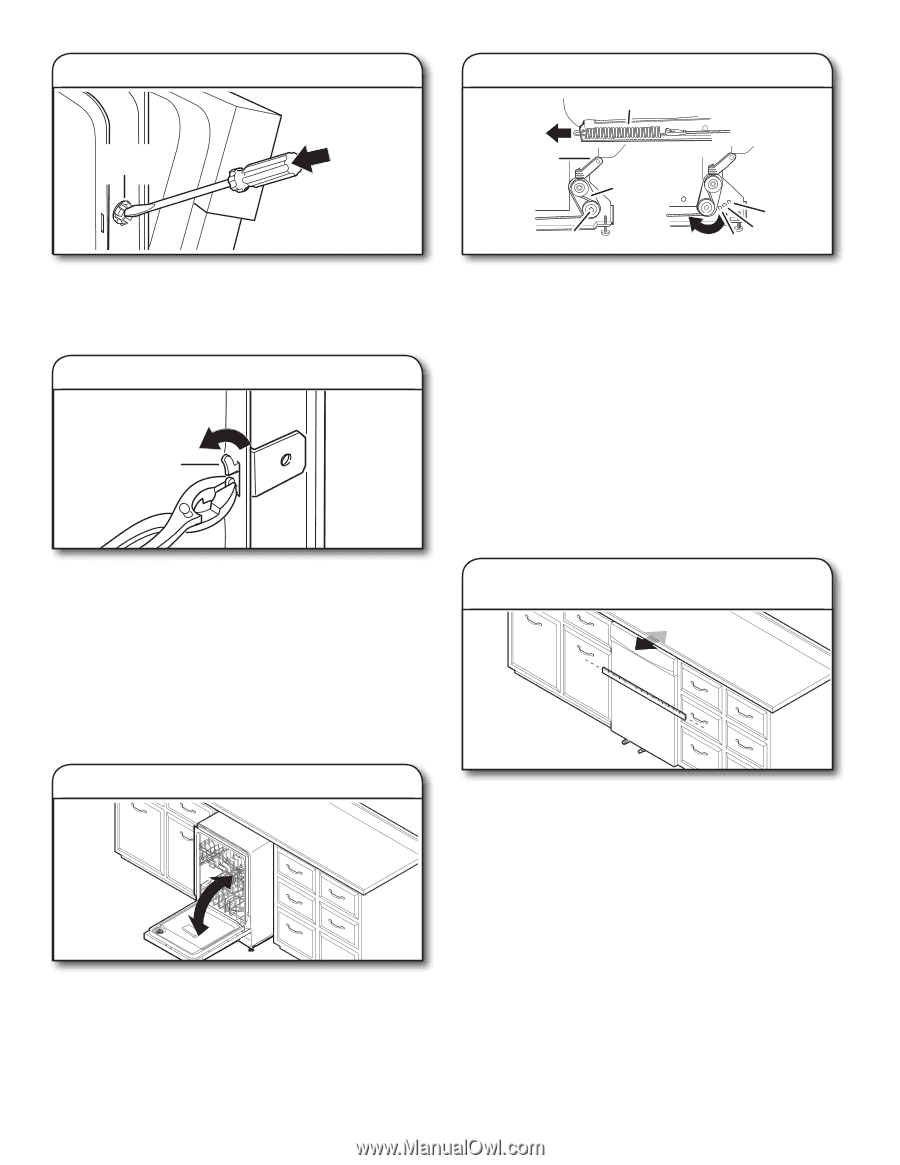
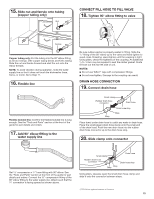
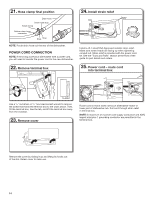
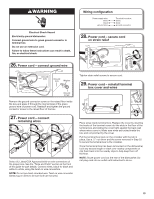
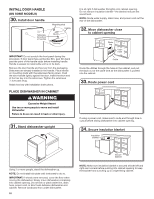
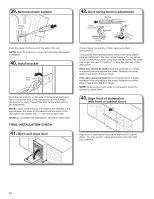
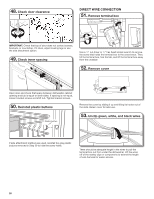
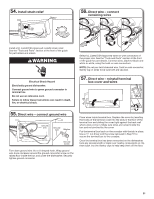
39. Remove plastic buttons Plastic button Push the plastic buttons out of the side of the tub. NOTE: Save the buttons to cover the holes after dishwasher is installed. 40. Install bracket Bend tabs Push bracket into slot on the side of dishwasher, and bend tab in toward the side of the dishwasher so that it keeps the bracket in place. Repeat this step for the other side of the dishwasher. NOTE: Install wood shims to the inside of the cabinets if the gap between the sides of the cabinet and the sides of the dishwasher are greater than 1/2" (13 mm) on each side. NOTE: Do not attach the dishwasher. This will be done later. FINAL INSTALLATION CHECK 41. Open and close door 42. Door spring tension adjustment Spring Plastic rope end Tensioner Screw 3 12 If door closes too quickly or falls, open and adjust spring tension. To adjust the door spring tension, remove the white plastic rope end attached to the door hinge. Using a 5/16" nut driver or hex socket, remove the screw from the tensioner. The screw can be put into one of 3 holes (1, 2, 3) in the front leg of the dishwasher. If the door closes by itself: Move the tensioner to a lowernumbered hole and replace the screw. Reattach the white plastic rope end to the door hinge. If the door opens by itself: Move the tensioner to a higher numbered hole and replace the screw. Reattach the white plastic rope end to the door hinge. NOTE: Tensioners on both sides of dishwasher should be secured at same holes. 43. Align front of dishwasher with front of cabinet doors Align front of dishwasher door panel with front of cabinet doors. You may need to adjust alignment to be even with your cabinets. 18
-
 1
1 -
2
-
3
-
4
-
5
-
6
-
7
-
8
-
9
-
10
-
11
-
12
-
 13
13 -
 14
14 -
 15
15 -
 16
16 -
 17
17 -
 18
18 -
 19
19 -
 20
20 -
 21
21 -
 22
22 -
 23
23 -
24
-
25
-
26
-
27
-
28
-
29
-
30
-
31
-
32
-
33
-
34
-
35
-
36
-
37
-
38
-
39
-
40
-
41
-
42
-
43
-
44
-
45
-
46
-
47
-
48
-
49
-
50
-
51
-
52
-
53
-
54
-
55
-
56
-
57
-
58
-
59
-
60
-
61
-
62
-
63
-
64
-
65
-
66
-
67
-
68
-
69
-
70
-
71
-
72
-
73
-
74
-
75
-
76
 |
 |