KitchenAid KECC508RPS Use & Care Guide - Page 6
Cooktop Controls, Touch-activated Electronic Control Models - lowes
 |
UPC - 050946991474
View all KitchenAid KECC508RPS manuals
Add to My Manuals
Save this manual to your list of manuals |
Page 6 highlights
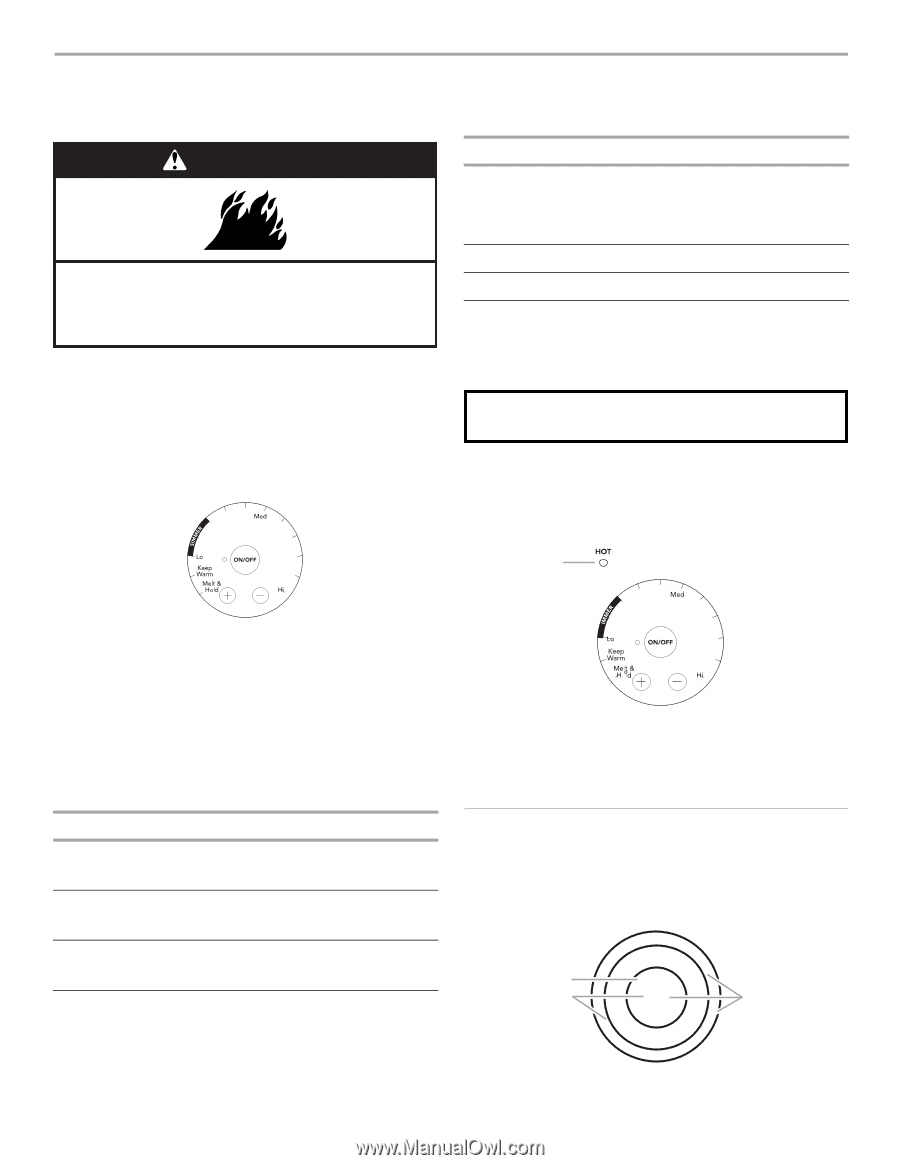
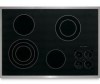
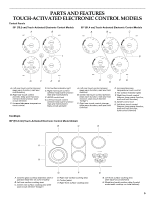
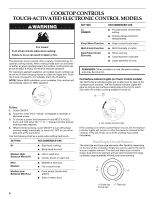
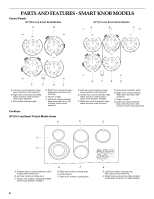
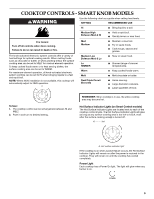
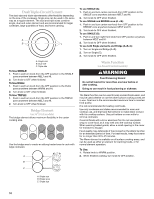
COOKTOP CONTROLS TOUCH-ACTIVATED ELECTRONIC CONTROL MODELS WARNING Fire Hazard Turn off all controls when done cooking. Failure to do so can result in death or fire. The electronic touch controls offer a variety of heat settings for optimal cooking results. When melting foods such as chocolate or butter, or when proofing bread, the surface cooking area can be set to MELT & HOLD for minimal element operation. For maximum element operation, all cooktop touch controls can be set to HI when bringing liquids to a fast and rapid boil. Touch the minus (-) keypad to immediately reach the HI setting. NOTE: Where 240V installation is not available, this cooktop will automatically adjust to 208V operation. SETTING Lo SIMMER Keep Warm Function Melt & Hold Function Dual/Triple Circuit Elements RECOMMENDED USE s Provide lowest simmer/heat setting. s Simmer (range of simmer temperatures). s Keep cooked foods warm. s Melt chocolate or butter. s Home canning. s Large-diameter cookware. s Large quantities of food. REMEMBER: When cooktop is in use, the entire cooktop area may become hot. Hot Surface Indicator Lights (on Touch Control models) The Hot Surface Indicator Lights are located next to each of the cooktop touch controls. The Hot Surface Indicator Lights will glow as long as any surface cooking area is too hot to touch, even after the surface cooking area(s) is turned off. A To Use: 1. Touch ON/OFF. 2. Touch the "plus" (+) or "minus" (-) keypads to increase or decrease power. 3. To choose a power level between HI and MELT & HOLD, touch and hold either the "+" or "-" keypad until the desired level has been reached. 4. When finished cooking, touch ON/OFF to turn off surface cooking area(s) individually, or touch ALL OFF to turn off all elements at the same time. Use the following chart as a guide when setting heat levels. SETTING RECOMMENDED USE Hi s Start food cooking. s Bring liquid to a boil. Medium High Between Med & Hi s Hold a rapid boil. s Quickly brown or sear food. Med Medium s Maintain a slow boil. s Fry or sauté foods. Medium Low Between Med & Lo s Cook soups, sauces and gravies. s Stew or steam food. 6 A. Hot surface indicator light If the cooktop is on when a power failure occurs, the Hot Surface Indicator Lights will remain on after the power is restored to the cooktop. They will remain on until the cooktop has cooled completely. Dual/Triple Circuit Element The dual-size and triple-size elements offer flexibility depending on the size of the cookware. Single size can be used in the same way as a regular element. The dual and triple sizes combine single, dual and outer element and are recommended for larger cookware, large quantities of food, and home canning. A B C A. Single size B. Dual size C. Triple size
-
 1
1 -
 2
2 -
 3
3 -
 4
4 -
 5
5 -
 6
6 -
 7
7 -
 8
8 -
 9
9 -
 10
10 -
 11
11 -
 12
12 -
13
-
14
-
15
-
16
-
17
-
18
-
19
-
20
-
21
-
22
-
23
-
24
-
25
-
26
-
27
-
28
-
29
-
30
-
31
-
32
-
33
-
34
-
35
-
36
 |
 |