KitchenAid KGSS907S Installation Instructions
KitchenAid KGSS907S - 30" Slide-In Gas Range Manual
 |
UPC - 883049027548
View all KitchenAid KGSS907S manuals
Add to My Manuals
Save this manual to your list of manuals |
KitchenAid KGSS907S manual content summary:
- KitchenAid KGSS907S | Installation Instructions - Page 1
FREESTANDING AND SLIDE-IN GAS RANGES INSTRUCTIONS POUR L'INSTALLATION DES CUISINIÈRES AUTOPORTANTES ET ENCASTRABLES DE 30" (76,2 CM) Table of Contents/Table des matières 2 IMPORTANT: Save for local electrical inspector's use. Installer: Leave installation instructions with the homeowner. Homeowner - KitchenAid KGSS907S | Installation Instructions - Page 2
SAFETY 2 INSTALLATION REQUIREMENTS 4 Tools and Parts 4 Location Requirements 4 Electrical Requirements 7 Gas Supply Requirements 7 Countertop Preparation 8 INSTALLATION INSTRUCTIONS 9 Unpack Range 9 Measure for Proper Height 9 Adjust Leveling Legs 10 Install Anti-Tip Bracket 10 Remove - KitchenAid KGSS907S | Installation Instructions - Page 3
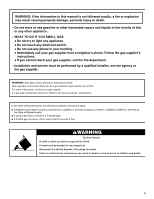
light any appliance. • Do not touch any electrical switch. • Do not use any phone in your building. • Immediately call your gas supplier from a neighbor's phone. Follow the gas supplier's instructions. • If you cannot reach your gas supplier, call the fire department. - Installation and service must - KitchenAid KGSS907S | Installation Instructions - Page 4
Gas Conversions ■ ½" combination wrench ■ 7 mm combination wrench ■ 7 mm nut driver ■ Size T20 TORX®† screwdriver Parts supplied Check that all parts are included. A B A. Filler strip B. Countertop C. Countertop cutout To order, see the "Assistance or Service" section of the Use and Care Guide - KitchenAid KGSS907S | Installation Instructions - Page 5
temperatures of 194° (90°C). Mobile Home - Additional Installation Requirements The installation of this range must conform to the Manufactured Home Construction and Safety Standard, Title 24 CFR, Part 3280 (formerly the Federal Standard for Mobile Home Construction and Safety, Title 24, HUD - KitchenAid KGSS907S | Installation Instructions - Page 6
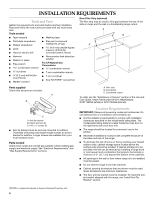
range, follow the range hood or microwave hood combination installation instructions for dimensional clearances above the cooktop surface. Freestanding Ranges Slide-In Ranges recommended for installation of rigid gas pipe. G. 6" (15.2 cm) available area for gas and electric installation H. Grounded - KitchenAid KGSS907S | Installation Instructions - Page 7
can be used. If the types of gas listed do not include the type of gas available, check with the local gas supplier. LP gas conversion: Conversion must be done by a qualified service technician. No attempt shall be made to convert the appliance from the gas specified on the model/serial rating plate - KitchenAid KGSS907S | Installation Instructions - Page 8
½" (1.3 cm) or ¾" (1.9 cm) I.D., flexible metal appliance connector may be used for connecting range to the gas supply line. ■ A ½" (1.3 cm) male pipe thread must be equipped with a manual shutoff valve. This valve should be located in the same room but external to the range opening, such as an - KitchenAid KGSS907S | Installation Instructions - Page 9
. Remove oven racks and parts package from inside oven. 2. To place range on its back, take 4 cardboard corners from the carton. Stack one cardboard corner on top of another. Repeat with the other 2 corners. Place them lengthwise on the floor behind the range to support the range when it is laid on - KitchenAid KGSS907S | Installation Instructions - Page 10
the range on its back or with the range supported on 2 legs after the range has been placed back to a standing position. NOTE: To place range range and be killed. Connect anti-tip bracket to rear range foot. Reconnect the anti-tip bracket, if the range is moved. Failure to follow these instructions - KitchenAid KGSS907S | Installation Instructions - Page 11
. 2. Using a pipe wrench to tighten, connect the gas supply to the range. B C D A F E J A. Gas pressure regulator B. 90° elbow (must have ½" male pipe thread) C. Nipple D. Union E. Black iron pipe I H G F. Manual gas shutoff valve G. ½" or ¾" gas pipe H. Nipple I. Union J. 90° elbow 11 - KitchenAid KGSS907S | Installation Instructions - Page 12
Attach one adapter to the gas pressure regulator and the other adapter to the gas shutoff valve. Tighten both adapters. 3. Use a combination wrench and channel lock pliers to attach found. 5. Remove cooktop burner caps and grates from parts package. Align notches in burner caps with pins in burner - KitchenAid KGSS907S | Installation Instructions - Page 13
an adapter. Do not use an extension cord. Failure to follow these instructions can result in death, fire, or electrical shock. 7. Plug into a grounded of air in the gas line. If burners do not light properly: ■ Turn cooktop control knob to the "OFF" position. ■ Check that the range is plugged in and - KitchenAid KGSS907S | Installation Instructions - Page 14
to be adjusted, locate the air shutter near the center rear of the range. Use a flat-blade screwdriver to loosen the locking screw. Rotate the air . On some models, an electric halo element also turns on. A B A. Gas burner B. Electric halo element NOTE: Oven door must be shut for broil burner to - KitchenAid KGSS907S | Installation Instructions - Page 15
and Care Guide for specific instruction on range operation. If range does not operate, check the following: ■ Household fuse is intact and tight, or circuit breaker has not tripped. ■ Range is plugged into a grounded 3 prong outlet. ■ Electrical supply is connected. ■ See "Troubleshooting" in the - KitchenAid KGSS907S | Installation Instructions - Page 16
to follow these instructions can result in death or serious burns to children and adults. To Convert Gas Pressure Regulator 1. Turn manual shutoff valve to the "closed" position. 2. Unplug range or disconnect power. B A C A. To range B. Manual shutoff valve "closed" position C. Gas supply line 16 - KitchenAid KGSS907S | Installation Instructions - Page 17
13,000 Btu/h 10,000 Btu/h 5,000 Btu/h Red Green Blue Red 0.70 mm 1.10 mm 0.95 mm 0.70 mm 5. Place Natural gas orifice spuds in plastic parts bag for future use and keep with literature package. 6. Replace burner cap. 7. Repeat steps 1-6 for the remaining burners, except for the TripleTier® Flame - KitchenAid KGSS907S | Installation Instructions - Page 18
to the "closed" position. 2. Unplug range or disconnect power. B A C A. To range B. Manual shutoff valve "closed" position C. Gas supply line 3. Remove warming drawer or storage drawer. See the "Remove Warming or Storage Drawer" section for instructions. Locate gas pressure regulator at rear of - KitchenAid KGSS907S | Installation Instructions - Page 19
Left rear 6,000 Btu/h 14,000 Btu/h 12,500 Btu/h 6,000 Btu/h 1.10 mm 1.70 mm 1.61 mm 1.10 mm 5. Place LP gas orifice spuds in plastic parts bag for future use and keep with literature package. 6. Replace burner cap. 7. Repeat steps 1-6 for the remaining burners, except for the TripleTier® Flame - KitchenAid KGSS907S | Installation Instructions - Page 20
70 mm 7. Replace burner plate, head and cap. 8. Place LP gas orifice spuds in plastic parts bag for future use and keep with package containing literature. A B Warming or Storage Drawer" section for instructions. 3. Complete installation. See "Make Gas Connection" and "Electronic Ignition System" - KitchenAid KGSS907S | Installation Instructions - Page 21
et ce qui peut se produire en cas de non-respect des instructions. AVERTISSEMENT : Si les renseignements dans ce manuel ne sont pas exactement entretien doivent être effectués par un installateur qualifié, une agence de service ou le fournisseur de gaz. AVERTISSEMENT : L'odorat ne permet pas - KitchenAid KGSS907S | Installation Instructions - Page 22
antibasculement si la cuisinière est déplacée. Le non-respect de ces instructions peut causer un décès ou des brûlures graves aux enfants et aux plan de travail Pour commander, voir la section "Assistance ou service" du Guide d'utilisation et d'entretien. Commander la pièce numéro W10113902A - KitchenAid KGSS907S | Installation Instructions - Page 23
24 CFR, Part 3280 (anciennement Federal Standard for Mobile Home Construction and Safety, Title 24, HUD Part 280). la garniture de porte du four, côté droit) D. 30" (76,2 cm) E. Longueur de la poignée au support à l'arrière de la cuisinière : 27¼" (69,2 cm)** F. Du coin du plan de travail vers - KitchenAid KGSS907S | Installation Instructions - Page 24
de 36" (91,4 cm). IMPORTANT : En cas d'installation d'une hotte ou d'un ensemble hotte/micro-ondes au-dessus de la cuisinière, suivre les instructions fournies avec la hotte de cuisinière ou de four à micro-ondes concernant les dimensions de dégagement à respecter au-dessus de la surface de la - KitchenAid KGSS907S | Installation Instructions - Page 25
satisfaire aux prescriptions de la plus récente édition du : National Fuel Gas Code ANSI Z223.1 (American National Standard), ou CAN/CGA B149 (édition tests de fuite de la cuisinière doivent être effectués selon les instructions du fabricant. Type de gaz Gaz naturel : La conception de cette cuisini - KitchenAid KGSS907S | Installation Instructions - Page 26
Canalisation de gaz ■ Installer une canalisation de gaz rigide de ¾" (1,9 cm) jusqu'à l'emplacement d'installation de la cuisinière. L'emploi d'une canalisation de plus petit diamètre ou plus longue peut susciter une déficience du débit d'alimentation. Pour l'alimentation au propane, le diamètre des - KitchenAid KGSS907S | Installation Instructions - Page 27
personnes pour déplacer et installer la cuisinière. Le non-respect de cette instruction peut causer une blessure au dos ou d'autre blessure. 1. Ôter les mat dans le sens de la longueur derrière la cuisinière à titre de support de la cuisinière lorsque celle-ci est placée sur sa partie postérieure - KitchenAid KGSS907S | Installation Instructions - Page 28
la cuisinière repose sur sa partie postérieure ou qu'elle est supportée par 2 pieds après avoir été replacée en position verticale. REMARQUE antibasculement si la cuisinière est déplacée. Le non-respect de ces instructions peut causer un décès ou des brûlures graves aux enfants et aide d'un marteau. - KitchenAid KGSS907S | Installation Instructions - Page 29
elle est conforme aux normes mentionnées à la section "Exigences de d'emplacement". 10. Poursuivre l'installation de la cuisinière en utilisant les instructions d'installation suivantes. Retrait du tiroir-réchaud ou du tiroir de remisage Retirer le tiroir-réchaud ou le tiroir de remisage pour avoir - KitchenAid KGSS907S | Installation Instructions - Page 30
autorisé de chauffage, le personnel autorisé d'une compagnie de gaz, et le personnel d'entretien autorisé. Le non-respect de ces instructions peut causer un décès, une explosion ou un incendie. Raccordement typique à une canalisation rigide On doit utiliser une combinaison de raccords pour - KitchenAid KGSS907S | Installation Instructions - Page 31
enlever la broche de liaison à la terre. Ne pas utiliser un adaptateur. Ne pas utiliser un câble de rallonge. Le non-respect de ces instructions peut causer un décès, un incendie ou un choc électrique. 7. Brancher sur une prise à 3 alvéoles reliée à la terre. Système d'allumage électronique Allumage - KitchenAid KGSS907S | Installation Instructions - Page 32
Si le brûleur ne s'allume pas correctement : ■ Ramener le bouton de commande de la table de cuisson à la position "Off" (arrêt). ■ Vérifier que la cuisinière est branchée , que le disjoncteur ne s'est pas déclenché et qu'aucun fusible n'est grillé. ■ Vérifier que chaque robinet d'arrêt est ouvert. ■ - KitchenAid KGSS907S | Installation Instructions - Page 33
é du four. Réinstaller le tiroirréchaud ou le tiroir de remisage. Réinstallation du tiroir-réchaud : 1. Aligner les glissières du tiroir avec les guides. A. Brûleur à gaz B. Élément de chauffage électrique périphérique REMARQUE : Pour que le brûleur du gril fonctionne correctement, il faut que la - KitchenAid KGSS907S | Installation Instructions - Page 34
de cuisson et le four. Pour des instructions spécifiques concernant l'utilisation de la cuisinière, consulter le Guide d'utilisation et d'entretien. Si la cuisiniè besoin d'assistance ou de service : Veuillez consulter la section "Assistance ou service" dans le Guide d'utilisation et d'entretien ou - KitchenAid KGSS907S | Installation Instructions - Page 35
de gaz 3. Retirer le tiroir-réchaud ou le tiroir de remisage. Voir la section "Retrait du tiroir-réchaud ou du tiroir de remisage" pour des instructions. Identifier le détendeur à l'arrière du tiroir de remisage ou du tiroir-réchaud. REMARQUE : Dans le cas d'un modèle avec tiroir-réchaud, on doit - KitchenAid KGSS907S | Installation Instructions - Page 36
une clé mixte de 7 mm pour enlever le gicleur externe. Faire tourner le gicleur dans le sens antihoraire. Conserver le gicleur externe à part. 6. Remplacer le gicleur pour gaz naturel par le gicleur pour propane correct. Le tableau qui suit permet de sélectionner l'emplacement correct du gicleur - KitchenAid KGSS907S | Installation Instructions - Page 37
de cuisson. 3. Retirer le tiroir-réchaud ou le tiroir de remisage. Voir la section "Retrait du tiroir-réchaud ou du tiroir de remisage" pour des instructions. Identifier le détendeur à l'arrière du tiroir de remisage ou du tiroir-réchaud. REMARQUE : Dans le cas d'un modèle avec tiroir-réchaud, on - KitchenAid KGSS907S | Installation Instructions - Page 38
Appuyer pour engager le tourne-écrou sur le gicleur; faire tourner le gicleur dans le sens antihoraire puis soulever pour l'enlever; conserver le gicleur à part. 5. Utiliser une clé mixte de 7 mm pour enlever le gicleur externe. Faire tourner le gicleur dans le sens antihoraire; conserver le gicleur - KitchenAid KGSS907S | Installation Instructions - Page 39
tiroir de remisage. Voir la section "Réinstallation des grilles du four et du tiroir-réchaud ou du tiroir de remisage" pour des instructions. 3. Achever l'installation. Voir les sections "Raccordement à la canalisation de gaz" et "Système d'allumage électronique". Il est très important de vérifier - KitchenAid KGSS907S | Installation Instructions - Page 40
. All rights reserved. Tous droits réservés. ® Registered Trademark/TM Trademark of KitchenAid, U.S.A., KitchenAid Canada licensee in Canada ® Marque déposée/TM Marque de commerce de KitchenAid, U.S.A., Emploi sous licence par KitchenAid Canada au Canada 3/09 Printed in U.S.A. Imprimé aux É.-U.
-
 1
1 -
 2
2 -
 3
3 -
 4
4 -
 5
5 -
 6
6 -
 7
7 -
8
-
9
-
10
-
11
-
12
-
13
-
14
-
15
-
16
-
17
-
18
-
19
-
20
-
21
-
22
-
23
-
24
-
25
-
26
-
27
-
28
-
29
-
30
-
31
-
32
-
33
-
34
-
35
-
36
-
37
-
38
-
39
-
40
 |
 |
INSTALLATION INSTRUCTIONS
30" (76.2 CM) FREESTANDING AND SLIDE-IN
GAS RANGES
INSTRUCTIONS POUR L’INSTALLATION
DES CUISINIÈRES AUTOPORTANTES ET
ENCASTRABLES DE 30" (76,2 CM)
Table of Contents/Table des matières
..................................................................................
2
W10118262B
IMPORTANT:
Save for local electrical inspector's use.
Installer:
Leave installation instructions with the homeowner.
Homeowner:
Keep installation instructions for future reference.
IMPORTANT :
À conserver pour consultation par l'inspecteur local des installations électriques.
Installateur :
Remettre les instructions d'installation au propriétaire.
Propriétaire :
Conserver les instructions d'installation pour référence ultérieure.