KitchenAid KMBP100ESS Use & Care Guide - Page 4
Parts And Features - microwave
 |
View all KitchenAid KMBP100ESS manuals
Add to My Manuals
Save this manual to your list of manuals |
Page 4 highlights
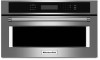
PARTS AND FEATURES This manual covers different models. The oven you have purchased may have some or all of the items listed. The locations and appearances of the features shown here may not match those of your model. H A The raised, curved lines in the center of the turntable bottom fit between the 3 spokes of the hub. The hub turns the turntable during microwave oven use. The rollers on the support should fit inside the turntable bottom ridge. Convection Rack The convection rack provides optimal heat circulation for convection cooking. B I J C,D K E F G A. Electronic oven control B. Convection element and fan (hidden behind back panel) C. Light (inaccessible, in ceiling) D. Grill element (can be lowered) E. Turntable F. Metal shielded window G. Lower oven (on combination models, see separate User Guide) H. Door safety lock system I. Dual microwave emission J. Cooking guide label K. Model/serial/rating (on right mounting rail, single oven models) Parts and Features not shown Steamer Convection grid Crisper pan and handle Baking tray Turntable ■ The rack will become hot. Always use oven mitts or pot holders when handling. ■ To avoid damage to the microwave oven, do not allow the rack to touch the inside cavity walls, ceiling or floor. ■ Always use the turntable. ■ To avoid damage to the microwave oven, do not store the rack in the microwave oven. ■ Two-level cooking is not recommended. ■ For best results, do not place popcorn bags on the rack. ■ The rack is designed specifically for this microwave oven. For best cooking results, do not attempt to use any other rack in this microwave oven. ■ See "Assistance or Service" section to reorder. Crisper Pan and Handle A B C A. Turntable B. Support and rollers C. Hub NOTE: By touching the Turntable ON/OFF key, it is possible to switch the turntable ON and OFF during some microwave cycles. The turntable can be turned "On" or "Off" during the Manual Cook, Manual Reheat, Manual Defrost, Manual Steam Cook, and all Easy Convect cycles. The turntable rotates in both directions to help cook food more evenly. Do not operate the microwave oven without having the turntable in place. See "Assistance or Service" to reorder any of the parts. The crisper pan, with its nonstick surface and detachable handle, has been specifically designed for microwave use, and is ideal for pan-frying (pan-browning) foods in the microwave oven. ■ The crisper pan will become hot. Always use the handle and oven mitts or pot holders when handling. Place gripping end on the edge of pan, squeeze handle, and lift pan. ■ To avoid damage to the microwave oven, do not allow the crisper pan or handle to touch the inside cavity walls, ceiling or floor. ■ Do not place crisper pan on the convection grid. Always use the turntable as a support for the crisper pan. ■ To avoid damage to the microwave oven, do not use another metal object with the crisper pan. ■ To avoid damage, do not place hot crisper pan directly on heatsensitive surfaces. ■ The crisper pan is designed specifically for this microwave oven. Do not use it in any other oven. ■ Use only wooden or plastic cooking utensils to help avoid scratches. ■ See "Assistance or Service" section to reorder. 4
-
 1
1 -
 2
2 -
 3
3 -
 4
4 -
 5
5 -
 6
6 -
 7
7 -
 8
8 -
 9
9 -
 10
10 -
11
-
12
-
13
-
14
-
15
-
16
-
17
-
18
-
19
-
20
-
21
-
22
-
23
-
24
-
25
-
26
-
27
-
28
-
29
-
30
-
31
-
32
-
33
-
34
-
35
-
36
-
37
-
38
-
39
-
40
-
41
-
42
-
43
-
44
-
45
-
46
-
47
-
48
 |
 |
