KitchenAid KPCM050NP User Guide - Page 22
Programming, Automatic Brew - coffee maker pro line
 |
UPC - 883049007922
View all KitchenAid KPCM050NP manuals
Add to My Manuals
Save this manual to your list of manuals |
Page 22 highlights
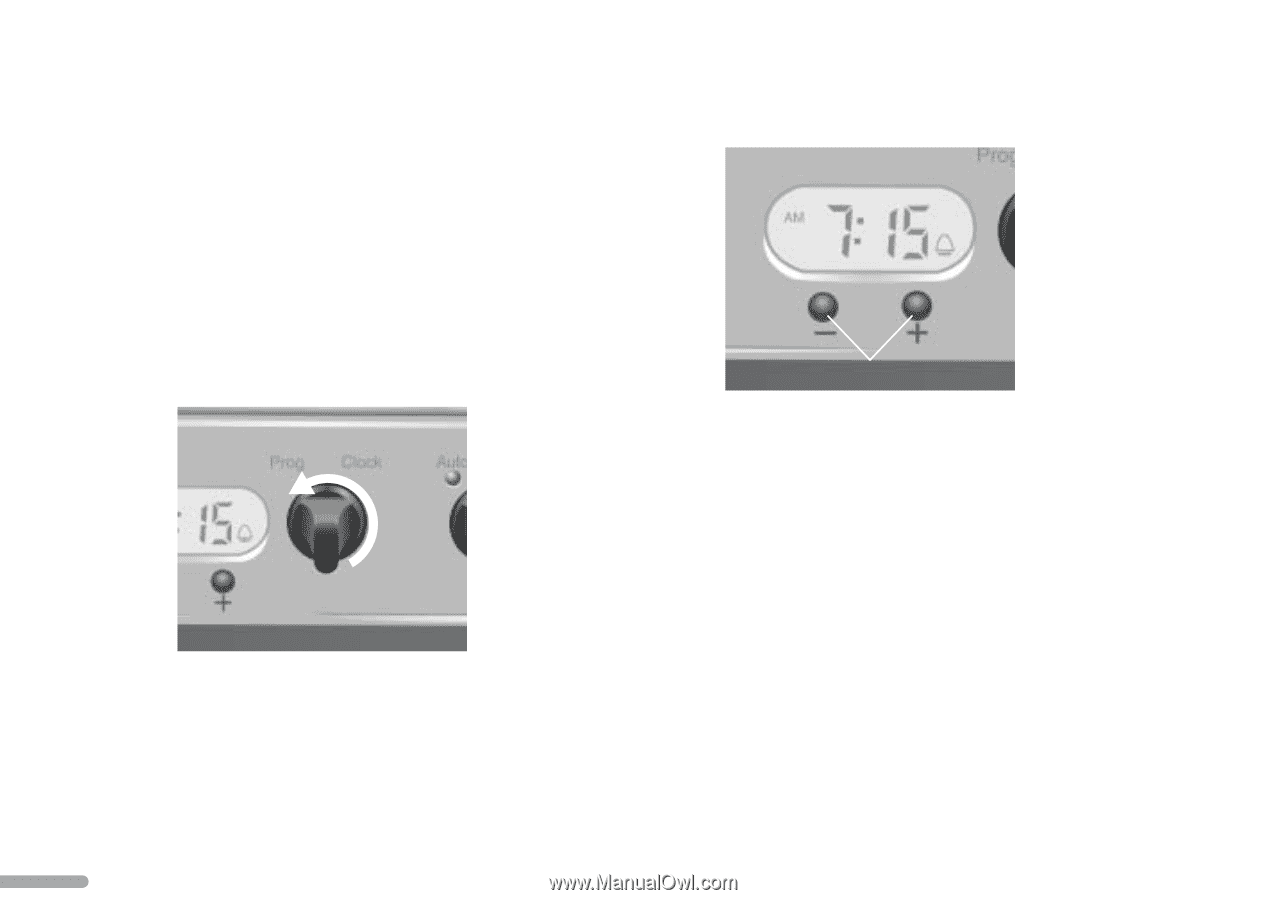
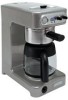
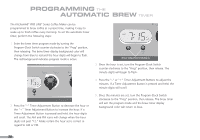
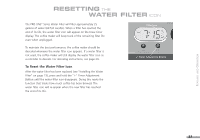
PROGRAMMING THE AUTOMATIC BREW TIMER The KitchenAid® PRO LINE® Series Coffee Maker can be programmed to brew coffee at a preset time, making it easy to wake up to fresh coffee every morning. To set the automatic brew timer, perform the following steps: 1. Enter the brew timer program mode by turning the Program-Clock Switch counter-clockwise to the "Prog" position, then releasing. The brew timer display background color will change from blue to red and the hour digits will begin to flash. The red background indicates program mode is active. 2. Press the "-" Timer Adjustment Button to decrease the hour or the "+" Timer Adjustment Button to increase the hour. If a Timer Adjustment Button is pressed and held, the hour digits will scroll. The AM and PM icons will change when the hour digits roll past "12." Make certain the hour set is correct in regard to AM or PM. Timer Adjustment Buttons 3. Once the hour is set, turn the Program-Clock Switch counter-clockwise to the "Prog" position, then release. The minute digits will begin to flash. 4. Press the "-" or "+" Timer Adjustment Buttons to adjust the minutes. If a Timer Adjustment Button is pressed and held, the minute digits will scroll. 5. Once the minutes are set, turn the Program-Clock Switch clockwise to the "Prog" position, then release. The brew timer will exit the program mode and the brew timer display background color will return to blue. 20
-
 1
1 -
2
-
3
-
4
-
5
-
6
-
7
-
8
-
9
-
10
-
11
-
12
-
13
-
14
-
15
-
16
-
 17
17 -
 18
18 -
 19
19 -
 20
20 -
 21
21 -
 22
22 -
 23
23 -
 24
24 -
 25
25 -
 26
26 -
 27
27 -
28
-
29
-
30
-
31
-
32
-
33
-
34
-
35
-
36
-
37
-
38
-
39
 |
 |