KitchenAid KRFF507HBS Owners Manual - Page 4
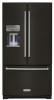
Changing the Light Bulb - refrigerator
 |
View all KitchenAid KRFF507HBS manuals
Add to My Manuals
Save this manual to your list of manuals |
Page 4 highlights
Style 2: Stainless Steel DO USE DO NOT USE � Soft, clean cloth � Abrasive cloths � Paper towels or newsprint � Steel-wool pads � Warm, soapy water with a mild detergent � Abrasive powders or liquids � Ammonia � Citrus-based cleaners � Acidic or vinegar-based cleaners � Oven cleaners � For heavy soil, use only a manufacturer's approved stainless steel cleaner and polish � Abrasive powders or liquids � Ammonia � Citrus-based cleaners � Acidic or vinegar-based cleaners � Oven cleaners � Abrasive cloths � Paper towels or newsprint � Steel-wool pads NOTES: � If unintentional contact does occur, clean plastic part with a sponge and mild detergent in warm water. Dry thoroughly with a soft cloth. � Avoid exposing stainless steel appliances to caustic or corrosive elements such as high-salt, high-moisture, or highhumidity environments. Damage due to exposure to these elements is not covered under the warranty. � Just because a cleaner is a liquid does not mean it is nonabrasive. Many liquid cleansers formulated to be gentle on tile and smooth surfaces still damage stainless steel. � When cleaning stainless steel, always wipe in the direction of the grain to avoid cross-grain scratching. � Citric acid permanently discolors stainless steel. To avoid damaging the finish of your stainless steel refrigerator: Do not allow these substances to remain on the finish: • Mustard • Citrus-based sauces • Tomato juice • Citrus-based products • Marinara sauce Condenser Cleaning WARNING Explosion Hazard Risk of Fire or Explosion due to Puncture of Refrigerant Tubing; Follow Handling Instructions Carefully. Flammable Refrigerant Used. There is no need for routine condenser cleaning in normal home operating environments. If the environment is particularly greasy or dusty or there is significant pet traffic in the home, the condenser should be cleaned every 6 months to ensure maximum efficiency. 1. Unplug refrigerator or disconnect power. 2. Remove the base grille. 3. Use a vacuum cleaner with a soft brush to clean the grille, the open areas behind the grille, and the front surface area of the condenser. 4. Replace the base grille when finished. 5. Plug in refrigerator or reconnect power. NOTE: If you are unable to clean the condenser, please call for service. Changing the Light Bulb IMPORTANT: The lights in both the refrigerator and freezer compartments use LED technology that do not need to be replaced. If the lights do not illuminate when the door or drawer is opened, call for assistance or service. Refer to the Quick Start Guide for contact information. The lighting system in this appliance may consist of: � Sealed LED modules � LED Bulbs � Incandescent Bulbs � Or a combination of the above. If an LED bulb does not illuminate when the refrigerator and/or freezer door is opened, replace with like bulb following this procedure: 1. Unplug refrigerator or disconnect power. 2. Remove the light shield (on some models). � Remove the hardware holding the light shield in place. � Top of the refrigerator compartment - Slide the light shield toward the back of the compartment to release it from the light assembly. 3. Not all appliance bulbs will fit your refrigerator. Replace the burned-out bulb(s) with an appliance bulb of the same size, shape and wattage. Order part number W10565137 (3.6 W). NOTE: Some LED replacement bulbs are not recommended for wet/damp environments. The refrigerator and freezer compartments are considered to be wet/damp environments. If using a brand of LED bulb other than the recommended LED bulb, before installation, read and follow all instructions on the LED packaging. 4 17-Dec-2020 11:40:23 EST | RELEASED In some European factories the letter "W" of the part code mentioned herein will be automatically replaced by the number "4000" (e.g. "W12345678" becomes "400012345678")
-
 1
1 -
 2
2 -
 3
3 -
 4
4 -
 5
5 -
 6
6 -
 7
7 -
 8
8 -
 9
9 -
 10
10 -
11
-
12
-
13
-
14
-
15
-
16
-
17
-
18
-
19
-
20
-
21
-
22
-
23
-
24
-
25
-
26
-
27
-
28
-
29
-
30
-
31
-
32
-
33
-
34
-
35
-
36
-
37
-
38
-
39
-
40
-
41
-
42
-
43
-
44
-
45
-
46
-
47
-
48
-
49
-
50
-
51
-
52
-
53
-
54
-
55
-
56
-
57
-
58
-
59
 |
 |
