KitchenAid KVWB406DSS Installation Guide - Page 10
Range Hood Use - lowes
 |
View all KitchenAid KVWB406DSS manuals
Add to My Manuals
Save this manual to your list of manuals |
Page 10 highlights
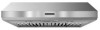
WARNING Electrical Shock Hazard Electrically ground blower. Connect ground wire to green and yellow ground wire in terminal box. Failure to do so can result in death or electrical shock. 4. Connect green (or bare) ground wire from home power supply to yellow-green ground wire (C) in terminal box using UL listed wire connectors. 5. Install terminal box cover. 6. Check that all light bulbs are secure in their sockets. 7. Reconnect power. Install Vent Covers (Optional) If you are installing an optional full width duct cover, follow the instructions included with that product. Complete Installation 1. Install metal grease filters. See the "Range Hood Care" section. 2. Check the operation of the range hood blower and light. See the "Range Hood Use" section. NOTE: To get the most efficient use from your new range hood, read the "Range Hood Use" section. RANGE HOOD USE The range hood is designed to remove smoke, cooking vapors and odors from the cooktop area. For best results, start the hood before cooking and allow it to operate several minutes after the cooking is complete to clear all smoke and odors from the kitchen. The hood controls are located on the underside of the range hood. Operating the fan 1. Move the fan switch to the "On" position to turn the fan ON. The fan will begin operating at the speed set on the fan speed switch. 2. Move the fan switch to the "Off" position to turn the fan OFF. Auto On Fan A B C A. Light control B. Blower control C. Fan speed control The range hood is equipped with a sensor to automatically turn on the fan when excessive heat is detected in the control area. When the fan switch is in the "Off" position, this sensor will turn the fan to high speed when necessary. When the heat decreases, the fan will turn off. When the fan switch is in the "On" position, the heat sensor is not active and the range hood functions normally. Adjusting the fan Range Hood Controls Operating the light 1. Move the light switch to the "1" position to turn range hood light to night light setting. 2. Move the light switch to the "2" position to turn range hood light to full light setting. 3. Move the light switch to the "Off" position to turn range hood light OFF. The fan has 3 speed controls. Move the fan speed switch to "1" position for low speed, "2" position for medium speed, or "3" position for high speed. Thermal Protector The range hood is equipped with a thermal protector to avoid overheating conditions. If the range hood shuts off while in use, move fan slider switch to Off to turn off the range hood. Wait approximately 60 minutes, then move slider to On to restart the range hood. 10
-
 1
1 -
2
-
3
-
4
-
 5
5 -
 6
6 -
 7
7 -
 8
8 -
 9
9 -
 10
10 -
 11
11 -
 12
12 -
 13
13 -
 14
14 -
 15
15 -
16
-
17
-
18
-
19
-
20
-
21
-
22
-
23
-
24
-
25
-
26
-
27
-
28
 |
 |
