KitchenAid KXU2836JSS Owners Manual - Page 10
levelness of the hood front to back.
 |
View all KitchenAid KXU2836JSS manuals
Add to My Manuals
Save this manual to your list of manuals |
Page 10 highlights
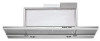
4. Install 2 - 3.5 x 9.5 mm mounting screws. Leave approximately ¹⁄₄" (0.6 cm) space between the screw heads and hood to slide the brackets into place. 7. Install a lower bracket with a 3.5 x 9.5 mm screw. Be sure to position the bracket slot as shown. A B C A A. 3.5 x 9.5 mm screws 5. Position an upper bracket so that the large end of the keyhole slots are over the mounting screws. Then push the bracket toward the rear of the hood so that the screws are in the neck of the slots. Tighten the mounting screws, making sure the mounting screws are in the narrow neck of the slots. A A. 3.5 x 9.5 mm screw B. Lower bracket C. Bracket slot 8. Install 2 - 5 x 18 mm adjusting screws. A B A. Upper bracket B. Mounting screws 6. Remove the grease filter by pulling the spring release handle and then pulling down the filter. A. 5 x 18 mm leveling screws 9. Place a level on either side the hood top and check the levelness of the hood front to back. 10. Adjust the adjusting screws so the hood is level from front to back. Repeat this procedure on the other side. 11. Drill 2 3 mm) pilot holes and install 2 - 4.5 x 16 mm wood screws to secure the front of the range hood to the cabinet bottom. A A A. Spring release handle A. 4.5 x 16 mm wood screws 10
-
 1
1 -
2
-
3
-
4
-
 5
5 -
 6
6 -
 7
7 -
 8
8 -
 9
9 -
 10
10 -
 11
11 -
 12
12 -
 13
13 -
 14
14 -
 15
15 -
16
-
17
-
18
-
19
-
20
-
21
-
22
-
23
-
24
-
25
-
26
-
27
-
28
-
29
-
30
-
31
-
32
 |
 |
