Kodak C700 Owner Manual Latin America - Page 20
Date and time formats, Changing the date and time formats
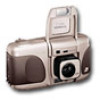 |
View all Kodak C700 manuals
Add to My Manuals
Save this manual to your list of manuals |
Page 20 highlights
3. Press the ENTER BUTTON (18) to store the selected month and to activate the next "blinking" date option (follow steps 2 and 3 to complete your selection). • After you set the "date" or "time," the LCD panel will display "DATE IS" or "TIME IS" followed by the selected date or time. 4. Repeat steps 1-3 to choose "SET TIME" and set the selection. Date and time formats The date and time formats are automatically set for you according to the designated language listed below. If you want to change the automatic settings for date and time formats, see Changing the date and time formats. Time Format Date Format English 12 hour month, day, year German 24 hour day, month, year French 24 hour day, month, year Spanish 24 hour day, month, year Japanese 24 hour year, month, day Changing the date and time formats (mm, dd, yy/ dd, mm, yy/ yy, mm, dd and 12/24 hour) 1. Repeatedly press the MENU BUTTON (21) until the LCD PANEL (14) displays "SET DATE FORMAT." 2. Press the SELECT BUTTON (19) to make the selection. Press the ZOOM-DIAL LEVER (1) to the right or left to increase or decrease the number. 3. Press the ENTER BUTTON (18) to store the selected format. • After you set the "date" or "time," the LCD panel will display "DATE FORMAT IS" followed by the selected format. 4. Repeat steps 1-3 to choose and "SET TIME FORMAT." 15
-
 1
1 -
2
-
3
-
4
-
5
-
6
-
7
-
8
-
9
-
10
-
11
-
12
-
13
-
14
-
 15
15 -
 16
16 -
 17
17 -
 18
18 -
 19
19 -
 20
20 -
 21
21 -
 22
22 -
 23
23 -
 24
24 -
 25
25 -
26
-
27
-
28
-
29
-
30
-
31
-
32
-
33
-
34
-
35
-
36
-
37
-
38
-
39
-
40
-
41
-
42
-
43
-
44
-
45
-
46
-
47
-
48
-
49
-
50
-
51
-
52
-
53
-
54
-
55
-
56
-
57
-
58
-
59
-
60
-
61
-
62
-
63
-
64
-
65
-
66
-
67
-
68
-
69
-
70
-
71
-
72
-
73
-
74
-
75
 |
 |
