Kodak DP800 Miniguide - Page 3
Connecting the Projector to your video player - parts
 |
View all Kodak DP800 manuals
Add to My Manuals
Save this manual to your list of manuals |
Page 3 highlights
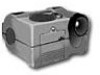
0510 CD-Inledning.ENG 12-03-98 16:40 Side 6 4 Connecting the Projector to your video player Using composite video Plug panel 3. Connect the power cable from the Projector to the wall outlet. 4. When all the connections are done and verified, switch on the video source, and then switch on the Projector. Connect to video out part of VCR R L Connect to VCR audio out Fig.4. Connecting to a composite video source 5. The Projector will now automatically display the pictures from the video source. If not, see the section Trouble shooting. 1. Find the Composite video cable, and the audio cable. All cables and adapters are provided with the Projector. 2. Make sure that the video source and the Projector are switched off. Connect the Composite video cable from theVideo out connector of the video source to the Composite video connector on the Projector plug panel, see fig.4. Connect the audio cable from the Audio out connectors of the video source to the Composite Audio in connectors on the Projector. Connect the red plug to the red connector, and the other plug to the white connector. Red is the right stereo channel. You can connect external speakers to the Projector from the Audio out connectors on the plug panel. Using Scart video The signals from the Scart connector are the same as from the Composite connector. If you have a Scart connector on your video, you will have to purchase a Scart to Composite interconnection. Connect the Scart end of the interconnection cable to your video, and then follow the procedure in the previous section, Using composite video. Using composite video Plug panel 4. When all the connections are done and verified, switch on the video source, and then switch on the Projector. Connect to VCR, S-video out. Fig.5. Connecting to a SuperVideo source 5. The Projector will now automatically display the pictures from the video source. If not, see the section Trouble shooting. You can connect external speakers to the Projector from the Audio out connectors on the plug panel. 1. Find the SuperVideo cable. All cables and adapters are provided with the Projector . 2. Make sure that the video source and the Projector are switched off. Connect the SuperVideo cable from the S-video out connector on the video source to the S-video connector on the Projector plug panel, see fig. 5. Connect the audio cable from the audio out connectors on the video source to the S-video Audio in connectors on the Projector. Connect the red plug to the red connector, and the other plug to the white connector. Red is the right stereo channel. Using external speakers You can connect external speakers to the Projector in two ways: 1. Powered speakers (Speakers with built in amplifier).These speakers can be connected directly to the audio out connectors on the Projector amplifier. 2. Amplifier. Connect the amplifier to the audio out on the Projector. When external speakers are connected,These can be turned on or off from the Projector. 3. Connect the power cable from the Projector to the wall outlet. 6 7
-
 1
1 -
 2
2 -
 3
3
 |
 |
