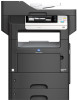
Konica Minolta bizhub 4750 bizhub 4750/4050 Fax Functions User Guide
Konica Minolta bizhub 4750 Manual
 |
View all Konica Minolta bizhub 4750 manuals
Add to My Manuals
Save this manual to your list of manuals |
Konica Minolta bizhub 4750 manual content summary:
- Konica Minolta bizhub 4750 | bizhub 4750/4050 Fax Functions User Guide - Page 1
User's Guide Fax Functions - Konica Minolta bizhub 4750 | bizhub 4750/4050 Fax Functions User Guide - Page 2
destination from Address Book 3-9 Directly entering data ...3-10 Selecting a destination from the history 3-11 Searching for a fax number from the LDAP server 3-11 Option settings for fax TX ...3-12 Basic option settings ...3-12 Specifying the size of the original to be scanned ([Scan Size 3-12 - Konica Minolta bizhub 4750 | bizhub 4750/4050 Fax Functions User Guide - Page 3
polling file...4-12 Printing or deleting a file in the folder 4-12 5 How to Receive a Fax 5.1 Receiving a fax automatically (using the machine in fax only mode 5-2 Auto RX ...5-2 Operations required to use this function (for administrators 5-2 5.2 Receiving a fax manually...5-3 Manual RX - Konica Minolta bizhub 4750 | bizhub 4750/4050 Fax Functions User Guide - Page 4
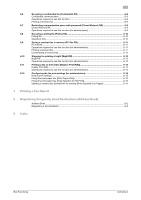
Fixing the print paper size ([Print Paper Size 6-15 Fixing the print paper tray ([Tray Selection for RX Print 6-15 Splitting a custom size (portrait) fax for printing ([Print Separate Fax Pages 6-15 7 Printing a Fax Report 8 Registering Frequently Used Destinations (Address Book) Address Book - Konica Minolta bizhub 4750 | bizhub 4750/4050 Fax Functions User Guide - Page 5
1 Fax Function - Konica Minolta bizhub 4750 | bizhub 4750/4050 Fax Functions User Guide - Page 6
for fax operations, including those enabling the user to change scan settings according to the original and to save incoming faxes in memory. The following describes precautions that should be observed when using fax functions. - To use the fax function, the optional Fax Kit FK-512 and Mount Kit MK - Konica Minolta bizhub 4750 | bizhub 4750/4050 Fax Functions User Guide - Page 7
2 Preparation for Fax Function (For Administrators) - Konica Minolta bizhub 4750 | bizhub 4750/4050 Fax Functions User Guide - Page 8
on this machine to be printed on sent and received faxes. Configuring the machine to suit your environment Registering frequently used fax numbers % This will save you from having to enter a destination each time you send data. Using an LDAP server to specify addresses % When the LDAP server or - Konica Minolta bizhub 4750 | bizhub 4750/4050 Fax Functions User Guide - Page 9
the cable, radio wave reception failures for radios and televisions may occur. - Follow the instructions shown below to attach a ferrite core. - Loop the cable through the ferrite core once settings: [Utility] - [Administrator Settings] - [Fax Settings] - [Line Parameter Setting] - [Dialing Method - Konica Minolta bizhub 4750 | bizhub 4750/4050 Fax Functions User Guide - Page 10
faxes include the following: This machine receives faxes automatically, and the user receives faxes manually. them printed on sent and received faxes. The date and time you set will be the reference time for the Timer TX that enables communication User's Guide Applied Functions]. [Fax Functions] 2-4 - Konica Minolta bizhub 4750 | bizhub 4750/4050 Fax Functions User Guide - Page 11
For details on how to register it, refer to page 8-2. Using an LDAP server to specify addresses When an LDAP server or Active Directory is used for user management purposes, you can search for or specify fax numbers using the server. To use the LDAP server to specify a destination, you must register - Konica Minolta bizhub 4750 | bizhub 4750/4050 Fax Functions User Guide - Page 12
3 How to Send - Konica Minolta bizhub 4750 | bizhub 4750/4050 Fax Functions User Guide - Page 13
(basic operation flow) 3 3 How to Send 3.1 Sending (basic operation flow) 1 Load the original. 2 Tap [Fax]. 3 Enter a fax number. % For details on how to specify a destination, refer to page 3-9. % Fax broadcasting can be performed by specifying multiple destinations. [Fax Functions] 3-2 - Konica Minolta bizhub 4750 | bizhub 4750/4050 Fax Functions User Guide - Page 14
inal, delete inactive jobs from the Job screen. Sending starts. Tips Sender Information is automatically added to a fax to be sent. Related setting - You can change the defaults of fax sending options to suit your environment. To configure settings: [Utility] - [User Settings] - [Scan/Fax Settings - Konica Minolta bizhub 4750 | bizhub 4750/4050 Fax Functions User Guide - Page 15
Confirm Address function is enabled. Faxing manually 1 Load the original. 2 Tap [Fax]. 3 Tap [Application], then configure fax option settings. % Before scanning the original on this machine, specify the size of the original to be scanned. If you fail to set the original size correctly, the image - Konica Minolta bizhub 4750 | bizhub 4750/4050 Fax Functions User Guide - Page 16
the Reset key. 6 As signal sounds are heard, tap [Start] or press the Start key. Sending starts. If you are using a phone, replace the handset. % If you press the Stop key while scanning the original, scanning stops. To cancel scanning the orig- inal, delete inactive jobs from the Job screen. [Fax - Konica Minolta bizhub 4750 | bizhub 4750/4050 Fax Functions User Guide - Page 17
already been registered, delete unnecessary programs before registering a new program. 0 To register a program, you must register the address book in advance. For details on how to register a destination, refer to page 8-2. 1 Tap [Fax]. 2 Tap [Application], then configure fax option settings. % The - Konica Minolta bizhub 4750 | bizhub 4750/4050 Fax Functions User Guide - Page 18
destination from Address Book or Group registered in this machine. Only one destination can be specified. dReference You can also use Web Connection to register a program. For details, refer to Chapter 2 "Configuring the Operating Environment of This Machine" in [User's Guide Applied Functions - Konica Minolta bizhub 4750 | bizhub 4750/4050 Fax Functions User Guide - Page 19
content of the program is applied. % When you tap [Check Setting], you can view the registered content of the selected program. % Tap [Delete] to delete the selected program. 5 Press the Start key. % Tap [Check Settings] before sending data, and check the specified destination and settings if - Konica Minolta bizhub 4750 | bizhub 4750/4050 Fax Functions User Guide - Page 20
cannot be displayed on one screen. dReference For details on how to register a fax destination, refer to page 8-2. Selecting a destination from Address Book Tapping [Addr. Book] displays the address book. From the address book, select a destination registered on this machine. You can send data by - Konica Minolta bizhub 4750 | bizhub 4750/4050 Fax Functions User Guide - Page 21
E-mail address through Confirm Addr (TX)] (default: [OFF]) - You can specify whether or not to allow the user to directly enter a destination. To configure settings: [Utility] - [Administrator Settings] - [Security Settings] - [Security Details] - [Manual Destination Input] (default: [Allow]). [Fax - Konica Minolta bizhub 4750 | bizhub 4750/4050 Fax Functions User Guide - Page 22
Power Switch is turned off and on, history information is deleted. Searching for a fax number from the LDAP server When the LDAP server or Windows Operating Environment of This Machine" in [User's Guide Applied Functions]. 1 Select [Addr. Book] - [LDAP], then tap [Address Search (LDAP)] or [Adv. - Konica Minolta bizhub 4750 | bizhub 4750/4050 Fax Functions User Guide - Page 23
scan the original. Scanning both sides of an original ([Simplex/Duplex]) To display: [Application] - [Basic] - [Simplex/Duplex] Select the surface of the original to be scanned less, the binding position is set to the long edge of the paper. When the long side of the original exceeds 11-11/16 inches - Konica Minolta bizhub 4750 | bizhub 4750/4050 Fax Functions User Guide - Page 24
so may cause a paper jam involving the originals, damage the originals, and/or cause an ADF failure. 2 Tap [Application] - [Original] - [Separate Scan], then set to [ON easy-to read images. Tap this button to scan an original, which consists of text and photos, at the optimum image quality level. - Konica Minolta bizhub 4750 | bizhub 4750/4050 Fax Functions User Guide - Page 25
] [Setting Details] Description Displays a list of specified destinations. • When you tap [Address Details], you can view detailed information of the selecting destination. • When you tap [C], you can delete the selected destination. Displays details of transmission settings. [Fax Functions] 3-14 - Konica Minolta bizhub 4750 | bizhub 4750/4050 Fax Functions User Guide - Page 26
4 Sending Options - Konica Minolta bizhub 4750 | bizhub 4750/4050 Fax Functions User Guide - Page 27
4 4 Sending Options 4.1 Resending a fax Auto resending (auto redial) If a fax transmission fails due to a line or recipient machine problem, the machine automatically resends (redials) the fax after a certain length of time has elapsed. Related setting (for the administrator) - You can change - Konica Minolta bizhub 4750 | bizhub 4750/4050 Fax Functions User Guide - Page 28
fax image, which may mean it is not visible on the transmitted fax. Related setting (for the administrator) You can specify the position to print sender information. To configure settings: [Utility] - [Administrator Settings] - [Fax Settings] - [Header/Footer Position] - [Header Position] (default - Konica Minolta bizhub 4750 | bizhub 4750/4050 Fax Functions User Guide - Page 29
sending at a specified time. Using the Timer TX function to reserve fax transmission during off-peak rate hours early in the morning and late at input area for the numeral. 6 Press the Start key. Scanning of the original starts. The fax is automatically sent at the specified time. Tips If the machine - Konica Minolta bizhub 4750 | bizhub 4750/4050 Fax Functions User Guide - Page 30
the destination machine. - When registering destinations with an address book, you can enable Check Dest. & Send in addition to registering fax numbers. Operation flow 1 Load the original. 2 Tap [Fax]. 3 Specify the destination. 4 Tap [Application] - [Fax Setting] - [Line Setting]. 5 Select [Yes] in - Konica Minolta bizhub 4750 | bizhub 4750/4050 Fax Functions User Guide - Page 31
TX] (default: [ON]) Operation flow 1 Load the original. 2 Tap [Fax]. 3 Specify the destination. 4 Tap [Application] - [Fax Setting] - [F-Code TX], then tap [ON]. 5 Enter the [Sub Address] and [Password], then tap [OK]. % [Sub Address]: Enter the registration number of the Confidential RX User Box - Konica Minolta bizhub 4750 | bizhub 4750/4050 Fax Functions User Guide - Page 32
Setting] - [F-Code TX] (default: [ON]) Operation flow 1 Load the original. 2 Tap [Fax]. 3 Specify the fax number of the relay station. 4 Tap [Application] - [Fax Setting] - [F-Code TX], then tap [ON]. 5 Enter the [Sub Address] and [Password], then tap [OK]. % [Sub Address]: Enter the registration - Konica Minolta bizhub 4750 | bizhub 4750/4050 Fax Functions User Guide - Page 33
correction mode defined by ITU-T (International Telecommunication Union - Telecommunication Standardization Sector). Fax machines that support the ECM communicate, while confirming that there is no error in the sent data. This prevents image blurring caused by noise on the phone line. By default - Konica Minolta bizhub 4750 | bizhub 4750/4050 Fax Functions User Guide - Page 34
by default. You can send faxes with V34 canceled if it is not possible to establish a communication in Super G3 mode depending on telephone line conditions (for example, when the remote or this machine is connected to a PBX line). Tips - When registering destinations with an address book, you - Konica Minolta bizhub 4750 | bizhub 4750/4050 Fax Functions User Guide - Page 35
the original page by page ([Quick Memory Tx]) Quick Memory TX Quick Memory TX is a method to start sending a fax as soon as one page of the original has been scanned. The total number of pages transmitted can be entered in the sender record. Normally, this machine begins transmission after all - Konica Minolta bizhub 4750 | bizhub 4750/4050 Fax Functions User Guide - Page 36
([Password TX]) Password TX The Password TX is a function that sends a fax with a password. It is used to send faxes to a device on which fax peers are restricted by passwords (a device with Closed Network RX enabled). Tips - You can only use this function to communicate with our models supporting - Konica Minolta bizhub 4750 | bizhub 4750/4050 Fax Functions User Guide - Page 37
Confidential Communication, Select Line, ECM OFF, V34 OFF, Password TX, Polling RX Registering a polling file Carry out Fax]. 3 Tap [Application] - [Fax Setting] - [Polling TX], then set to [ON]. 4 Press the Start key. The file is registered in the polling transmission folder. Printing or deleting - Konica Minolta bizhub 4750 | bizhub 4750/4050 Fax Functions User Guide - Page 38
4.11 Registering a polling file ([Polling TX]) 4 2 Tap [Others] - [Polling TX]. 3 Check the information of the registered file, then tap [Print] or [Delete]. [Fax Functions] 4-13 - Konica Minolta bizhub 4750 | bizhub 4750/4050 Fax Functions User Guide - Page 39
5 How to Receive a Fax - Konica Minolta bizhub 4750 | bizhub 4750/4050 Fax Functions User Guide - Page 40
RX, the following settings are required. - Set [Utility] - [Administrator Settings] - [Fax Settings] - [Line Parameter Setting] - [RX Mode] to [Auto RX] (default: [Auto RX]). - Select [Utility] - [Administrator Settings] - [Fax Settings] - [Line Parameter Setting] - [Number of RX Call Rings], then - Konica Minolta bizhub 4750 | bizhub 4750/4050 Fax Functions User Guide - Page 41
Setting] - [RX Mode] to [Manual RX] (default: [Auto RX]). Operation flow 1 Tap [Fax]. 2 Tap [Off-Hook]. % If you are using a phone, pick up the handset. 3 Check that [Receive] is selected. 4 Tap [Start]. Reception begins. If you are using a phone, replace the handset. [Fax Functions] 5-3 - Konica Minolta bizhub 4750 | bizhub 4750/4050 Fax Functions User Guide - Page 42
by mistake in a region where the DRPD service is not available, it will result in a fax receiving failure. Operations required to use this function [Fax Settings] - [Line Parameter Setting] - [RX Mode] to [Auto RX] (default: [Auto RX]). - Select [Utility] - [Administrator Settings] - [Fax Settings - Konica Minolta bizhub 4750 | bizhub 4750/4050 Fax Functions User Guide - Page 43
6 Receiving Options - Konica Minolta bizhub 4750 | bizhub 4750/4050 Fax Functions User Guide - Page 44
(for administrators) To print reception information, the following settings are required. - Select [Utility] - [Administrator Settings] - [Fax Settings] - [Header/Footer Position] - [Footer Position], then specify the position to print reception information (default: [OFF]). [Fax Functions] 6-2 - Konica Minolta bizhub 4750 | bizhub 4750/4050 Fax Functions User Guide - Page 45
problem, the saved fax can be forwarded to another destination (fax or E-mail destination). In-memory proxy reception functions automatically. Tips - In-memory proxy reception is disabled when the memory is full. - When the troubleshooting is complete for paper jam etc., the machine starts printing - Konica Minolta bizhub 4750 | bizhub 4750/4050 Fax Functions User Guide - Page 46
[Function Settings] - [TSI User Box Setting] - [Enable Settings], then enable the TSI Routing function (default: [OFF]). - Select [Utility] - [Administrator Settings] - [Fax Settings] - [Function Settings] - [TSI User Box Setting] - [TSI User Box Registration], then register the fax numbers of (TSI - Konica Minolta bizhub 4750 | bizhub 4750/4050 Fax Functions User Guide - Page 47
required. - Select [Utility] - [Administrator Settings] - [Fax Settings] - [Function Settings] - [Forward TX Setting] - [Enable Settings], then enable the Forward TX function (default: [OFF]). - Select [Utility] - [Administrator Settings] - [Fax Settings] - [Function Settings] - [Forward TX Setting - Konica Minolta bizhub 4750 | bizhub 4750/4050 Fax Functions User Guide - Page 48
Settings] - [Memory RX Setting] to enable the Memory RX function, then specify the password to access the received fax (default: [OFF]). Printing or deleting a received fax A received fax can be printed or deleted by accessing the Memory RX folder. 1 Tap [Fax]. 2 Tap [Others] - [Memory RX]. 3 Enter - Konica Minolta bizhub 4750 | bizhub 4750/4050 Fax Functions User Guide - Page 49
the selected file. % If you click [Print], you can print out the selected file. % Click [Delete] to delete the selected file. Downloading starts. dReference For details on how to use Web Connection, refer to Chapter 1 "Using Web Connection" in [User's Guide Applied Functions]. [Fax Functions] 6-7 - Konica Minolta bizhub 4750 | bizhub 4750/4050 Fax Functions User Guide - Page 50
RX User Box. 1 Tap [Fax]. 2 Tap [Others] - [Confidential RX]. 3 Select the desired Confidential RX User Box, then tap [Open]. % If the password is set to the Confidential RX User Box, enter the password. 4 Select a fax to print, then tap [Print]. % Tap [Delete] to delete the selected fax. Printing - Konica Minolta bizhub 4750 | bizhub 4750/4050 Fax Functions User Guide - Page 51
that restricts the peers by passwords. When receiving a fax, the machine checks the password sent from the sender against the password preset for this machine and, if they match, accepts transmission. Restricting fax senders helps to reduce unnecessary printing and wasteful paper use. Tips You can - Konica Minolta bizhub 4750 | bizhub 4750/4050 Fax Functions User Guide - Page 52
functions. F-Code TX, ECM OFF, V34 OFF, Quick Memory TX, Password TX, Polling TX dReference Optionally, you can use the Polling TX function function, refer to page 4-4. Operation flow 1 Tap [Fax]. 2 Specify the destination. 3 Tap [Application] - [Fax Setting] - [Polling RX], then set to [ON]. - Konica Minolta bizhub 4750 | bizhub 4750/4050 Fax Functions User Guide - Page 53
folder. 1 Tap [Fax]. 2 Tap [Others] - [Memory RX]. 3 Enter the password to access the received fax, then tap [OK]. % If no password is specified, proceed to Step 4. 4 Select a fax to print, then tap [Print]. % Tap [Delete] to delete the selected fax. Printing starts. Tips The printed fax is erased - Konica Minolta bizhub 4750 | bizhub 4750/4050 Fax Functions User Guide - Page 54
the selected file. % If you click [Print], you can print out the selected file. % Click [Delete] to delete the selected file. Downloading starts. dReference For details on how to use Web Connection, refer to Chapter 1 "Using Web Connection" in [User's Guide Applied Functions]. [Fax Functions] 6-12 - Konica Minolta bizhub 4750 | bizhub 4750/4050 Fax Functions User Guide - Page 55
required. - Select [Utility] - [Administrator Settings] - [Fax Settings] - [Function Settings] - [Nighttime RX Settings] - [Night Fax RX Print], then enable the Night RX function (default: [OFF]). - Select [Utility] - [Administrator Settings] - [Fax Settings] - [Function Settings] - [Nighttime RX - Konica Minolta bizhub 4750 | bizhub 4750/4050 Fax Functions User Guide - Page 56
6.11 Printing a fax on both sides ([Duplex Print (RX)]) 6 6.11 Printing a fax on both sides ([Duplex Print (RX)]) Duplex Print (RX) An original is printed on both sides of paper when multi-page fax is received. This can reduce the paper consumption. Operations required to use this function (for - Konica Minolta bizhub 4750 | bizhub 4750/4050 Fax Functions User Guide - Page 57
Fax Pages], then enable the Print Separate Fax Pages function (default: [OFF]). Tips - If [Reduction Ratio] is set to 100% (Full Size), [Print Separate Fax Pages] is compulsory switched to [OFF], and the area that cannot be fitted on a standard size sheet is not printed at all. - If [Duplex Print - Konica Minolta bizhub 4750 | bizhub 4750/4050 Fax Functions User Guide - Page 58
7 Printing a Fax Report - Konica Minolta bizhub 4750 | bizhub 4750/4050 Fax Functions User Guide - Page 59
types of fax reports are available. Reports are printed automatically if certain conditions are satisfied, or printed manually. Report name faxes received. By default, the report is automatically printed when a confidential fax is received. This list contains the details of [Fax Settings - Konica Minolta bizhub 4750 | bizhub 4750/4050 Fax Functions User Guide - Page 60
8 Registering Frequently Used Destinations (Address Book) - Konica Minolta bizhub 4750 | bizhub 4750/4050 Fax Functions User Guide - Page 61
and Changing Addr.] (default: [Allow]). dReference Address books can also be registered using Web Connection. For details, refer to Chapter 2 "Configuring the Operating Environment of This Machine" in [User's Guide Applied Functions]. Registering a fax destination Register the destination - Konica Minolta bizhub 4750 | bizhub 4750/4050 Fax Functions User Guide - Page 62
is an error correction mode defined by ITU-T (Internation- al Telecommunication Union - Telecommunication Standardization Sector). Fax machines equipped with the ECM feature communicate with each other, confirming that the sent data is free of errors. This prevents image blurring caused by telephone - Konica Minolta bizhub 4750 | bizhub 4750/4050 Fax Functions User Guide - Page 63
9 Index - Konica Minolta bizhub 4750 | bizhub 4750/4050 Fax Functions User Guide - Page 64
3-12 S Scan Size 3-12 Sender information 4-3 Separate Scan 3-13 Settings 3-12 Sharpness 3-14 Simplex/Duplex 3-12 Specifying a destination 3-9 Address Book 3-9 Direct Input 3-10 Favorites 3-9 History 3-11 LDAP 3-11 T Timer TX 4-4 TSI Routing 6-4 V V34 OFF 4-9 [Fax Functions] 9-2 - Konica Minolta bizhub 4750 | bizhub 4750/4050 Fax Functions User Guide - Page 65
http://konicaminolta.com A6F7-9563-00A © 2013 2013. 9
-
 1
1 -
 2
2 -
 3
3 -
 4
4 -
 5
5 -
 6
6 -
 7
7 -
8
-
9
-
10
-
11
-
12
-
13
-
14
-
15
-
16
-
17
-
18
-
19
-
20
-
21
-
22
-
23
-
24
-
25
-
26
-
27
-
28
-
29
-
30
-
31
-
32
-
33
-
34
-
35
-
36
-
37
-
38
-
39
-
40
-
41
-
42
-
43
-
44
-
45
-
46
-
47
-
48
-
49
-
50
-
51
-
52
-
53
-
54
-
55
-
56
-
57
-
58
-
59
-
60
-
61
-
62
-
63
-
64
-
65
 |
 |

User’s Guide Fax Functions