Konica Minolta bizhub C3320i bizhub C3320i Quick Guide - Page 15
Name of each component main unit
 |
View all Konica Minolta bizhub C3320i manuals
Add to My Manuals
Save this manual to your list of manuals |
Page 15 highlights
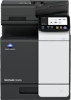
4 4.2 Name of each component (main unit) Front/side 3 4 2 1 15 14 13 5 6 7 8 9 12 11 10 No. Name Description 1 Control Panel Used to configure various settings in this machine. 2 Automatic Document Automatically feeds and scans originals by page. This unit scans a 2- Feeder sided original by only requiring the paper be fed into the machine once without reversing. This unit is referred to as ADF in the manual. 3 ADF Feed Cover Open this cover when clearing a paper jam in the ADF. 4 Lateral Guide Adjust this guide along the width of the original. 5 Original Tray Load the original face up in this tray. 6 Original Output Tray The scanned original is fed out onto this tray. 7 Document Stopper Used to prevent the output original from falling. 8 Power Connection Connect the power cord to this inlet to supply power to this machine. 9 Bypass Tray Used to print data on non-standard size paper or envelopes. 10 Main Power Switch Press this switch to turn the machine on or off. 11 USB Port (Type A) USB2.0/1.1 Used to connect a USB flash drive to this machine. 12 Tray 1 Allows you to load up to 500 sheets. 13 Mobile Touch Area This area is used to associate this machine with an NFC-compatible Android terminal or an iOS terminal compatible with Bluetooth LE. 14 Data Indicator Flashes or lights up to indicate the data receiving status on this machine. 15 Output Tray Outputs printed pages. 14 bizhub C3320i
-
 1
1 -
2
-
3
-
4
-
5
-
6
-
7
-
8
-
9
-
 10
10 -
 11
11 -
 12
12 -
 13
13 -
 14
14 -
 15
15 -
 16
16 -
 17
17 -
 18
18 -
 19
19 -
 20
20 -
21
-
22
-
23
-
24
-
25
-
26
-
27
-
28
-
29
-
30
-
31
-
32
-
33
-
34
-
35
-
36
-
37
-
38
-
39
-
40
-
41
-
42
-
43
-
44
-
45
 |
 |
