Konica Minolta bizhub C3850 bizhub C3850/C3350 Quick Start Guide - Page 42
Preparation for printing USB connection, Changing the installation settings Windows 7/8/Server 2008
 |
View all Konica Minolta bizhub C3850 manuals
Add to My Manuals
Save this manual to your list of manuals |
Page 42 highlights
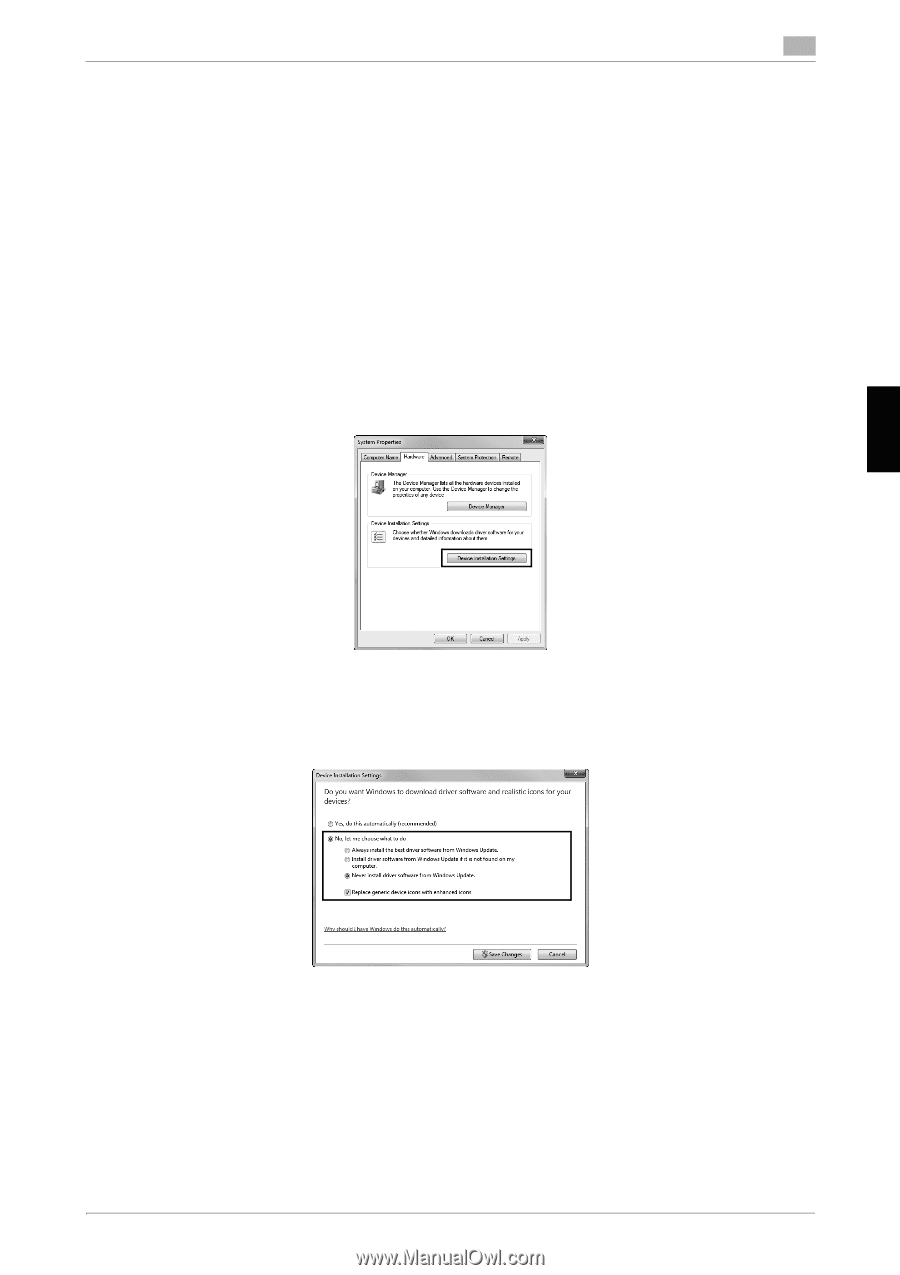
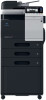
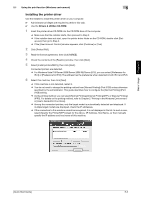
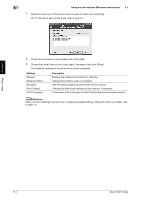
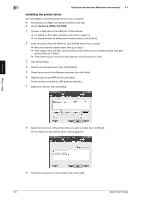
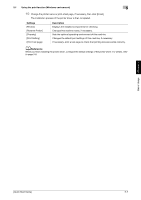
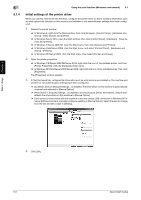
5.1 Using the print function (Windows environment) 5 5.1.3 Preparation for printing (USB connection) Changing the installation settings (Windows 7/8/Server 2008 R2/Server 2012) If you are using Windows 7/8/Server 2008 R2/Server 2012, change the computer settings before installing the printer driver. 1 Open the [Control Panel] window. % In Windows 8, right-click the Start window, then click [All apps] - [Control Panel]. % In Windows Server 2012, click [Control Panel] in the Start window. % In Windows 7/Server 2008 R2, open the Start menu, then click [Control Panel]. 2 Click [System and Security] - [System]. 3 Click [Advanced system settings] on the menu in the left-hand pane. The [System Properties] window appears. 4 In the [Hardware] tab, click [Device Installation Settings]. Basic Usage Chapter 5 5 Select [No, let me choose what to do], select [Never install driver software from Windows Update.], then click [Save Changes]. % After you have installed the printer driver, change the setting back to [Yes, do this automatically (recommended)]. 6 Click [OK] to close the [System Properties] window. [Quick Start Guide] 5-5
-
 1
1 -
2
-
3
-
4
-
5
-
6
-
7
-
8
-
9
-
10
-
11
-
12
-
13
-
14
-
15
-
16
-
17
-
18
-
19
-
20
-
21
-
22
-
23
-
24
-
25
-
26
-
27
-
28
-
29
-
30
-
31
-
32
-
33
-
34
-
35
-
36
-
 37
37 -
 38
38 -
 39
39 -
 40
40 -
 41
41 -
 42
42 -
 43
43 -
 44
44 -
 45
45 -
 46
46 -
 47
47 -
48
-
49
-
50
-
51
-
52
-
53
-
54
-
55
-
56
-
57
-
58
-
59
-
60
-
61
-
62
-
63
-
64
 |
 |