Konica Minolta bizhub PRESS C8000 bizhub PRESS C8000 Security User Guide - Page 39
Printing Audit Log, Administrator Security Functions, Utility/Counter, control panel
 |
View all Konica Minolta bizhub PRESS C8000 manuals
Add to My Manuals
Save this manual to your list of manuals |
Page 39 highlights
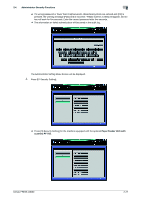
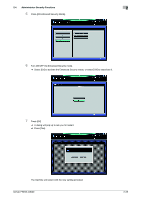
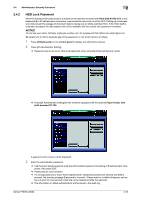
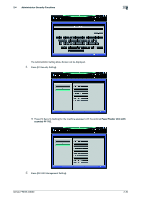
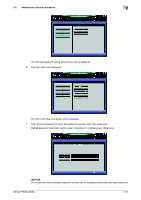
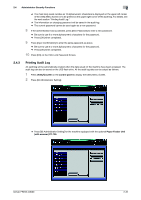
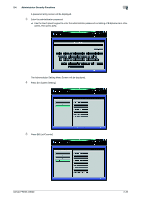
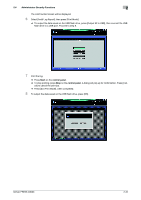
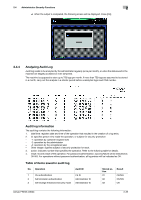
2.4 Administrator Security Functions 2 % The main body serial number as 13 alphanumeric characters is displayed on the upper left corner of the Utility Menu Screen or to be printed on the upper right corner of the audit log. For details, see the next section "Printing Audit Log." % The information on changing password will be saved in the audit log. % The current password cannot be used again as a new password. 8 If the authentication has succeeded, press [New Password] to enter a new password. % Be sure to use 8 or more alphanumeric characters for the password. % Press [OK] when completed. 9 Press [Input Confirmation] to enter the same password as above. % Be sure to use 8 or more alphanumeric characters for the password. % Press [OK] when completed. 10 Press [OK] on the HDD Lock Password Screen. 2.4.3 Printing Audit Log An audit log will be automatically created when the data saved on the machine have been accessed. The audit log can also be saved on the USB flash drive. All the audit log data can be output as follows. 1 Press Utility/Counter on the control panel to display the Utility Menu Screen. 2 Press [02 Administrator Setting]. % Press [03 Administrator Setting] for the machine equipped with the optional Paper Feeder Unit (with scanner) PF-705. bizhub PRESS C8000 2-32
-
 1
1 -
2
-
3
-
4
-
5
-
6
-
7
-
8
-
9
-
10
-
11
-
12
-
13
-
14
-
15
-
16
-
17
-
18
-
19
-
20
-
21
-
22
-
23
-
24
-
25
-
26
-
27
-
28
-
29
-
30
-
31
-
32
-
33
-
 34
34 -
 35
35 -
 36
36 -
 37
37 -
 38
38 -
 39
39 -
 40
40 -
 41
41 -
 42
42 -
 43
43 -
 44
44 -
45
-
46
-
47
-
48
 |
 |
