Kyocera FS-1350DN KM-NET Viewer Operation Guide Rev-5.2-2010.10 - Page 39
Setting ID Card Login, Network Groups, Adding or Editing a Network Group
 |
View all Kyocera FS-1350DN manuals
Add to My Manuals
Save this manual to your list of manuals |
Page 39 highlights
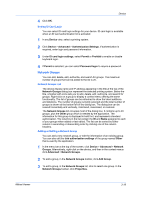
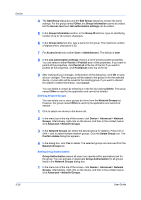
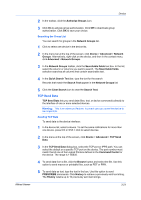
Device 4 Click OK. Setting ID Card Login You can select ID card login settings for your device. ID card login is available when an ID card authentication kit is activated. 1 In any Device view, select a printing system. 2 Click Device > Advanced > Authentication Settings. If authentication is required, enter login and password information. 3 Under ID card login settings, select Permit or Prohibit to enable or disable keyboard login. 4 If Permit is selected, you can select Password login to require a password. Network Groups You can add, delete, edit, authorize, and search for groups. The maximum number of groups that can be added to the list is 20. Network Groups List The device display name and IP address appearing in the title at the top of the Network Groups dialog box represent the selected printing system. Below the title, a toolbar with icons lets you to add, delete, edit, authorize, and search for groups. Right-click on a group to display a context menu offering the same functionality. The list of groups can be refreshed to show the latest additions and deletions. The number of groups currently selected and the total number of groups is shown at the bottom left of the dialog box. The dialog box can be resized horizontally and vertically, minimized, maximized, or restored. The Network Groups list occupies most of the dialog box. It contains up to 20 groups, plus the Other group which is needed by the application. The information for this group is displayed in bold font, and represents standard authorization. The columns in the list contain the ID and Name assigned to each of your groups when added or last edited. The list can be sorted by either column in ascending or descending order by clicking one of the column headers. Adding or Editing a Network Group You can add a new network group, or edit the information of an existing group. You can also edit the Job authorization settings of the group named Other that is used by the application. 1 In the menu bar at the top of the screen, click Device > Advanced > Network Groups. Alternatively, right-click on the device, and then in the context menus click Advanced > Network Groups. 2 To add a group, in the Network Groups toolbar, click Add Group. 3 To edit a group, in the Network Groups list, click to select one group. In the Network Groups toolbar, click Properties. KMnet Viewer 3-19
-
 1
1 -
2
-
3
-
4
-
5
-
6
-
7
-
8
-
9
-
10
-
11
-
12
-
13
-
14
-
15
-
16
-
17
-
18
-
19
-
20
-
21
-
22
-
23
-
24
-
25
-
26
-
27
-
28
-
29
-
30
-
31
-
32
-
33
-
 34
34 -
 35
35 -
 36
36 -
 37
37 -
 38
38 -
 39
39 -
 40
40 -
 41
41 -
 42
42 -
 43
43 -
 44
44 -
45
-
46
-
47
-
48
-
49
-
50
-
51
-
52
-
53
-
54
-
55
-
56
-
57
-
58
-
59
-
60
-
61
-
62
-
63
-
64
-
65
-
66
-
67
-
68
-
69
-
70
-
71
-
72
-
73
-
74
-
75
-
76
-
77
-
78
-
79
 |
 |