Kyocera FS-C8008DN Quick Reference Guide - Page 38
Cleaning the, main charger
 |
View all Kyocera FS-C8008DN manuals
Add to My Manuals
Save this manual to your list of manuals |
Page 38 highlights
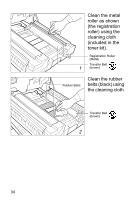
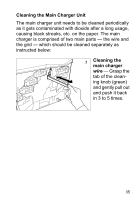
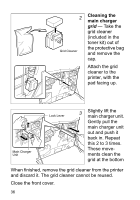
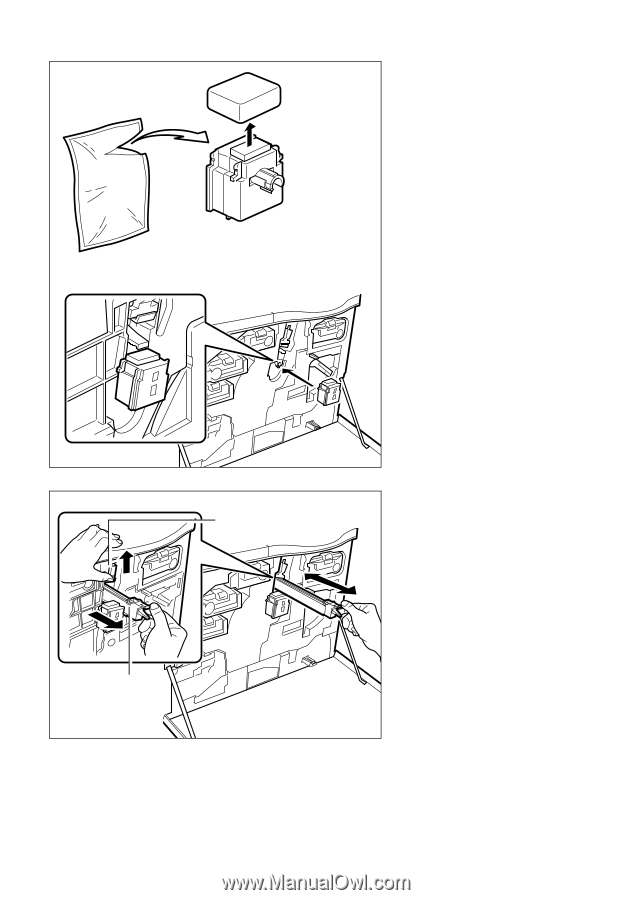
2 Grid Cleaner Cleaning the main charger grid - Take the grid cleaner (included in the toner kit) out of the protective bag and remove the cap. Attach the grid cleaner to the printer, with the pad facing up. Main Charger Unit Lock Lever 3 Slightly lift the main charger unit. Gently pull the main charger unit out and push it back in. Repeat this 2 to 3 times. These move- ments clean the grid at the bottom. When finished, remove the grid cleaner from the printer and discard it. The grid cleaner cannot be reused. Close the front cover. 36
-
 1
1 -
2
-
3
-
4
-
5
-
6
-
7
-
8
-
9
-
10
-
11
-
12
-
13
-
14
-
15
-
16
-
17
-
18
-
19
-
20
-
21
-
22
-
23
-
24
-
25
-
26
-
27
-
28
-
29
-
30
-
31
-
32
-
 33
33 -
 34
34 -
 35
35 -
 36
36 -
 37
37 -
 38
38 -
 39
39 -
 40
40
 |
 |
36
When finished, remove the grid cleaner from the printer
and discard it. The grid cleaner cannot be reused.
Close the front cover.
Grid Cleaner
2
Cleaning the
main charger
grid
— Take the
grid cleaner
(included in the
toner kit) out of
the protective bag
and remove the
cap.
Attach the grid
cleaner to the
printer, with the
pad facing up.
3
Lock Lever
Main Charger
Unit
Slightly lift the
main charger unit.
Gently pull the
main charger unit
out and push it
back in. Repeat
this 2 to 3 times.
These move-
ments clean the
grid at the bottom.