Kyocera FS1750 IC Link User's Manual ver. 2.8 - Page 20
Project>Build, Project Build, Send to printer, Project was written to the print spooler
 |
View all Kyocera FS1750 manuals
Add to My Manuals
Save this manual to your list of manuals |
Page 20 highlights
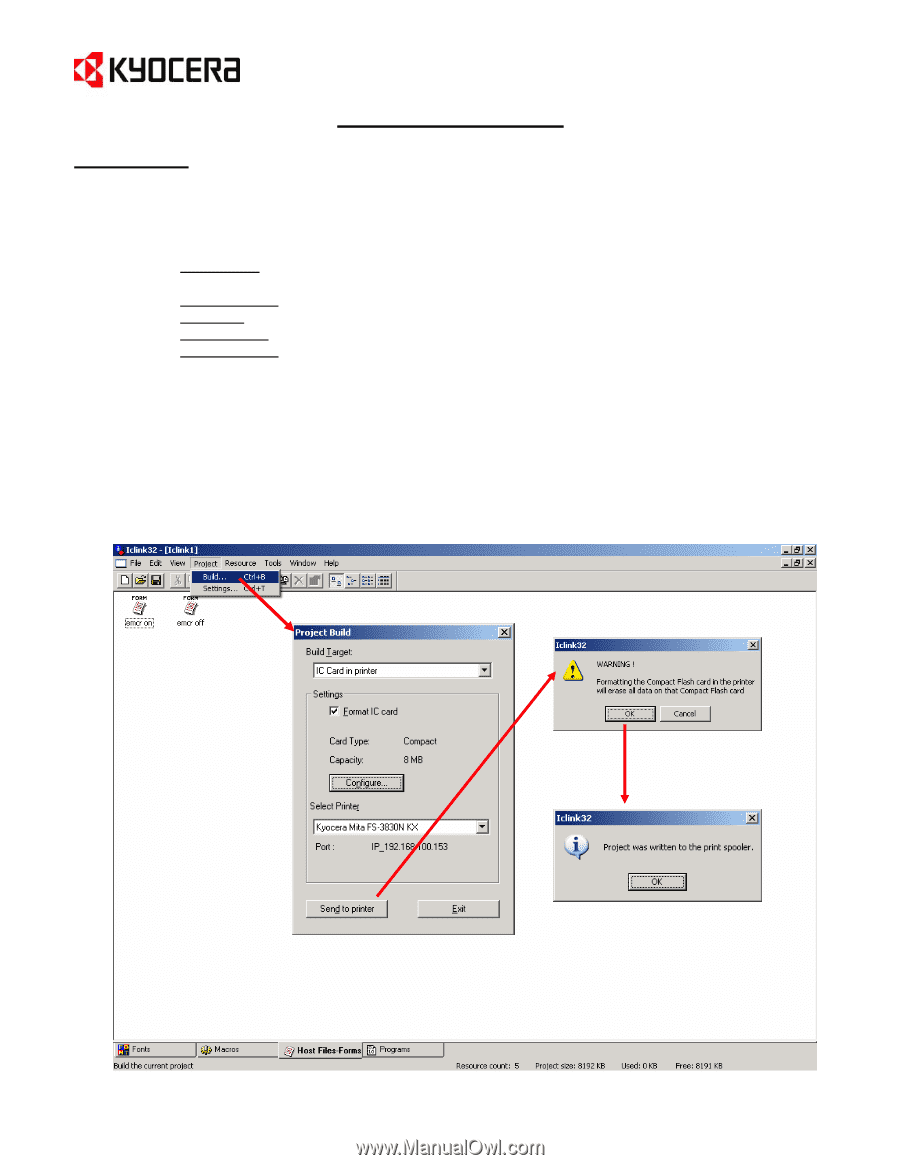
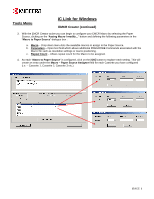
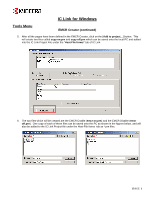
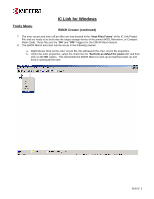
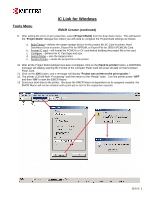
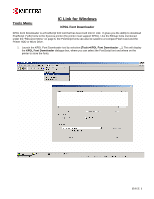
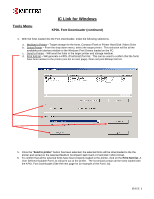
IC Link for Windows Tools Menu EMCR Creator (continued) 9. After setting the emcr on.prn properties, select [Project>Build] from the drop down menu. This will launch the "Project Build" dialogue box where you will need to configure the Project Build settings as follows: a. Build Target - defines the target storage device for the project file (IC Card in printer, Hard Disk/Micro Drive in printer, Export File for EPROM, or Export File for JEIDA (PCMCIA) Card. b. Format IC card - will format the PCMCIA or CF card before building the project file to the card. c. Configure - defines the IC Card type and size. d. Select Printer - sets the target printer. e. Send to Printer - sends the project file to the printer. 10. After all the Project Build settings have been completed, click on the [Send to printer] button, a WARNING message will display warning the Format of the Compact Flash Card will erase all data on that Compact Flash Card. 11. Click on the [OK] button, and a message will display "Project was written to the print spooler.". 12. The printer LCD will flash "Processing" and then return to the "Ready" state. Turn the printer power "OFF" and then "ON" to start the EMCR Macro. 13. Send your print data to the printer. Because the EMCR Macro is dependent on its assigned cassette, the EMCR Macro will not be initiated until a print job is sent to the respective cassette. {PAGE }
-
 1
1 -
2
-
3
-
4
-
5
-
6
-
7
-
8
-
9
-
10
-
11
-
12
-
13
-
14
-
 15
15 -
 16
16 -
 17
17 -
 18
18 -
 19
19 -
 20
20 -
 21
21 -
 22
22 -
 23
23 -
 24
24 -
 25
25 -
26
-
27
-
28
-
29
-
30
-
31
-
32
-
33
-
34
-
35
-
36
-
37
-
38
-
39
 |
 |