Kyocera KM-1650 Scan System (F) Operation Guide (Functions Edition) - Page 51
“Selec. of senders (users)” setting,
 |
View all Kyocera KM-1650 manuals
Add to My Manuals
Save this manual to your list of manuals |
Page 51 highlights
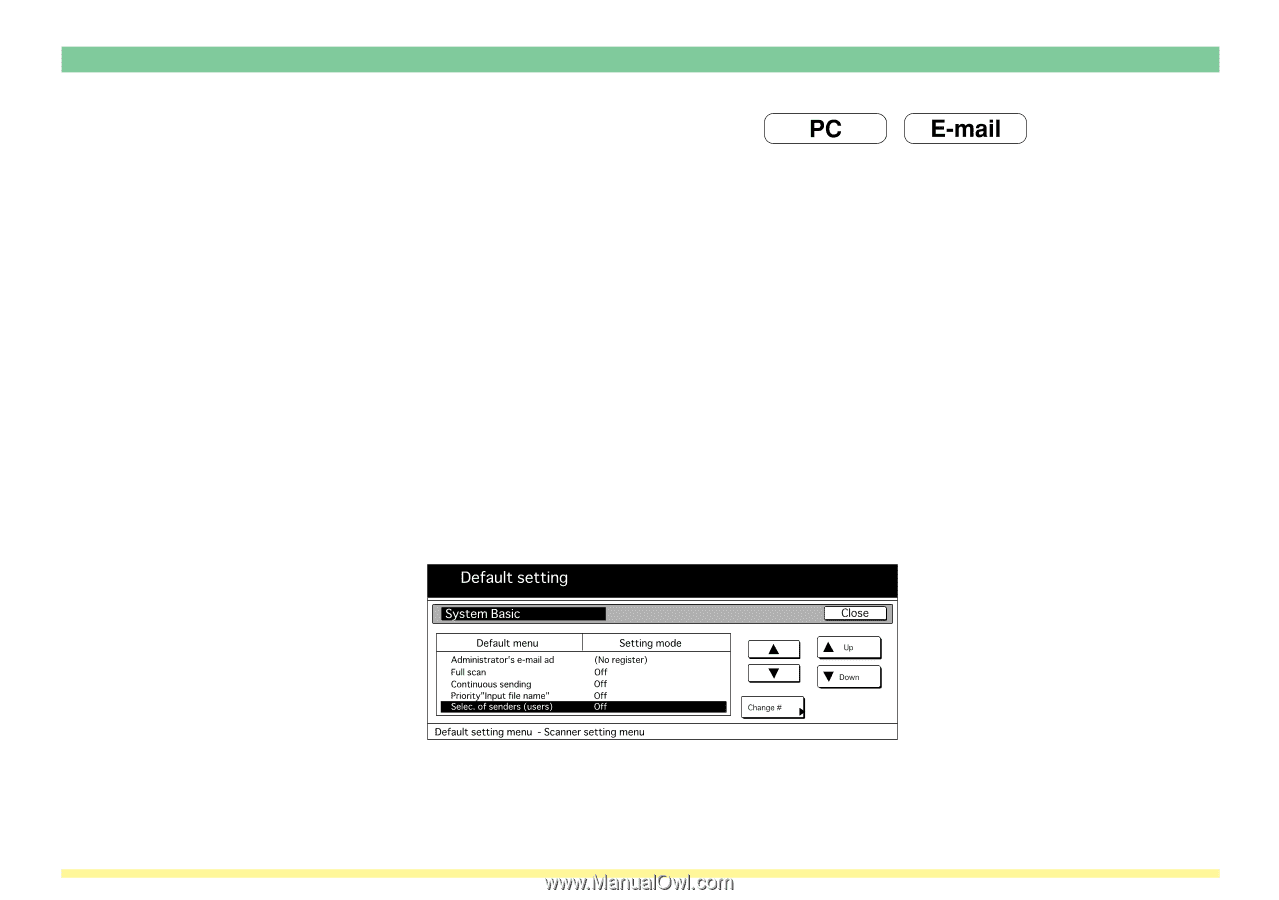
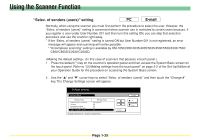
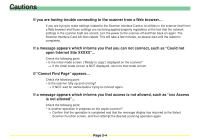
Using the Scanner Function "Selec. of senders (users)" setting Normally, when using the scanner you must first perform the procedure to select the user. However, the "Selec. of senders (users)" setting is convenient when scanner use is restricted to certain users because, if you register a user under User Number 001 and then turn this setting ON, you can skip that selection procedure and use the scanner right away. * If the "Selec. of senders (users)" setting is turned ON but User Number 001 is not registered, an error message will appear and scanning will not be possible. * "Uncompress scanning" setting is available by KM-1650/2050/3035/4035/5035/4530/5530/6330/7530/ C850/C850D/C2630/C2630D. (In this case of scanners that possess a touch panel.) 1 . Press the default (*) key on the scanner's operation panel and then access the System Basic screen on the touch panel. Refer to "(3) Making settings from the touch panel" on page 2-2 of the Set-Up Edition of your Operation Guide for the procedure on accessing the System Basic screen. 2 . Use the "L" and "M" cursor keys to select "Selec. of senders (users)" and then touch the "Change #" key. The Change Settings screen will appear. Page 1-33
-
 1
1 -
2
-
3
-
4
-
5
-
6
-
7
-
8
-
9
-
10
-
11
-
12
-
13
-
14
-
15
-
16
-
17
-
18
-
19
-
20
-
21
-
22
-
23
-
24
-
25
-
26
-
27
-
28
-
29
-
30
-
31
-
32
-
33
-
34
-
35
-
36
-
37
-
38
-
39
-
40
-
41
-
42
-
43
-
44
-
45
-
 46
46 -
 47
47 -
 48
48 -
 49
49 -
 50
50 -
 51
51 -
 52
52 -
 53
53 -
 54
54 -
 55
55 -
 56
56 -
57
-
58
-
59
-
60
-
61
-
62
-
63
-
64
-
65
-
66
-
67
-
68
-
69
-
70
-
71
-
72
-
73
-
74
-
75
-
76
-
77
-
78
-
79
-
80
-
81
-
82
-
83
-
84
-
85
-
86
-
87
-
88
-
89
-
90
-
91
-
92
-
93
-
94
-
95
-
96
-
97
-
98
-
99
-
100
-
101
-
102
-
103
-
104
-
105
-
106
-
107
-
108
-
109
-
110
-
111
-
112
-
113
-
114
-
115
-
116
-
117
-
118
-
119
-
120
-
121
-
122
-
123
-
124
-
125
-
126
-
127
-
128
-
129
-
130
-
131
-
132
-
133
-
134
-
135
-
136
-
137
-
138
-
139
-
140
-
141
-
142
-
143
-
144
-
145
-
146
-
147
-
148
-
149
-
150
-
151
-
152
-
153
-
154
-
155
-
156
-
157
-
158
-
159
-
160
-
161
-
162
-
163
-
164
-
165
-
166
-
167
-
168
-
169
-
170
-
171
-
172
-
173
-
174
-
175
-
176
-
177
-
178
-
179
-
180
-
181
-
182
-
183
-
184
-
185
-
186
-
187
-
188
-
189
-
190
-
191
-
192
-
193
-
194
-
195
-
196
-
197
-
198
-
199
-
200
-
201
-
202
-
203
-
204
-
205
-
206
-
207
-
208
-
209
-
210
-
211
-
212
-
213
-
214
-
215
-
216
-
217
-
218
-
219
-
220
-
221
-
222
-
223
-
224
-
225
-
226
-
227
-
228
-
229
-
230
-
231
-
232
-
233
-
234
-
235
-
236
-
237
-
238
-
239
-
240
-
241
-
242
-
243
-
244
-
245
-
246
-
247
-
248
-
249
-
250
-
251
-
252
-
253
-
254
-
255
-
256
 |
 |