Kyocera KM-3035 Printing System (U) Operation Guide (Functions Edition)
Kyocera KM-3035 Manual
 |
View all Kyocera KM-3035 manuals
Add to My Manuals
Save this manual to your list of manuals |
Kyocera KM-3035 manual content summary:
- Kyocera KM-3035 | Printing System (U) Operation Guide (Functions Edition) - Page 1
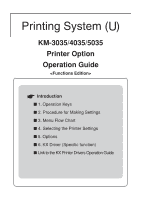
U KM-3035/4035/5035 Printer Option Operation Guide Introduction I 1. Operation Keys I 2. Procedure for Making Settings I 3. Menu Flow Chart I 4. Selecting the Printer Settings I 5. Options I 6. KX Driver (Specific function) I Link to the KX Printer Drivers Operation Guide - Kyocera KM-3035 | Printing System (U) Operation Guide (Functions Edition) - Page 2
printer. The explanations in this Operation Guide were written with the assumption that the user has a basic understanding of how to work in Microsoft Windows. For further information on using Windows, refer to your Microsoft Windows manual On Copying • It may be prohibited to copy copyrighted - Kyocera KM-3035 | Printing System (U) Operation Guide (Functions Edition) - Page 3
term "Programs" means the original and all whole or partial copies of it, including modified copies or portions merged into other programs. IBM retains title to after the cause of action arose. If you acquired the Program in the United States, this license is governed by the laws of the State of New - Kyocera KM-3035 | Printing System (U) Operation Guide (Functions Edition) - Page 4
Trademark Acknowledgement All resident fonts in this printer are licensed from Agfa Corporation. Helvetica, Palatino License expires or is terminated, you shall either return to Agfa Japan or destroy all copies of the Software and Typefaces and documentation as requested. 6. You agree that you will - Kyocera KM-3035 | Printing System (U) Operation Guide (Functions Edition) - Page 5
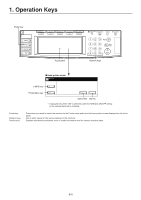
Touch panel: Press when you want to switch the machine to the Printer mode and have the basic printer screen displayed on the touch panel. Use to enter values for the various settings of this machine. Displays operational procedures, error or trouble information and the various operation keys. 1-1 - Kyocera KM-3035 | Printing System (U) Operation Guide (Functions Edition) - Page 6
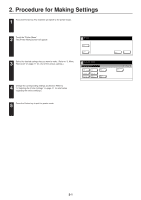
2. Procedure for Making Settings 1 Press the Printer key. The machine will switch to the printer mode. 2 Touch the "Printer Menu". The [Printer Menu] screen will appear. 3 Select the desired settings that you want to make. (Refer to "3. Menu Flow Chart" on page 3-1 for a list of the various - Kyocera KM-3035 | Printing System (U) Operation Guide (Functions Edition) - Page 7
3. Menu Flow Chart Printer menu Status Page print out 4-1 Selecting the interface setting 4-3 Selecting rate 4-4 Data bit length 4-4 Stop bit length 4-4 Parity 4-4 Protocol 4-4 Selecting the network interface NetWare On/Off 4-5 NetWare Frame Type 4-5 TCP/IP On/Off 4-5 DHCP On - Kyocera KM-3035 | Printing System (U) Operation Guide (Functions Edition) - Page 8
3. Menu Flow Chart Selecting the emulation PCL6 Code set Line Printer Code set IBM Proprinter Code set Diabro 630 Code set EPSON LQ-850 Code set KPDL KPDL Error Report print out On/Off KPDL (Auto) - Kyocera KM-3035 | Printing System (U) Operation Guide (Functions Edition) - Page 9
3. Menu Flow Chart Page Settings Copiers (Number of copies) Orientation (Printing orientation) Zoom (Printing reduction) Page Protect Mode LE (Linefeed) action CR (Carriage-Return) action Wide A4 On/Off Printing Quality settings KIR (Smoothing) - Kyocera KM-3035 | Printing System (U) Operation Guide (Functions Edition) - Page 10
data Deleting program data Deleting macro data 3-4 4-31 4-31 4-31 4-32 4-32 4-33 4-33 4-34 4-34 4-37 4-37 4-37 4-38 4-38 4-39 4-39 4-40 4-40 4-41 4-41 - Kyocera KM-3035 | Printing System (U) Operation Guide (Functions Edition) - Page 11
Reading data Additional settings Form Feed Time Out Resource Protect mode Auto Continue On/Off and Recovery Time Finishing Error Service Maintenance menu Service Representative Status Page print out Printer Reset Print HEX-DUMP (Dump received data) 4-43 4-43 4-45 4-45 4-46 4-46 4-47 4-47 4-47 4-47 - Kyocera KM-3035 | Printing System (U) Operation Guide (Functions Edition) - Page 12
3. Menu Flow Chart e-MPS e-MPS settings Quick copy print out Private print/Stored job print out Virtual Mailbox data print out Virtual Mailbox Data List print out Code Job List print out e-MPS configurations 4-49 4-50 4-51 4-51 4-51 4-52 3-6 - Kyocera KM-3035 | Printing System (U) Operation Guide (Functions Edition) - Page 13
Settings 4-1 Status Page print out Prints out a list of such items as the printer default settings, memory volume, etc. G Accessing the Status Page print out screen Touch the "Print Status Page" key. The [Print Status Page] screen will appear. 1 Status - Kyocera KM-3035 | Printing System (U) Operation Guide (Functions Edition) - Page 14
Parallel TX/RX mode Sets the transmission and reception mode when the printer is connected to your computer with a parallel interface. Auto, Normal, out together with the Service Representative Status Page print out. Remarks Option is displayed only when the optional network card is installed. - Kyocera KM-3035 | Printing System (U) Operation Guide (Functions Edition) - Page 15
4. Selecting the Printer Settings G Accessing the Interface settings screen Touch the "Interface" key. The [Interface] screen will appear the desired TX/RX mode and then touch the "Close" key. The display will return to the [Printer Menu] screen. • To cancel the setting, touch the "Back" key. 4-3 - Kyocera KM-3035 | Printing System (U) Operation Guide (Functions Edition) - Page 16
4. Selecting the Printer Settings G Selecting the serial interface settings 1 Select "Serial" tab. 2 the "Close" key. The display will return to the [Interface] screen. G Selecting the network interface 1 Select "Network" tab. 2 Use the "L" and "M" cursor keys to select the desired item and then - Kyocera KM-3035 | Printing System (U) Operation Guide (Functions Edition) - Page 17
4. Selecting the Printer Settings 9 NetWare On/Off Select "On" or "Off", as desired, under the "Netware" setting and then touch the "Close" key. The display will return to the [Network] screen. • When "On" is selected, the Frame Type settings will be displayed. • To cancel the setting, touch the " - Kyocera KM-3035 | Printing System (U) Operation Guide (Functions Edition) - Page 18
4. Selecting the Printer Settings 3 Use the numeric keys to input the first block of 3 digits of the address then press the sharp (#) key in order to input the - Kyocera KM-3035 | Printing System (U) Operation Guide (Functions Edition) - Page 19
4. Selecting the Printer Settings ^ Ether Talk ON/OFF Select "On" or "Off", as desired, and then touch the "Close" key. The display will return to the [Network] screen. • To cancel the setting, touch the "Back" key. & Network Card Status Page print out Select "On" or "Off", as desired, and then - Kyocera KM-3035 | Printing System (U) Operation Guide (Functions Edition) - Page 20
Remarks 1 Selecting the emulation Sets the emulation protocol. PCL6, Line Printer, IBM Proprinter, DIABRO 630, EPSON LQ-850, KPDL, KPDL up emulation mode when the emulation protocol has been set to KPDL (Auto). PCL6, Line Printer, IBM Proprinter, DIABRO 630, EPSON LQ-850, KC-GL 4 KC-GL Page A2, - Kyocera KM-3035 | Printing System (U) Operation Guide (Functions Edition) - Page 21
for which you want to set the emulation protocol. 2 Select the desired emulation and then touch the "Close" key. The display will return to the [Printer Menu] screen. 2 Code set 1 Select one of the following emulation protocols and then touch the "Detail" key. The selecting screen for the code set - Kyocera KM-3035 | Printing System (U) Operation Guide (Functions Edition) - Page 22
4. Selecting the Printer Settings 2 KPDL Error Report print out On/Off 1 Select one of the following emulation protocols and then touch the "Print KPDL errors" key. The [Print - Kyocera KM-3035 | Printing System (U) Operation Guide (Functions Edition) - Page 23
4. Selecting the Printer Settings 5 KC-GL Pen 1 Select "KC-GL" as the emulation protocol and then touch the "Pen Adjust" key. The [Pen Adjust] screen will appear. 2 Use - Kyocera KM-3035 | Printing System (U) Operation Guide (Functions Edition) - Page 24
ID of the desired font. To select a font that is already installed in the printer, enter "I###" (with the desired font ID entered in place of ###). To verify according to the type of the font as shown below. S: Software font (download) M: Memory card font H: Hardware font H: RAM disk font O: Optional - Kyocera KM-3035 | Printing System (U) Operation Guide (Functions Edition) - Page 25
4. Selecting the Printer Settings G Accessing the Font setting screen Touch the "Font" key. The [Font] screen will appear. G Font setting 1 Touch the "Internal" or "option" Key and than - Kyocera KM-3035 | Printing System (U) Operation Guide (Functions Edition) - Page 26
Gothic Select "Regular" or "Dark (bold)", as desired, under the "Letter Gothic" setting and then touch the "Close" key. The display will return to the [Printer Menu] screen. • To cancel the setting, touch the "Back" key. 5 Code set 1 Touch the "Code set" key under the "Code set" •To cancel the - Kyocera KM-3035 | Printing System (U) Operation Guide (Functions Edition) - Page 27
4. Selecting the Printer Settings 6 Font List print out 1 Touch the "Internal" or "option" key under "Printing List" setting. The display will return to the [List of font] screen. • - Kyocera KM-3035 | Printing System (U) Operation Guide (Functions Edition) - Page 28
shown in the following chart. For the most efficient use of the printer functions, select the various settings according to your printing needs. Item Available settings Remarks 1 Copiers (Number of copies) 001 - 999 2 (Orientation) Printing orientation Portrait, Landscape Allows you to set - Kyocera KM-3035 | Printing System (U) Operation Guide (Functions Edition) - Page 29
4. Selecting the Printer Settings G Accessing the Page Settings screen Touch the "Page set" key. The [Page set] screen will appear. 1 Copiers (Number of copies) 1 Use the "L" and "M" cursor keys to select "Copies" and then touch the "Change" key. The [Copies] screen will appear. 2 Use the "+" and/or - Kyocera KM-3035 | Printing System (U) Operation Guide (Functions Edition) - Page 30
4. Selecting the Printer Settings 3 Zoom (Printing reduction) 1 Use the "L" and "M" cursor keys to select "Zoom" and then touch the "Change" key. The [Zoom (Reduce)] screen will appear. 2 Use - Kyocera KM-3035 | Printing System (U) Operation Guide (Functions Edition) - Page 31
4. Selecting the Printer Settings 5 Linefeed (LF) action 1 Use the "L" and "M" cursor keys to select "LF Action" and then touch the desired carriage-return action and then touch the "Close" key. The display will return to the [Printer menu] screen. • To cancel the setting, touch the "Back" key. 4-19 - Kyocera KM-3035 | Printing System (U) Operation Guide (Functions Edition) - Page 32
in the following chart. For the most efficient use of the printer functions, select the various settings according to your printing needs. Item smoothing process. Off, On 2 Eco Print Mode On/OFF Allows printing in a toner-saving mode. Use this mode for test pages, etc., when high printing quality - Kyocera KM-3035 | Printing System (U) Operation Guide (Functions Edition) - Page 33
4. Selecting the Printer Settings G Accessing the Printing Quality settings screen 1 Touch the "Print Quality" key. The [Print Quality] screen will appear. 2 Use the "L" and "M" cursor keys to select - Kyocera KM-3035 | Printing System (U) Operation Guide (Functions Edition) - Page 34
printer utilized Copiers. Face-down (Inner tray), Face-Up (Side tray) Main tray, (Face-Up, Face-down) Sub tray, (Face-Up, Face-down) Job separator, Mailbox (Face-Up), Mailbox (Face-Down) "Main tray, (Face-Up, Face-down) and Sub tray, (Face-Up, Face-down)" is displayed only when the optional Finisher - Kyocera KM-3035 | Printing System (U) Operation Guide (Functions Edition) - Page 35
4. Selecting the Printer Settings G Accessing the Paper settings screen 1 Touch the "Paper Handling" key. The [Paper Handling] screen will appear. 2 Use the "L" and "M" cursor keys to select the - Kyocera KM-3035 | Printing System (U) Operation Guide (Functions Edition) - Page 36
to the user. Thus, if the size of the RAM disk created is too large, printing speed may actually be decreased or the machine may run out of available memory. WARNING: Resetting the printer or turning the main switch OFF will erase all data written to the RAM Disk. The factory default setting - Kyocera KM-3035 | Printing System (U) Operation Guide (Functions Edition) - Page 37
4. Selecting the Printer Settings Item 9 Deleting program data Deletes the selected program data from the RAM disk. 0 Deleting macro data Deletes the selected macro data from the RAM - Kyocera KM-3035 | Printing System (U) Operation Guide (Functions Edition) - Page 38
screen and the machine will enter a "waiting for data" state. • When data is received from a computer, "Processing" will be displayed in the [Printer Menu] screen. Once the operation is completed, "Waiting" will be displayed. 3 Partition List print out Touch the "List of Partitions" key. A Partition - Kyocera KM-3035 | Printing System (U) Operation Guide (Functions Edition) - Page 39
Mode] screen, touch the "Cancel" key. 3 Touch the "Enter" key. The display will return to the basic printer screen and the data will be read. • "Processing" will be displayed in the basic printer screen while the data is being read. 6 Reading program data 1 Touch the "Program" key under the "Read - Kyocera KM-3035 | Printing System (U) Operation Guide (Functions Edition) - Page 40
] screen, touch the "Cancel" key. 3 Touch the "Delete" key. The display will return to the basic printer screen and the data will be deleted. • "Processing" will be displayed in the basic printer screen while the data is being deleted. 8 Deleting font data 1 Touch the "Font" key under the "Delete - Kyocera KM-3035 | Printing System (U) Operation Guide (Functions Edition) - Page 41
, touch the "Cancel" key. 3 Touch the "Delete" key. The display will return to the basic printer screen and the program data will be deleted. • "Processing" will be displayed in the basic printer screen while the program data is being deleted. 0 Deleting macro data 1 Touch the "Macro" key under - Kyocera KM-3035 | Printing System (U) Operation Guide (Functions Edition) - Page 42
disk settings It is possible to perform hard disk settings for the 9 items shown in the following chart. For the most efficient use of the printer functions, select the various settings according to your printing needs. Item 1 Writing data If "Write Data" is selected here, the machine will enter - Kyocera KM-3035 | Printing System (U) Operation Guide (Functions Edition) - Page 43
screen and the machine will enter a "waiting for data" state. • When data is received from a computer, "Processing" will be displayed in the [Printer Menu] screen. Once the operation is completed, "Waiting" will be displayed. 2 Partition List print out Touch the "List of Partitions" key. A Partition - Kyocera KM-3035 | Printing System (U) Operation Guide (Functions Edition) - Page 44
Disk] screen, touch the "Cancel" key. 3 Touch the "Enter" key. The display will return to the basic printer screen and the data will be read. • "Processing" will be displayed in the basic printer screen while the data is being read. 5 Reading program data 1 Touch the "Program" key under the "Read - Kyocera KM-3035 | Printing System (U) Operation Guide (Functions Edition) - Page 45
] screen, touch the "Cancel" key. 3 Touch the "Delete" key. The display will return to the basic printer screen and the data will be deleted. • "Processing" will be displayed in the basic printer screen while the data is being deleted. 7 Deleting font data 1 Touch the "Font" key under the "Delete - Kyocera KM-3035 | Printing System (U) Operation Guide (Functions Edition) - Page 46
, touch the "Cancel" key. 3 Touch the "Delete" key. The display will return to the basic printer screen and the program data will be deleted. • "Processing" will be displayed in the basic printer screen while the program data is being deleted. 9 Deleting macro data 1 Touch the "Macro" key under - Kyocera KM-3035 | Printing System (U) Operation Guide (Functions Edition) - Page 47
Displayed only when the memory card has been inserted. Displayed only when the memory card has been inserted. (ALWAYS format the memory card using this printer. If you attempt to format it with another device, it may become unusable.) Displayed only when there is appropriate data in the memory card - Kyocera KM-3035 | Printing System (U) Operation Guide (Functions Edition) - Page 48
4. Selecting the Printer Settings Item Available settings Remarks 6 Reading program data Reads the selected program data from the memory card. Select from among the program partition names that - Kyocera KM-3035 | Printing System (U) Operation Guide (Functions Edition) - Page 49
screen and the machine will enter a "waiting for data" state. • When data is received from a computer, "Processing" will be displayed in the [Printer Menu] screen. Once the operation is completed, "Waiting" will be displayed. 2 Partition List print out Touch the "List of Partitions" key. A Partition - Kyocera KM-3035 | Printing System (U) Operation Guide (Functions Edition) - Page 50
[Memory Card] screen, touch the "Cancel" key. 3 Touch the "Enter" key. The display will return to the basic printer screen and the data will be read. • "Processing" will be displayed in the basic printer screen while the data is being read. 5 Reading font data 1 Touch the "Fonts" key under the "Read - Kyocera KM-3035 | Printing System (U) Operation Guide (Functions Edition) - Page 51
"Macro" key under the "Read" setting. 2 Touch the "Yes" key. The display will return to the basic printer screen and the macro data will be read. • "Processing" will be displayed in the basic printer screen while the macro data is being read. • If you select "No" here, the macro data will not - Kyocera KM-3035 | Printing System (U) Operation Guide (Functions Edition) - Page 52
] screen, touch the "Cancel" key. 3 Touch the "Delete" key. The display will return to the basic printer screen and the data will be deleted. • "Processing" will be displayed in the basic printer screen while the data is being deleted. 9 Deleting font data 1 Touch the "Font" key under the "Delete - Kyocera KM-3035 | Printing System (U) Operation Guide (Functions Edition) - Page 53
, touch the "Cancel" key. 3 Touch the "Delete" key. The display will return to the basic printer screen and the program data will be deleted. • "Processing" will be displayed in the basic printer screen while the program data is being deleted. ! Deleting macro data 1 Touch the "Macro" key under - Kyocera KM-3035 | Printing System (U) Operation Guide (Functions Edition) - Page 54
It is possible to perform ROM (option) settings for the 2 items shown in the following chart. For the most efficient use of the printer functions, select the various settings according to your printing needs. Item 1 Partition List print out Available settings List of Partitions Remarks 2 Reading - Kyocera KM-3035 | Printing System (U) Operation Guide (Functions Edition) - Page 55
4. Selecting the Printer Settings G Accessing the ROM (option) settings screen Touch the "Option ROM" key. The [Option ROM] , touch the "Cancel" key. 3 Touch the "Enter" key. The display will return to the basic printer screen and the data will be read. • "Processing" will be displayed in the basic - Kyocera KM-3035 | Printing System (U) Operation Guide (Functions Edition) - Page 56
Permanent, Permanent/ Protects downloaded resource data such as be changed as well. 4 Finishing Error Off, On If the default setting is "Off". 5 Service Maintenance menu This is the maintenance menu used by the service personnel. Print Status Page 6 Printer Reset Resets only the Printer Board - Kyocera KM-3035 | Printing System (U) Operation Guide (Functions Edition) - Page 57
4. Selecting the Printer Settings G Accessing the Additional settings screen Touch the "Others" key. The [Others] screen will appear. 1 Form Feed Time Out 1 Use the "L" and "M" cursor keys to - Kyocera KM-3035 | Printing System (U) Operation Guide (Functions Edition) - Page 58
4. Selecting the Printer Settings 3 Auto Continue On/Off and Recovery Time 1 Use the "L" and [Others] screen. • To cancel the setting, touch the "Back" key. 4 Finishing Error 1 Use the "L" and "M" cursor keys to select "Finishing Error" and then touch the "Change" key. 2 Use the "L" and "M" cursor - Kyocera KM-3035 | Printing System (U) Operation Guide (Functions Edition) - Page 59
Representative Status Page print out Touch the "Print Status Page" key. A Service Representative Status Page will be printed out. 6 Printer Reset 1 Touch the "Printer Reset" key. 2 Touch the "Yes" key. The Printer Board will be reset. • If you select "No" here, the display will return to the [Others - Kyocera KM-3035 | Printing System (U) Operation Guide (Functions Edition) - Page 60
about e-MPS, refer to the KX Printer Drivers Operation Guide. About the e-MPS settings It is printer driver. 4 Virtual Mailbox Data List print out Print out of the Virtual Mailbox List 5 Code Job List print out Print out of the Cod JOB List 6 e-MPS configurations Number of quick copy - Kyocera KM-3035 | Printing System (U) Operation Guide (Functions Edition) - Page 61
4. Selecting the Printer Settings G Accessing the e-MPS settings screen Touch the "e-MPS" key. The [e-MPS] screen will appear. 1 Quick copy print out 1 Touch the "Quick Copy" key. 2 Use the "L" and "M" cursor keys to select your user name and then touch the "Next" key. 3 Use the "L" and "M" cursor - Kyocera KM-3035 | Printing System (U) Operation Guide (Functions Edition) - Page 62
the "L" and "M" cursor keys to select your user name and then touch the "Next" key. 3 Use the "L" and "M" cursor keys to select the desired job and then touch the "Next" key. 4 Use the "+" and/or "-" key or the numeric keys to select the number of pages to be printed. 5 Touch the "Print - Kyocera KM-3035 | Printing System (U) Operation Guide (Functions Edition) - Page 63
4. Selecting the Printer Settings 3 Virtual Mailbox data print out 1 Touch the "Print VMB Data" key. 2 Use the "L" and "M" cursor keys to select the desired tray and then touch - Kyocera KM-3035 | Printing System (U) Operation Guide (Functions Edition) - Page 64
4. Selecting the Printer Settings 6 e-MPS configurations 1 Touch the "Configuration" key. 2 Maximum number of quick copy jobs Use the "L" and "M" cursor keys to select "Quick Copy" and then touch the "Change" key. 3 Use the "+" and/or "-" key to select the maximum number of quick copy jobs that can - Kyocera KM-3035 | Printing System (U) Operation Guide (Functions Edition) - Page 65
as enabling the use of the e-MPS function. Serial Interface Option Install the serial interface in this machine when the serial port is used for printer interface. 5-1 - Kyocera KM-3035 | Printing System (U) Operation Guide (Functions Edition) - Page 66
the specific functions of the KX driver. Refer to the KX Printer Drivers Operation Guide regarding general explanations. (Click on here when you want to see the KX Printer Drivers Operation Guide.) * The following procedure is explained as though it is being carried out in Windows XP. If you are - Kyocera KM-3035 | Printing System (U) Operation Guide (Functions Edition) - Page 67
exercise DUE CAUTION in the management of the password that you register here. * If Copy Management is turned ON and this setting does no match the setting made in the printer itself, it will not be possible to make test prints. Thus, when you install the printer driver, you will need to check the
-
 1
1 -
 2
2 -
 3
3 -
 4
4 -
 5
5 -
 6
6 -
 7
7 -
8
-
9
-
10
-
11
-
12
-
13
-
14
-
15
-
16
-
17
-
18
-
19
-
20
-
21
-
22
-
23
-
24
-
25
-
26
-
27
-
28
-
29
-
30
-
31
-
32
-
33
-
34
-
35
-
36
-
37
-
38
-
39
-
40
-
41
-
42
-
43
-
44
-
45
-
46
-
47
-
48
-
49
-
50
-
51
-
52
-
53
-
54
-
55
-
56
-
57
-
58
-
59
-
60
-
61
-
62
-
63
-
64
-
65
-
66
-
67
 |
 |
KM-3035/4035/5035
Printer Option
Operation Guide
<Functions Edition>
U
Introduction
■
1. Operation Keys
■
2. Procedure for Making Settings
■
3. Menu Flow Chart
■
4. Selecting the Printer Settings
■
5. Options
■
6. KX Driver (Specific function)
■
Link to the KX Printer Drivers Operation Guide