Kyocera TASKalfa 181 181/221 Operation Guide Rev-2
Kyocera TASKalfa 181 Manual
 |
View all Kyocera TASKalfa 181 manuals
Add to My Manuals
Save this manual to your list of manuals |
Kyocera TASKalfa 181 manual content summary:
- Kyocera TASKalfa 181 | 181/221 Operation Guide Rev-2 - Page 1
- Kyocera TASKalfa 181 | 181/221 Operation Guide Rev-2 - Page 2
purchase of Taskalfa 181/221. This Operation Guide is intended to help you operate the machine correctly, perform routine maintenance and take a simple troubleshooting action as necessary, so that you can always use the machine in good condition. Please read this Operation Guide before you start - Kyocera TASKalfa 181 | 181/221 Operation Guide Rev-2 - Page 3
Guide The sections of this guide and parts of the machine marked with symbols are safety warnings meant to protect the user, other individuals and surrounding objects, and ensure correct and safe usage the related section includes safety warnings. Specific points of attention are indicated inside the - Kyocera TASKalfa 181 | 181/221 Operation Guide Rev-2 - Page 4
2-7 Setting Date and Time 2-8 Network (TCP/IP) Setup 2-10 Installing Software 2-13 Loading Paper 2-14 Loading Originals 2-25 3 Basic Operation Power On/Off 3-2 Low Power Mode and Auto Low Power Mode 3-4 Sleep and Auto Sleep 3-5 Printing from Applications 3-6 4 Copying Functions - Kyocera TASKalfa 181 | 181/221 Operation Guide Rev-2 - Page 5
Accounting Mode 7-2 All Account Management 7-10 Individual Account Management 7-11 Enabling Job Accounting 7-12 Default Settings 7-13 Using Job Accounting 7-17 8 Maintenance Cleaning 8-2 Toner Container and Waste Toner Box Replacement 8-6 9 Troubleshooting Solving Malfunctions - Kyocera TASKalfa 181 | 181/221 Operation Guide Rev-2 - Page 6
shock when removing a paper jam or when replacing toner. Label 2 High temperature inside. Do not touch getting burned. Label 3 Do not attempt to incinerate the toner container. Dangerous sparks may cause burns. Label 1 High the waste toner box. Dangerous sparks may cause burns. NOTE: Do - Kyocera TASKalfa 181 | 181/221 Operation Guide Rev-2 - Page 7
Installation machine cool and facilitate changing of parts and maintenance, allow access space as shown below. 11 13/16" 30 cm 39 3/8" 100 cm Other precautions The service environmental conditions are as follows: • Temperature: 50 to 90.5 °F • Avoid locations near a window or with exposure to direct - Kyocera TASKalfa 181 | 181/221 Operation Guide Rev-2 - Page 8
when this machine is moved after installation, the floor material may be damaged an earth connection is not possible, contact your service representative. Other precautions Connect the power plug to Ensure that the socket/outlet is located/installed near the equipment and is easily accessible. Handling - Kyocera TASKalfa 181 | 181/221 Operation Guide Rev-2 - Page 9
to avoid the danger of fire or electrical shock. Then contact your service representative. Do not remove or connect the power plug with wet hands, as there is a danger of electrical shock. Always contact your service representative for maintenance or repair of internal parts. OPERATION GUIDE vii - Kyocera TASKalfa 181 | 181/221 Operation Guide Rev-2 - Page 10
plug from the outlet as a safety precaution. If the optional Fax kit is installed, note that turning the machine off at the main power switch disables moving the machine, contact your service representative. Do not touch electrical parts, such as connectors or printed circuit boards. They could be - Kyocera TASKalfa 181 | 181/221 Operation Guide Rev-2 - Page 11
kit is installed and the main power switch is off, transmitting/receiving Fax is disabled. Do not turn off the main power switch, but press the Power key on the operation panel to enter Sleep mode. Other precautions Return the exhausted toner container and waste toner box to your dealer or service - Kyocera TASKalfa 181 | 181/221 Operation Guide Rev-2 - Page 12
(Department of Health and Human Services) in 1968. This indicates that the product is safe to use during normal operation and maintenance. The laser optical system, enclosed must be attached to laser products marketed in the United States. On this machine, the label is on the right. x OPERATION - Kyocera TASKalfa 181 | 181/221 Operation Guide Rev-2 - Page 13
. Shown at below is the label located on the cover of the optical unit. 4. Maintenance For safety of the service personnel, follow the maintenance instructions in the other section of this manual. 5. Safety switch The power to the laser unit is cut off when the front cover is opened. OPERATION - Kyocera TASKalfa 181 | 181/221 Operation Guide Rev-2 - Page 14
installation. This equipment generates, uses and can radiate radio frequency energy and, if not installed and used in accordance with the instructions TO LOCAL, STATE OR FEDERAL LAWS. Other precautions (for users in California, the United States) This product contains a CR Coin Lithium Battery which - Kyocera TASKalfa 181 | 181/221 Operation Guide Rev-2 - Page 15
Kyocera shall have no obligation to furnish labor. This warranty covers Maintenance Kits and the components of Maintenance Kits included with the original MFP for a period of three years or 150,000 copies/prints, whichever first occurs. Maintenance Kits consist of the developing unit, the drum unit - Kyocera TASKalfa 181 | 181/221 Operation Guide Rev-2 - Page 16
the following items is prohibited and may be penalized by low. It may not be limited to these items. Do not knowingly copy/scan the items that are not to be copied/ scanned. Paper money Bank note Securities Stamp Passport Certificate • Local laws and regulations may prohibit or restrict copying - Kyocera TASKalfa 181 | 181/221 Operation Guide Rev-2 - Page 17
Legal and Safety Information Please read this information before using your machine. This chapter provides information on the following topics. • Legal Sided Copy Function xix • Paper Recycling xix • Energy Star (ENERGY STAR®) Program xix • About this Operation Guide xx OPERATION GUIDE xv - Kyocera TASKalfa 181 | 181/221 Operation Guide Rev-2 - Page 18
Legal Information Copying or other reproduction of all or part of this guide without the prior written consent of Kyocera Mita Corporation is prohibited. xvi OPERATION GUIDE - Kyocera TASKalfa 181 | 181/221 Operation Guide Rev-2 - Page 19
Kyocera Corporation. • KPDL and KIR (Kyocera Image Refinement) are trademarks of Kyocera . • Windows Me, Windows XP and Windows Vista are PC/AT are trademarks of International Business Machines Corporation. • Power PC European language fonts installed in this machine Inc. are installed in this machine - Kyocera TASKalfa 181 | 181/221 Operation Guide Rev-2 - Page 20
personal purposes at the address stated on the registration printers. If you need to have access to the fonts on more than three printers Monotype Imaging-published specifications, and the from all bugs, errors and omissions. The acknowledge that you have read this Agreement, understand it GUIDE - Kyocera TASKalfa 181 | 181/221 Operation Guide Rev-2 - Page 21
elapses since the device was last used, as well as a Sleep Mode where printer and fax functions remain in a waiting state but power consumption is Recycling This device supports the recycled paper which reduces the load on the environment. Your sales or service representative can provide GUIDE xix - Kyocera TASKalfa 181 | 181/221 Operation Guide Rev-2 - Page 22
Explains the replacement of the toner container and the waste toner box and maintenance of this product. Chapter 9 - Troubleshooting Explains how to handle error messages, paper jams and other problems. Appendix Explains the specifications of this product, paper specifications that can be used in - Kyocera TASKalfa 181 | 181/221 Operation Guide Rev-2 - Page 23
Conventions in This Guide The following conventions are used depending on the nature of the or operations for reference. NOTE: Indicates items that are required or prohibited so as to avoid problems. IMPORTANT: Indicates what must be observed to prevent injury or machine breakdown and how to - Kyocera TASKalfa 181 | 181/221 Operation Guide Rev-2 - Page 24
Originals and Paper Sizes This section explains the notation used in this guide when referring to sizes of originals or paper sizes. As with A4, B5 and Letter, which may be used and source tray. For further details, refer to the page detailing that function or source tray. xxii OPERATION GUIDE - Kyocera TASKalfa 181 | 181/221 Operation Guide Rev-2 - Page 25
1 Part Names This chapter identifies the machine parts and operation panel keys. • Operation Panel 1-2 • Machine 1-6 OPERATION GUIDE 1-1 - Kyocera TASKalfa 181 | 181/221 Operation Guide Rev-2 - Page 26
indicator 3 Print key and indicator 4 Scan key and indicator 5 Fax key and indicator 6 Combine key and indicator 7 Border Erase key and indicator 8 Duplex key and indicator 9 Offset key and indicator 10 Function key 11 Scanner mode select key 23 Auto Density key 1-2 33 34 36 OPERATION - Kyocera TASKalfa 181 | 181/221 Operation Guide Rev-2 - Page 27
Initial mode Initial mode is the state mode. For the 18 ppm model, the optional paper feeder must be installed. For details, refer to Default Cassette on page 6-6. It is possible to change the image quality mode selected in the initial mode (copy mode, number of copies, and exposure mode) if - Kyocera TASKalfa 181 | 181/221 Operation Guide Rev-2 - Page 28
Message Display The message display on this machine indicates the operation status of the machine. Copier Basic Screen 1 Ready to copy . Auto 3 100% Auto 4 16 2 5 ratio. (Refer to 4-5) Displayed in the auto paper selection mode. Displays the original size, paper size, and selected cassette. - Kyocera TASKalfa 181 | 181/221 Operation Guide Rev-2 - Page 29
print/resume printing, to clear a specific error, and to begin a new page to forcibly print the last page that waits for printing. Select to stop printing in progress. Select to perform network setting. (See Network (TCP/IP) Setup on page 2-10.) Also select this to change various printer functions - Kyocera TASKalfa 181 | 181/221 Operation Guide Rev-2 - Page 30
Part Names Machine 1 8 9 10 7 6 1 Original cover 2 Output tray 3 Operation panel 4 Cassette 1 5 Paper width adjusting tab 6 Paper length adjusting tab 7 Left cover handle 8 MP tray 9 MP tray extension 10 Slider 2 3 5 4 1-6 OPERATION GUIDE - Kyocera TASKalfa 181 | 181/221 Operation Guide Rev-2 - Page 31
12 13 11 Platen 12 Original size indicator plates 13 Left cover 14 Waste toner box 15 Toner container release lever 16 Toner container 17 Charger cleaner rod 18 Front cover Part Names 1 11 17 14 18 15 16 OPERATION GUIDE 1-7 - Kyocera TASKalfa 181 | 181/221 Operation Guide Rev-2 - Page 32
Part Names 19 Main power switch 20 Main power switch cover 21 Handles for transport 22 USB interface connector 23 Network interface connector 24 Memory card slot 22 24 23 20 21 21 19 1-8 OPERATION GUIDE - Kyocera TASKalfa 181 | 181/221 Operation Guide Rev-2 - Page 33
2-2 • Determining the Connection Method and Preparing Cables ..2-3 • Connecting Cables 2-5 • Switching the Language for Display [Language]...........2-7 • Setting Date and Time 2-8 • Network (TCP/IP) Setup 2-10 • Installing Software 2-13 • Loading Paper 2-14 • Loading Originals 2-25 OPERATION - Kyocera TASKalfa 181 | 181/221 Operation Guide Rev-2 - Page 34
CD-ROM (Product Library). Refer to them as necessary. Documents KYOCERA COMMAND CENTER Operation Guide Printer Driver User Guide Network FAX Driver Operation Guide KM-NET for Direct Printing Operation Guide PRESCRIBE Commands Technical Reference PRESCRIBE Commands Command Reference 2-2 OPERATION - Kyocera TASKalfa 181 | 181/221 Operation Guide Rev-2 - Page 35
, Scanner default settings, User and destination registration MFP Printing Network Send E-mail Sends the image data of scanned originals to the desired recipient as a file attached to an E-mail message. USB Network Network Send to PC Saves the scanned image as a data file on your PC. Network - Kyocera TASKalfa 181 | 181/221 Operation Guide Rev-2 - Page 36
/Scanner* Network interface /Network FAX** LAN (10Base-T or 100Base-TX, Shielded) Printer USB interface USB2.0 compatible cable (Hi-Speed USB compliant, Max. 5.0 m, Shielded) * Function available when using optional scanner kit. For details on scanner, refer to the Scan Kit Operation Guide - Kyocera TASKalfa 181 | 181/221 Operation Guide Rev-2 - Page 37
memory indicator are off. After this, turn off the main power switch. 2 Connect the LAN cable to the network interface located on right side of the body. 3 Connect the other end of the cable to the hub. 4 Configure the network. For details, refer to Network (TCP/IP) Setup on page 2-10. OPERATION - Kyocera TASKalfa 181 | 181/221 Operation Guide Rev-2 - Page 38
. 2 Connect the USB cable to the appropriate interface located on the right side of the body. 3 Connect the other end of the cable to the PC. Connecting the Power Cable Connect one end of the supplied power cable to the machine and the other end to a power outlet. IMPORTANT: Only use - Kyocera TASKalfa 181 | 181/221 Operation Guide Rev-2 - Page 39
System Menu / Counter: End Language MP Tray Setting 2 Press U or V repeatedly until Language appears. The default message language is English. 3 Press the Enter key. 4 Press U or V. The display cycles through language will be changed. The display returns to Ready to copy. OPERATION GUIDE 2-7 - Kyocera TASKalfa 181 | 181/221 Operation Guide Rev-2 - Page 40
will be printed in the header of the E-mail message. Set the date, time and time difference from GMT of the region where the machine is used. NOTE: Be sure to set the time difference before setting the date and time. System Menu / Counter: Job Accounting Copy Default Machine Default Enter Pin Code - Kyocera TASKalfa 181 | 181/221 Operation Guide Rev-2 - Page 41
setting is complete, press U or V to select End, and then press the Enter key. 12 Press the Reset key. The message display returns to the copier basic screen. OPERATION GUIDE 2-9 - Kyocera TASKalfa 181 | 181/221 Operation Guide Rev-2 - Page 42
Preparation before Use Network (TCP/IP) Setup Registering the IP Address Register the IP address of this machine. NOTE: Prior to the IP address entries, obtain permission from the network administrator. Ready GO CANCEL MENU Menu Back Print Status Page Interface 1 Press the Print key. 2 Press U - Kyocera TASKalfa 181 | 181/221 Operation Guide Rev-2 - Page 43
steps 8 and 9 of IP address setting to input the address. 3 Press the Enter key. 4 When you finish making all of the network setting, press the Reset key. The message display returns to the printer basic screen. DHCP Settings Select whether or not to use the DHCP server. The default setting is On - Kyocera TASKalfa 181 | 181/221 Operation Guide Rev-2 - Page 44
Preparation before Use TCP/IP Setting Back DHCP IP Address DHCP Back On Off 2 Press U or V to select DHCP, and then press the Enter key. 3 Press U or V to select On, and then press the Enter key. 2-12 OPERATION GUIDE - Kyocera TASKalfa 181 | 181/221 Operation Guide Rev-2 - Page 45
printer function of this machine or perform TWAIN transmission or FAX transmission from your PC. 2 NOTE: Installation on Windows XP, Windows 2000, Server 2003 and Windows Vista must be done by a user logged on with administrator privileges. Plug and Play is disabled on this device when in Sleep Mode - Kyocera TASKalfa 181 | 181/221 Operation Guide Rev-2 - Page 46
exposing opened paper to high temperatures and high humidity as dampness can be a cause of problems. Seal any remaining paper after loading in the MP tray or cassettes back in the paper with holes or paper with pre-prints like logo or company name, refer to the Paper on Appendix-10. 2-14 OPERATION - Kyocera TASKalfa 181 | 181/221 Operation Guide Rev-2 - Page 47
be set. 2 The following paper sizes are supported: A3, B4, A4, A4R, B5, B5R You should not use inkjet printer paper or any paper guides to fit the paper. IMPORTANT: Make sure that the width guides are flush against the paper. If there is space between the guides and the paper, set the width guides - Kyocera TASKalfa 181 | 181/221 Operation Guide Rev-2 - Page 48
inserting it into the cassette. Creases in the paper may lead to paper jams. • The maximum paper limit indicator A is provided on a paper width guide. Make sure that the paper loaded is below the maximum paper limit indicator. • When loading paper into the cassette, set it with the side which - Kyocera TASKalfa 181 | 181/221 Operation Guide Rev-2 - Page 49
Preparation before Use • If the length and width guides are not flush against the paper, a size that so that 2 the wrinkled side is toward the length guide. NOTE: When loading paper into the cassette, set it with the side to be printed facing up. 6 Stick the accompanying paper label so that - Kyocera TASKalfa 181 | 181/221 Operation Guide Rev-2 - Page 50
tray extension to match the paper size. Refer to the label which sealed inside the machine when opening the MP tray. 2 Adjust the paper width guides to the width of the paper. 2-18 OPERATION - Kyocera TASKalfa 181 | 181/221 Operation Guide Rev-2 - Page 51
Preparation before Use 3 Insert the paper along the paper width guides into the tray until it stops. IMPORTANT: Keep the side that was closest the package seal facing up. the tray. NOTE: When loading paper into the MP tray, set it with the side to be printed facing down. OPERATION GUIDE 2-19 - Kyocera TASKalfa 181 | 181/221 Operation Guide Rev-2 - Page 52
(mm) 235×105 (mm) 3 7/8"×7 1/2" 4 1/8"×9 1/2" 110×220 (mm) 162×229 (mm) 7 1/4"×10 1/2" 3 7/8"×8 7/8" 3 5/8"×6 1/2" 176×250 (mm) 229×324 (mm) 1 Open the MP tray. 2 Adjust the paper width guides to the width of envelope. 2-20 OPERATION - Kyocera TASKalfa 181 | 181/221 Operation Guide Rev-2 - Page 53
the edge with the flap facing towards you. For portrait form envelopes, close the flap. Insert the envelope all the way along the width guides, keeping the printing side face-down and the edge with the flap facing the insertion slot. When you load envelopes or cardstock in the MP tray Load - Kyocera TASKalfa 181 | 181/221 Operation Guide Rev-2 - Page 54
displayed. Proceed to Paper Type described below. Selecting a Size from Other Regular Sizes Sizes that can be set: Inch Specification - A3, B4, B5R, B5, A5R, B6R, A6R, HAGAKI, Folio, Executive, ISO B5, Envelope DL, MP Tray Setting appears, and then press the Enter key. 2-22 OPERATION GUIDE - Kyocera TASKalfa 181 | 181/221 Operation Guide Rev-2 - Page 55
that can be set: Plain, Transparency, Preprinted, Labels, Bond, Recycled, Vellum, Rough, Letterhead, Color [Colour], Prepunched, Envelope, Cardstock, Thick paper, High quality, Custom 1 (to 8) OPERATION GUIDE 2-23 - Kyocera TASKalfa 181 | 181/221 Operation Guide Rev-2 - Page 56
Preparation before Use MP Tray Paper type : * Plain Transparency Preprinted Press U or V to select the MP tray paper type, and then press the Enter key. The message display returns to the copier basic screen. 2-24 OPERATION GUIDE - Kyocera TASKalfa 181 | 181/221 Operation Guide Rev-2 - Page 57
Open the original cover. NOTE: If the optional document processor is installed, open the document processor. Before opening the document processor, be processor open if the original is books or magazines. 2 Place the original. Put the scanning side facedown and align it flush against GUIDE 2-25 - Kyocera TASKalfa 181 | 181/221 Operation Guide Rev-2 - Page 58
scanned. Originals Supported by the Document Processor The document processor supports to 80 g/m²) (30 sheets for auto selection mode) Originals Not Supported by the Document Processor Do not use the document (1) Original table (2) Original insert guides (3) Left cover (4) Original eject - Kyocera TASKalfa 181 | 181/221 Operation Guide Rev-2 - Page 59
Chapter 4 Auto Selection Mode.) 2 Arrange the originals in order and set them face up (front side up for 2-sided originals) on the original table. IMPORTANT: Be sure to set only a number of originals that does not exceed the level indicator located inside the rear original insert guide. If you set - Kyocera TASKalfa 181 | 181/221 Operation Guide Rev-2 - Page 60
order to turn them over. Do not touch them at this point. Any attempt to remove them may cause the originals to jam 2-28 OPERATION GUIDE - Kyocera TASKalfa 181 | 181/221 Operation Guide Rev-2 - Page 61
3 Basic Operation This chapter explains the following operations. • Power On/Off 3-2 • Low Power Mode and Auto Low Power Mode 3-4 • Sleep and Auto Sleep 3-5 • Printing from Applications 3-6 OPERATION GUIDE 3-1 - Kyocera TASKalfa 181 | 181/221 Operation Guide Rev-2 - Page 62
may be operating when the Power key is lit. Turning off the main power switch while the hard disk is operating may cause damage. 3-2 OPERATION GUIDE - Kyocera TASKalfa 181 | 181/221 Operation Guide Rev-2 - Page 63
for an even longer period of time (e.g. vacation), remove the power plug from the outlet as a safety precaution. If the optional Fax kit is installed, note that turning the machine off at the main power switch disables fax transmission and reception. 3 CAUTION: Remove paper from the cassettes - Kyocera TASKalfa 181 | 181/221 Operation Guide Rev-2 - Page 64
. Note that ambient environmental conditions, such as ventilation, may cause the machine to respond more slowly. Auto Low Power Mode Auto Low Power Mode automatically switches the machine into Low Power Mode if left idle for a preset time. The default preset time is 1 minutes. 3-4 OPERATION GUIDE - Kyocera TASKalfa 181 | 181/221 Operation Guide Rev-2 - Page 65
except the Power indicator. This status is referred to as Sleep. 3 If print data is received during Sleep, the print job is performed while the touch panel remains unlit. When using the optional for a preset time in the Low Power Mode. The default preset time is 1 minutes. OPERATION GUIDE 3-5 - Kyocera TASKalfa 181 | 181/221 Operation Guide Rev-2 - Page 66
print the document from applications, install the printer driver on your computer from the supplied CD-ROM (Product Library). 1 Create a document using an application. 2 Click File and select Print in the application. The Print Collate to print out one by paper size. To print on the special paper - Kyocera TASKalfa 181 | 181/221 Operation Guide Rev-2 - Page 67
are supplied automatically from the paper source loaded with paper of optimum size and type. To print on special paper such as envelope or thick paper, place it on the MP tray and of the 3 document. Selecting Rotate 180° will print the document rotated 180°. 9 Click OK button to return to the - Kyocera TASKalfa 181 | 181/221 Operation Guide Rev-2 - Page 68
Basic Operation 3-8 OPERATION GUIDE - Kyocera TASKalfa 181 | 181/221 Operation Guide Rev-2 - Page 69
Selection 4-14 • Mixed Sized Originals 4-15 • Original Orientation 4-16 • EcoPrint 4-18 • Combine Mode 4-19 • Margin Mode 4-22 • Border Erase 4-23 • Duplex Copying 4-25 • Continuous Scan 4-28 • Auto Image Rotation 4-29 • Interrupt Mode 4-30 • Program Function 4-32 OPERATION GUIDE 4-1 - Kyocera TASKalfa 181 | 181/221 Operation Guide Rev-2 - Page 70
2 Place the originals on the platen or in the optional document processor. NOTE: For loading instructions, refer to Loading Originals on page 2-25. Ready to copy . Auto 100% Auto 3 Select the desired copier's functions to use. 4 Select the copy paper. If Auto is displayed on the message display - Kyocera TASKalfa 181 | 181/221 Operation Guide Rev-2 - Page 71
Density Use this procedure to adjust the density when copying. Copying Functions Mode Description Auto Density mode The machine detects the density of the original and sets the optimum density. 4 Manual Density mode Adjust the density by pressing the Lighter or Darker key. NOTE: You - Kyocera TASKalfa 181 | 181/221 Operation Guide Rev-2 - Page 72
type of original. The table below shows the quality options. Image quality mode Text + Photo Text Photo Description For originals with both text and on page 6-9.) If you select the Photo mode, the manual copy exposure mode is set. (See Adjusting Density on page 4-3.) 4-4 OPERATION GUIDE - Kyocera TASKalfa 181 | 181/221 Operation Guide Rev-2 - Page 73
mode is selected when you select a cassette. Refer to Default Magnification on page 6-6. Automatically reduces or enlarges the original image suitably to the selected paper size. 5 1/2 × 8 1/2": 64 start copying. Manual Zoom Mode With this mode, the magnification can be set between 25 % - Kyocera TASKalfa 181 | 181/221 Operation Guide Rev-2 - Page 74
Manually reduces or enlarges the original image in 1% increments between 25% and 400%. 200 % The procedure for zoom mode Mode With this mode 77% (11 × 17 >> 8.5 × 14), 64% (11 × 17 >> 8.5 × 11), 50% mode is explained below. 1 Press the Copy key. 2 Place the originals on the platen. 4-6 OPERATION - Kyocera TASKalfa 181 | 181/221 Operation Guide Rev-2 - Page 75
desired maginification, and then press the Enter key. The zoom ratio is displayed on the message display. 5 Press the Start key to start copying. 4 OPERATION GUIDE 4-7 - Kyocera TASKalfa 181 | 181/221 Operation Guide Rev-2 - Page 76
installed, you can select whether or not to turn on the collate mode at a default setting. Refer to Collate Copying on page 6-9. ! ! ! ! Scan and press the Start key. Scanning of the original starts. If Scanning of the original is performed. 6 After scanning all originals, press - Kyocera TASKalfa 181 | 181/221 Operation Guide Rev-2 - Page 77
installed, use this function with collate copying. You can select whether or not to turn on the offset mode at a default When you use offsetting, printed copies are segregated after each key. Scanning of the Scanning of the original is performed. 6 After scanning all originals, press the - Kyocera TASKalfa 181 | 181/221 Operation Guide Rev-2 - Page 78
document finisher. Note also that saddle stitching (center stapling) requires the folding unit. The following stapling options and orientations are available. Cassette Paper Load Direction Cassette Edge (Left top corner) Original Orientation: Left Top Edge (Left top corner) 4-10 OPERATION GUIDE - Kyocera TASKalfa 181 | 181/221 Operation Guide Rev-2 - Page 79
procedure for staple mode is explained below. 1 Press the Copy key. 2 Place the originals on the platen. 3 Pressthe Staple key. Staple : Left Top Right Top 4 Press U or V to select the desired stapling position, and then press the Enter key. 4 5 Press the Start key. Scanning of the original - Kyocera TASKalfa 181 | 181/221 Operation Guide Rev-2 - Page 80
Copying Functions Original Size Specify the size of originals being scanned. Be sure to specify the original size when copying non-standard sizes. Selecting an Original Size copying. 1 Press the Copy key. 2 Place the originals on the platen. 3 Press the Original Size key. 4-12 OPERATION GUIDE - Kyocera TASKalfa 181 | 181/221 Operation Guide Rev-2 - Page 81
can set the horizontal size to 2" to 17" in 1/8" increments [50 to 432 mm in 1 mm increments]. 8 Press the Start key to start copying. OPERATION GUIDE 4-13 - Kyocera TASKalfa 181 | 181/221 Operation Guide Rev-2 - Page 82
screen when the MP tray is selected. Refer to MP Tray Confirmation Display on page 6-16. 4 Press the Start key to start copying. 4-14 OPERATION GUIDE - Kyocera TASKalfa 181 | 181/221 Operation Guide Rev-2 - Page 83
of different sizes can be placed in the document processor at the same time. Supported Combinations of Originals The supported combinations of originals are as follows. Ledger and Letter (A3 and A4) 4 the Mixed Size Originals key. 4 Press the Start key to start copying. OPERATION GUIDE 4-15 - Kyocera TASKalfa 181 | 181/221 Operation Guide Rev-2 - Page 84
(XY Zoom) • Duplex • Margin/Centering originals • Border erase • Combine mode • Booklets • Stapling/Punch (optional feature) When placing originals on the platen [Top Edge Left] NOTE: To change the default setting for the original orientation, refer to Original Orientation on page 6-19. - Kyocera TASKalfa 181 | 181/221 Operation Guide Rev-2 - Page 85
. 3 Press the Function key. Function : End 4 Press U or V to select Orig. direction, and then press the Enter key. Orig. Orient . : Top Edge Continuous Scan : Off 4 Original Orientation : * Top Edge Top Top Edge Left 5 Press U or V to select Top Edge Top or Top Edge Left, and then press the - Kyocera TASKalfa 181 | 181/221 Operation Guide Rev-2 - Page 86
EcoPrint Use EcoPrint to save toner when printing. Use this function for test copies or any other occasion where high quality print is unnecessary. NOTE: The copy exposure will be a little lighter. You can select whether or not to turn on the ecoprint mode at a default setting. Refer to EcoPrint - Kyocera TASKalfa 181 | 181/221 Operation Guide Rev-2 - Page 87
mode to copy four originals 4 onto one sheet. The following 2-in-1 options and output orientations are available. Original Copy Orientation of Original Platen Document processor NOTE: When placing the original on the platen, be sure to copy the originals in page order. OPERATION GUIDE - Kyocera TASKalfa 181 | 181/221 Operation Guide Rev-2 - Page 88
copying four originals onto a single sheet. This mode can be used with Duplex mode to copy eight originals onto one sheet. The . None Solid Dotted Borders (Cropmark) The procedure for using Combine mode copying is explained below. 1 Press the Copy key. 2 Place the originals on the - Kyocera TASKalfa 181 | 181/221 Operation Guide Rev-2 - Page 89
Combine key. 4 Press U or V to select the desired combine copying mode, and then press the Enter key. 5 Press U or V to select key. 4 6 Press the Start key to start scanning. If the originals have been set in the Scanning of the original is performed. 8 After scanning all originals, press the - Kyocera TASKalfa 181 | 181/221 Operation Guide Rev-2 - Page 90
) side. The following margin widths are available. Input units Inch Models Metric Models Margin Width 1/8 to 3/4" (in 1/8" increments) 1 mm to 18 mm (in 1 mm increments) NOTE: You can set the default margin width. Refer to Margin Width Default Value on page 6-10 for details. Use the procedure - Kyocera TASKalfa 181 | 181/221 Operation Guide Rev-2 - Page 91
book. Original Copy In each option, the available ranges are as below. Input units Inch Models Metric Models Border Erase Range 1/8 to 3/4"(in 1/8" increments) 1 mm to 18 mm (in 1 mm increments) NOTE: To specify the default width value of Border Erase, refer to Border Erase Width Default - Kyocera TASKalfa 181 | 181/221 Operation Guide Rev-2 - Page 92
Copying Functions Border Erase Width : 1/4" 1/8" 3/4" 5 Press Y or Z to set the border erase width, and then press the Enter key. You can set the width to 1/8" to 3/4" in 1/8" increments [1 mm to 18 mm in 1 mm increments]. 6 Press the Start key to start copying. 4-24 OPERATION GUIDE - Kyocera TASKalfa 181 | 181/221 Operation Guide Rev-2 - Page 93
copies from two-sided originals or originals with facing pages such as books. The following modes are available. One-sided to Two-sided Produces two-sided copies from 1/2 x 11" (Letter), 11 x 8 1/2", 5 1/2 x 8 1/2" (Statement), 8 1/2 x 13" (Oficio II), 8K, 16K, and 16KR. OPERATION GUIDE 4-25 - Kyocera TASKalfa 181 | 181/221 Operation Guide Rev-2 - Page 94
limited to 11 x 8 1/2" and 16K in the inch specifications and A4, B5, and 16K in the metric specifications. The paper size can be changed and the zoom ratio adjusted 1 sided 2 sided 2 sided 2 sided Book 2-sided 4 Press U or V to select the desired duplex copy mode, and then press the Enter key. If - Kyocera TASKalfa 181 | 181/221 Operation Guide Rev-2 - Page 95
Copying Functions Scanning of the original is performed. 8 After scanning all originals, press the Enter key to start copying. 4 OPERATION GUIDE 4-27 - Kyocera TASKalfa 181 | 181/221 Operation Guide Rev-2 - Page 96
to be scanned at more than one time, and to be copied in one batch. Since multiple originals of the same type are scanned in Orig. Orient . Continuous Scan : Top Edge : Off 3 Press the Function key. 4 Press U or V to select Continuous scan, and then press the Enter key. Continuous Scan : * Off On - Kyocera TASKalfa 181 | 181/221 Operation Guide Rev-2 - Page 97
for auto rotation. You can select whether or not to enable auto rotation at a default setting. Refer to Auto Rotation Copy on page 6-10. 4 The procedure for the platen. 3 Press the Function key. Function : Orig. Orient . Continuous Scan Auto Rotation : Top Edge : Off : On 4 Press U or V to - Kyocera TASKalfa 181 | 181/221 Operation Guide Rev-2 - Page 98
print data or received fax data with priority. After priority output is complete, the interrupted job is resumed. NOTE: To use the fax functions, the optional fax kit must be installed. During a Copy Job The procedure for using Interrupt Mode the Start key to resume copying. 4-30 OPERATION GUIDE - Kyocera TASKalfa 181 | 181/221 Operation Guide Rev-2 - Page 99
Press the Interrupt key during output. Select Interrupt mode is displayed. Select Interrupt Mode . Interrupt Copy Priority:Printer Priority:Fax NOTE: If the machine has neither print data nor received fax data, Interrupt mode OK [Interrupt mode] is displayed. Proceed to step 4. 4 2 Press U or V to - Kyocera TASKalfa 181 | 181/221 Operation Guide Rev-2 - Page 100
The following procedure is an example of registering the copying function. 1 Press the Program key while the copy mode is accessed. Program : Program #7 Program #8 Register program . 2 Press U or V to select key. Copying starts with the settings that were registered. 4-32 OPERATION GUIDE - Kyocera TASKalfa 181 | 181/221 Operation Guide Rev-2 - Page 101
that can be made are shown below. • Using This Machine as a Network Printer 5-2 • Status Page Printing 5-3 • e-MPS Function 5-4 • Interface 5-11 • Emulation 5-16 • Font 5-19 • Print Configuration 5-24 • Print Quality 5-29 • Memory Card Operation 5-32 • Hard Disk Operation 5-38 • RAM - Kyocera TASKalfa 181 | 181/221 Operation Guide Rev-2 - Page 102
setting items • Network • Emulation selection • Number of copies and print orientation • Print quality • Paper sizes for cassette and MP tray È Installation and setting operation of printer driver (Refer to Installing Software on page 2-13.) È Printing from application 5-2 OPERATION GUIDE - Kyocera TASKalfa 181 | 181/221 Operation Guide Rev-2 - Page 103
Status Page Printing The printer default settings, the memory capacity, and so on are printed in a list. Use the procedure below to print the status page. Ready GO CANCEL MENU 1 Press the Print key. 2 Press U or V to select MENU, and then press the Enter key. Menu Back Print Status Page - Kyocera TASKalfa 181 | 181/221 Operation Guide Rev-2 - Page 104
, the optional hard disk must be installed. For details on e-MPS, refer to the KX Printer Driver Operation Guide. Even if the RAM Disk Operation (see page 2-44) is turned On, the e-MPS function can be used. In this case, only proof-and-hold and printing private print can be used. How to Display - Kyocera TASKalfa 181 | 181/221 Operation Guide Rev-2 - Page 105
is stored in the hard disk. To print the remaining number of copies, execute printing from the operation panel. At this time, you can change the number of copies. For the method of setting with the printer driver, refer to the KX Printer Driver Operation Guide. Use the procedure below to center - Kyocera TASKalfa 181 | 181/221 Operation Guide Rev-2 - Page 106
is complete. In the stored job mode, print data can be stored in the hard disk without access codes after printing is complete. For the method of setting the respective functions with the printer driver, refer to the KX Printer Driver Operation Guide. 1 Display the e-MPS screen. (See How to - Kyocera TASKalfa 181 | 181/221 Operation Guide Rev-2 - Page 107
the printer driver, refer to the KX Printer Driver Operation Guide. e-MPS Quick Copy Private/Stored Print VMB Data 1 Display the e-MPS screen. (See How to Display the e-MPS Screen on page 5-4.) 5 2 Press U or V to select Print VMB Data, and then press the Enter key. Print VMB Data 001: File - Kyocera TASKalfa 181 | 181/221 Operation Guide Rev-2 - Page 108
e-MPS Configuration Back Quick Copy Temp Code Job Size 3 Press U or V to select Quick Copy, and then press the Enter key. Quick Copy 32 (0 50) 4 Press Y or Z to enter the maximum number of jobs that can be stored. You can set the number to 0 to 50. 5 Press the Enter key. 5-8 OPERATION GUIDE - Kyocera TASKalfa 181 | 181/221 Operation Guide Rev-2 - Page 109
Printing Functions Capacity for Storage of 5-4.) e-MPS List of VMB List of Code JOB e-MPS Configuration 2 Press U or V to select e-MPS Configuration, and then press the Enter key. e-MPS Configuration Back Back Temp Code Job Size 3 Press U or V MB. 5 Press the Enter key. OPERATION GUIDE 5-9 - Kyocera TASKalfa 181 | 181/221 Operation Guide Rev-2 - Page 110
Printing Functions Total Capacity for Storage of Virtual Mailboxes Set the total capacity (upper limit) for storage of virtual mailboxes in the hard disk. The actual maximum size, however, is the size of available hard disk space. e-MPS List of VMB List of Code JOB e-MPS Configuration GUIDE - Kyocera TASKalfa 181 | 181/221 Operation Guide Rev-2 - Page 111
description of each setting item. Network Setting To perform network printing, network setting is required. This section describes the setting required for using the network function. NOTE: Before setting the IP address, ask your network administrator to obtain the address and prepare it. NetWare - Kyocera TASKalfa 181 | 181/221 Operation Guide Rev-2 - Page 112
On, and then press the Enter key. 5 Press the Reset key. The message display returns to the printer basic screen. TCP/IP When connecting to a Windows network through TCP/IP, turn TCP/IP On. 1 Display the Interface screen. (See How to Display the Interface Screen on page 5-11.) 5-12 OPERATION - Kyocera TASKalfa 181 | 181/221 Operation Guide Rev-2 - Page 113
with your network administrator before performing this setting. If you use the following procedure to manually register the IP address, be sure to turn the DHCP setting Off and the TCP/IP setting On. 1 Display the TCP/IP screen referring to steps 1 to 3 of TCP/IP setting. OPERATION GUIDE 5-13 - Kyocera TASKalfa 181 | 181/221 Operation Guide Rev-2 - Page 114
address, and then press the Enter key. Next, set the default gateway. Default Gateway To register the default gateway, continue the procedure from step 2 above. TCP/IP Setting IP Address Subnet Mask Gateway 1 Press U or V to select Gateway, and then press the Enter key. 5-14 OPERATION GUIDE - Kyocera TASKalfa 181 | 181/221 Operation Guide Rev-2 - Page 115
procedure as steps 4 to 6 of IP Address setting to input the address, and then press the Enter key. 3 When you finish making all of the setting, press the Reset key. The message display returns to the printer basic screen. Network Status Page Printing When printing the status page, you can also - Kyocera TASKalfa 181 | 181/221 Operation Guide Rev-2 - Page 116
KPDL (AUTO), switching between KPDL and an alternative emulation mode will be automatically performed according to the print data. If you set KPDL or KPDL (AUTO), the details of any error that occurs during printing can be printed. 1 Press the Print key. Ready GO CANCEL MENU 2 Press U or V to - Kyocera TASKalfa 181 | 181/221 Operation Guide Rev-2 - Page 117
commands, refer to the PRESCRIBE Command Reference Manual. 7 Press the Reset key. The message display returns to the printer basic screen. KPDL Error Printing The details of any error that occurs during printing in the KPDL emulation mode can be printed. Continue the procedure from step 5 of - Kyocera TASKalfa 181 | 181/221 Operation Guide Rev-2 - Page 118
details of any error will be printed. 3 Press the Reset key. The message display returns to the printer basic screen. mode selection to set this item as shown below. Available emulation modes: PCL6, KC-GL, Line Printer, IBM Proprinter, DIABLO 630, EPSON LQ-850 KPDL(AUTO) Back Alt. Emulation Print - Kyocera TASKalfa 181 | 181/221 Operation Guide Rev-2 - Page 119
Printing Functions Font You can select the default font for the current interface. The default font GO CANCEL MENU Menu Interface Emulation Font Interface Back Network USB Font Selection Font Back Select Font Code Set 1 Press the Print key. 2 Press U or V to select MENU set. OPERATION GUIDE 5-19 - Kyocera TASKalfa 181 | 181/221 Operation Guide Rev-2 - Page 120
and then press the Enter key. For internal font numbers, see Font List Printing on page 5-23. 5 Press the Reset key. The message display returns to the printer basic screen. Font Size If you have selected a proportional font as the default font, you can set the font size. If you have selected the - Kyocera TASKalfa 181 | 181/221 Operation Guide Rev-2 - Page 121
Printing Functions Select Font I000BI0a0c0k Detail 3 Press U or V to select Detail, and then press the Enter key. Font Size Setting 8.50Point (4.00 999 the character pitch to 0.44 to 99.99 cpi. 5 Press the Reset key. The message display returns to the printer basic screen. OPERATION GUIDE 5-21 - Kyocera TASKalfa 181 | 181/221 Operation Guide Rev-2 - Page 122
Printing the Enter key. 5 Press the Reset key. The message display returns to the printer basic screen. Code Set Selection With the PCL6 emulation, you can select a code and then press the Enter key. Code Setting IBM PC-8 PC-855 Serbia ISO Cyrillic 3 Press U or V to select the desired code set - Kyocera TASKalfa 181 | 181/221 Operation Guide Rev-2 - Page 123
List of Inter. Fonts List of Inter . Fonts No Print Printing Functions 4 Press the Reset key. The message display returns to the printer basic screen. 1 Display the Font screen. (See U or V to select Print, and then press the Enter key. Printing of the font list starts. OPERATION GUIDE 5-23 - Kyocera TASKalfa 181 | 181/221 Operation Guide Rev-2 - Page 124
You can set the following items for print configuration. • Number of Copies • Reduction Printing • Print Orientation • Page Protect Mode • Line Feed (LF) Action • Carriage Return (CR) Action • Wide A4 NOTE: You can set the print configuration for each interface. How to Display the Page - Kyocera TASKalfa 181 | 181/221 Operation Guide Rev-2 - Page 125
then press the Enter key. You can set any number from 1 to 999. 4 Press the Reset key. The message display returns to the printer basic screen. Reduction Printing If you specify the paper size (original size) and the output size, the machine reduces the image at a preset magnification ratio to - Kyocera TASKalfa 181 | 181/221 Operation Guide Rev-2 - Page 126
printer basic screen. Page Protect Mode To maintain the printer memory efficiently, the default setting of this mode is Auto. Normally, this menu is not displayed. If a print overrun error occurs due to insufficient printer feed. CR and LF: Performs a line feed and carriage 5-26 OPERATION GUIDE - Kyocera TASKalfa 181 | 181/221 Operation Guide Rev-2 - Page 127
: Does not perform a carriage return. 4 Press the Reset key. The message display returns to the printer basic screen. Wide A4 The print area of the A4 size can be enlarged. Page Set LF Action CR Action Wide A4 1 Display or V to select On or Off, and then press the Enter key. OPERATION GUIDE 5-27 - Kyocera TASKalfa 181 | 181/221 Operation Guide Rev-2 - Page 128
Printing Functions 4 Press the Reset key. The message display returns to the printer basic screen. 5-28 OPERATION GUIDE - Kyocera TASKalfa 181 | 181/221 Operation Guide Rev-2 - Page 129
29.) Print Quality Back KIR Mode EcoPrint Mode 2 Press U or V to select KIR Mode, and then press the Enter key. KIR Mode Back On Off 3 Press U or V to select On or Off, and then press the Enter key. 4 Press the Reset key. The message display returns to the printer basic screen. OPERATION GUIDE - Kyocera TASKalfa 181 | 181/221 Operation Guide Rev-2 - Page 130
ecoprint mode allows printing with less toner consumption. Use this mode when high quality printing is not necessary, for example, for trial printing. 1 Display the Print Quality screen. (See How to Display the Print Quality Screen on page 5-29.) Print Quality Back KIR Mode EcoPrint Mode 2 Press - Kyocera TASKalfa 181 | 181/221 Operation Guide Rev-2 - Page 131
Print Quality EcoPrint Mode Resolution Print Density Print Density 3 Printing Functions 2 Press U or V to select Print Density, and then press the Enter key. 3 Press Y or Z to set the print density, and then press the Enter key. 4 Press the Reset key. The message display returns to the printer - Kyocera TASKalfa 181 | 181/221 Operation Guide Rev-2 - Page 132
installed in this machine, the following operations are available. • Reading Font Data • Reading Macro Data • Reading Data • Reading Program • Writing Data • Deleting Data • Deleting Font Data • Deleting Program Data • Deleting Macro Data • Deleting Language Data • Formatting Memory Card • Printing - Kyocera TASKalfa 181 | 181/221 Operation Guide Rev-2 - Page 133
Macro Data Memory Card Back Read Fonts Read Macro Reading Data Memory Card Read Fonts Read Macro Read Data Reading Program Memory Card Read Macro Read Data Read Program OPERATION GUIDE Printing Functions 4 Press the Reset key. The message display returns to the printer basic screen. 1 Display the - Kyocera TASKalfa 181 | 181/221 Operation Guide Rev-2 - Page 134
Write Data Delete Data 5-34 3 Press U or V to select the program to read, and then press the Enter key. The selected program is read from the memory card. 4 Press the Reset key. The message display returns to the printer basic screen. 1 Display the Memory Card screen. (See How to Display the Memory - Kyocera TASKalfa 181 | 181/221 Operation Guide Rev-2 - Page 135
Data Memory Card Delete Data Delete Font Delete Program Deleting Macro Data OPERATION GUIDE Printing Functions The selected data is deleted from the memory card. 4 Press the Reset key. The message display returns to the printer basic screen. 1 Display the Memory Card screen. (See How to Display the - Kyocera TASKalfa 181 | 181/221 Operation Guide Rev-2 - Page 136
Printing Functions Memory Card Delete Font data is deleted from the memory card. 4 Press the Reset key. The message display returns to the printer basic screen. 1 Display the Memory Card screen. (See How to Display the Memory Card Screen on , and then press the Enter key. 5-36 OPERATION GUIDE - Kyocera TASKalfa 181 | 181/221 Operation Guide Rev-2 - Page 137
List Memory Card Delete Macro Delete the language List of Partitions List of Partitions No Print Printing Functions 3 Press U or V to select OK, and then press the Enter Partitions, and then press the Enter key. 5 3 Press U or V to select Print, and then press the Enter key. The partition list is - Kyocera TASKalfa 181 | 181/221 Operation Guide Rev-2 - Page 138
hard disk is installed in this machine, the following operations are available. • Reading Data • Reading Program • Writing Data • Deleting Data • Deleting Font Data • Deleting Program Data • Deleting Macro Data • Deleting Language Data • Formatting Hard Disk • Printing a Partition List Ready - Kyocera TASKalfa 181 | 181/221 Operation Guide Rev-2 - Page 139
. 5 The RAM disk functions are disabled at the default setting. To use the RAM disk functions, set as follows. 1 Press the Print key. Ready GO CANCEL MENU 2 Press U or V to select MENU, and then press the Enter key. Menu Page Set Print Quality RAM Disk Mode 3 Press U or V to select RAM Disk - Kyocera TASKalfa 181 | 181/221 Operation Guide Rev-2 - Page 140
See Memory Card Operation on page 5-32. 1 Press the Print key. 2 Press U or V to select MENU, and then press the Enter key. 3 Press U or V to select RAM Disk Mode, and then press the Enter key. 4 Press U or V to select Yes, and then press the Enter key. This machine restarts. 5-40 OPERATION GUIDE - Kyocera TASKalfa 181 | 181/221 Operation Guide Rev-2 - Page 141
Tray Mode Feed Select 2 Press U or V to select MP Tray Mode, and then press the Enter key. MP Tray Mode Back Cassette First 3 Press U or V to select Cassette or First, and then press the Enter key. 4 Press the Reset key. The message display returns to the printer basic screen. OPERATION GUIDE - Kyocera TASKalfa 181 | 181/221 Operation Guide Rev-2 - Page 142
the printer basic screen. Duplex Print Mode Set the binding position on finished prints in duplex printing. Setting Short edge bind Binding at a short edge Output destination Long edge bind Binding at a long edge NOTE: This setting is displayed only if the optional duplex unit is installed - Kyocera TASKalfa 181 | 181/221 Operation Guide Rev-2 - Page 143
returns to the printer basic screen. Setting Top tray Finisher Job Separator Output destination Output tray of main body Optional finisher Optional job separator NOTE: This item is displayed only if the optional finisher or job separator is installed. Paper Handling MP Tray Mode Feed Select - Kyocera TASKalfa 181 | 181/221 Operation Guide Rev-2 - Page 144
Printing Functions Override A4/Letter The A4 and Letter sizes can be regarded as a size that can be used in common. 1 Display the Press U or V to select On or Off, and then press the Enter key. 4 Press the Reset key. The message display returns to the printer basic screen. 5-44 OPERATION GUIDE - Kyocera TASKalfa 181 | 181/221 Operation Guide Rev-2 - Page 145
Printer Function Resetting • Resource Protect Mode • Auto Continue • Duplex Printing Error Detection • Stapling Error Detection • Service Status Page Printing manually selected. 1 Display the Others screen. (See How to Display the Others Screen on page 5-45.) Others Back Form Feed Time-Out Print - Kyocera TASKalfa 181 | 181/221 Operation Guide Rev-2 - Page 146
(such as the current page orientation and font) to the default settings. 1 Display the Others screen. (See How to Display the Others Screen on page 5-45.) Others Form Feed Time-Out Print HEX -DUMP Printer Reset 2 Press U or V to select Printer Reset, and then press the Enter key. 5-46 OPERATION - Kyocera TASKalfa 181 | 181/221 Operation Guide Rev-2 - Page 147
OK Printing Functions 3 Press U or V to select OK, and then press the Enter key. The printer functions are reset. Resource Protect Mode The resource protect mode protects the resource data such as downloaded fonts and macros and memorizes the PCL resources even if the emulation mode is switched - Kyocera TASKalfa 181 | 181/221 Operation Guide Rev-2 - Page 148
be continued after the preset recovery time elapses (auto continue). • Memory Overflow/Press GO • Print overrun Press GO • KPDL error Press GO • File not found Press GO • HARD DISK error Press GO • RAM disk error Press GO • MemoryCard err Press GO • Illegal Account Press GO • Exceeded Max.out Press - Kyocera TASKalfa 181 | 181/221 Operation Guide Rev-2 - Page 149
key. The message display returns to the printer basic screen. Duplex Printing Error Detection This setting is available if the optional duplex unit is installed. You can select whether or not to display Duplex disabled Press GO when you select duplex printing and specify a paper type that cannot be - Kyocera TASKalfa 181 | 181/221 Operation Guide Rev-2 - Page 150
more detailed printer setting information than the normal status page. This page is mainly used by the service personnel for maintenance. Use the following procedure to print this page as needed. 1 Display the Others screen. (See How to Display the Others Screen on page 5-45.) 5-50 OPERATION GUIDE - Kyocera TASKalfa 181 | 181/221 Operation Guide Rev-2 - Page 151
press the Enter key. 3 Press U or V to select Print Status Page, and then press the Enter key. 4 Press U or V to select Print, and then press the Enter key. 5 The service status page is printed. 5 Press the Reset key. The message display returns to the printer basic screen. OPERATION GUIDE 5-51 - Kyocera TASKalfa 181 | 181/221 Operation Guide Rev-2 - Page 152
Printing Functions 5-52 OPERATION GUIDE - Kyocera TASKalfa 181 | 181/221 Operation Guide Rev-2 - Page 153
concerning the general operation of this machine. The principal settings that can be made are shown below. • Default Setting Mode 6-2 • Machine Default Settings 6-13 • MP Tray Settings 6-28 • Browsing and Printing the Total Counter 6-31 • Report Output 6-33 • Language Setting 6-34 OPERATION - Kyocera TASKalfa 181 | 181/221 Operation Guide Rev-2 - Page 154
. These settings can be changed freely according to the method of use. Copier Default Settings You can set the following items as copier default settings. • Density Mode • Original Image Quality • EcoPrint Mode • Background Color Adjustment • Paper Selection • Paper Type in Auto Paper Selection - Kyocera TASKalfa 181 | 181/221 Operation Guide Rev-2 - Page 155
Mode, and then press the Enter key. 3 Press U or V to select Auto or Manual, and then press the Enter key. 4 Press the Reset key. The message display returns to the copier basic screen. 1 Display the Copy Default screen. (See How to Display the Copy Default Screen on page 6-2.) OPERATION GUIDE - Kyocera TASKalfa 181 | 181/221 Operation Guide Rev-2 - Page 156
returns to the copier basic screen. EcoPrint Mode Select whether or not to set the ecoprint mode at the default setting. 1 Display the Copy Default screen. (See How to Display the Copy Default Screen on page 6-2.) Copy Default : Density Mode Original Image EcoPrint : Manual : Txt+Phto : Off - Kyocera TASKalfa 181 | 181/221 Operation Guide Rev-2 - Page 157
The message display returns to the copier basic screen. Paper Selection Set Default cassette, and then press the Enter key. 4 Press the Reset key. The message display returns to the copier basic screen. Paper Type in Auto Paper Selection Paper to be selected in the auto paper selection mode - Kyocera TASKalfa 181 | 181/221 Operation Guide Rev-2 - Page 158
Reset key. The message display returns to the copier basic screen. Default Magnification Select whether or not to set the auto zoom ratio selection mode when a cassette is selected. 1 Display the Copy Default screen. (See How to Display the Copy Default Screen on page 6-2.) 6-6 OPERATION GUIDE - Kyocera TASKalfa 181 | 181/221 Operation Guide Rev-2 - Page 159
display returns to the copier basic screen. Auto OCR Density Adjustment Adjust the overall density of scanning for OCR when using the optional scanner functions. 1 Display the Copy Default screen. (See How to Display the Copy Default Screen on page 6-2.) Copy Default : Default Magnif . Adj. Auto - Kyocera TASKalfa 181 | 181/221 Operation Guide Rev-2 - Page 160
copier basic screen. Density Adjustment for Text Originals Adjust the density of the central value in the manual density mode for text originals. 1 Display the Copy Default screen. (See How to Display the Copy Default Screen on page 6-2.) Copy Default left lightens it. 6-8 OPERATION GUIDE - Kyocera TASKalfa 181 | 181/221 Operation Guide Rev-2 - Page 161
display returns to the copier basic screen. Density Adjustment for Photo Originals Adjust the density of the central value in the manual density mode for photo originals. 1 Display the Copy Default screen. (See How to Display the Copy Default Screen on page 6-2.) Copy Default : Txt+Photo Dens - Kyocera TASKalfa 181 | 181/221 Operation Guide Rev-2 - Page 162
The message display returns to the copier basic screen. Auto Rotation Copy Select whether or not to set the auto rotation copy mode as a default setting. 1 Display the Copy Default screen. (See How to Display the Copy Default Screen on page 6-2.) Copy Default : Collate Offset Auto Rotation : On - Kyocera TASKalfa 181 | 181/221 Operation Guide Rev-2 - Page 163
or V to set the default value of margin width, copier basic screen. Border Erase Width Default Value Set the default value of the border erase width. Copy Default : Auto Rotation Margin Width BorderEraseWidth : On : 1/4" : 1/4" 6 1 Display the Copy Default set the default value of copier basic - Kyocera TASKalfa 181 | 181/221 Operation Guide Rev-2 - Page 164
normally recommended to use the factory default setting. 1 Display the Copy Default screen. (See How to Display the Copy Default Screen on page 6-2.) Copy Default : BorderEraseWidth Copy Limit Corr. Black the Reset key. The message display returns to the copier basic screen. 6-12 OPERATION GUIDE - Kyocera TASKalfa 181 | 181/221 Operation Guide Rev-2 - Page 165
Display • Paper Weight for Paper Type • Duplex Print for Paper Type • Custom Paper Type • Original Orientation • Auto Sleep Time • Auto Low Power Time 6 • Copy Output Destination • Fax Output Destination • Default Operation Mode • Key Sound • Date and Time • Display Contrast - Kyocera TASKalfa 181 | 181/221 Operation Guide Rev-2 - Page 166
accepted, the Machine Default screen is displayed. installed. Machine Default : End Auto Cassette SW Paper Size(1st) : On : Auto I 1 Display the Machine Default screen. (See How to Display the Machine Default key. The message display returns to the copier basic screen. Paper Size (cassettes 1 to - Kyocera TASKalfa 181 | 181/221 Operation Guide Rev-2 - Page 167
feeder is installed. Machine Default : End Auto Default Screen on page 6-13.) 2 Press U or V to select the cassette for which you set the paper type from Paper Type(1st) to (4th), and then press the Enter key. 3 Press U or V to select the paper type, and then press the Enter key. OPERATION GUIDE - Kyocera TASKalfa 181 | 181/221 Operation Guide Rev-2 - Page 168
copier basic screen. MP Tray Confirmation Display Select whether or not to display the MP Tray Paper size screen when pressing the Paper Selection key to select the multi-purpose tray. 1 Display the Machine Default you set the paper weight, and then press the Enter key. 6-16 OPERATION GUIDE - Kyocera TASKalfa 181 | 181/221 Operation Guide Rev-2 - Page 169
copier basic screen. Duplex Print for Paper Type 6 Select whether or not to use paper of custom 1 to 8 in duplex printing. 1 Display the Machine Default screen. (See How to Display the Machine Default Screen on page 6-13.) Machine Default to the copier basic screen. OPERATION GUIDE 6-17 - Kyocera TASKalfa 181 | 181/221 Operation Guide Rev-2 - Page 170
Default Screen on page 6-13.) 2 Press U or V to select Special P.type, and then press the Enter key. 3 Press U or V to select Match Print Direction or Fast Mode, and then press the Enter key. 4 Press the Reset key. The message display returns to the copier basic screen. 6-18 OPERATION GUIDE - Kyocera TASKalfa 181 | 181/221 Operation Guide Rev-2 - Page 171
to the copier basic Default screen. (See How to Display the Machine Default Screen on page 6-13.) 2 Press U or V to select Sleep mode time, and then press the Enter key. 3 Press Y or Z to select the desired time from 1 to 240 minutes [1 to 120 minutes], and then press the Enter key. OPERATION GUIDE - Kyocera TASKalfa 181 | 181/221 Operation Guide Rev-2 - Page 172
key. The message display returns to the copier basic screen. Auto Low Power Time Set the time that elapses before the low power mode is automatically activated. Time that can be set: Inch Specification- 1 to 240 minutes (in 1 minute increments) Metric Specification- 1 to 120 minutes (in 1 minute - Kyocera TASKalfa 181 | 181/221 Operation Guide Rev-2 - Page 173
System Menu Machine Default : Sleep Mode Time Low Power Time Copy Otput Destn : 1 Min. : 1 Min. : Top Optional job separator NOTE: This item is displayed only if the optional fax kit and finisher or job separator are installed. Machine Default : Low Power Time : 1 Min. Copy Otput Destn : Top - Kyocera TASKalfa 181 | 181/221 Operation Guide Rev-2 - Page 174
kit is installed. Machine Default : Copy Otput Destn : Top Tray Fax Output Destn : Top Tray Main Mode : Copy Select the Main Mode : * Copy Mode Fax Mode 1 Display the Machine Default screen. (See How to Display the Machine Default returns to the copier basic screen. 6-22 OPERATION GUIDE - Kyocera TASKalfa 181 | 181/221 Operation Guide Rev-2 - Page 175
from the Greenwich Mean Time (GMT), and summer time. 1 Display the Machine Default screen. (See How to Display the Machine Default Screen on page 6-13.) Machine Default : Low Power Time Key Sound On /Off Date/Time : : 1 U or V to select End, and then press the Enter key. OPERATION GUIDE 6-23 - Kyocera TASKalfa 181 | 181/221 Operation Guide Rev-2 - Page 176
copier Default : Date/Time : Display Contrast Admin. Code : 08:48 : 2 Press U or V to select Admin. Code, and then press the Enter key. Admin. Code Change : 1800 # keys 3 Enter the new administrator management code using the numeric keys, and then press the Enter key. 6-24 OPERATION GUIDE - Kyocera TASKalfa 181 | 181/221 Operation Guide Rev-2 - Page 177
key. The message display returns to the copier basic screen. Auto Sleep The machine enters automatically the sleep mode when the preset time elapses without any operation if this setting is turned On. NOTE: This setting is displayed only on the inch specification machine. You can disable the auto - Kyocera TASKalfa 181 | 181/221 Operation Guide Rev-2 - Page 178
. The message display returns to the copier basic screen. Silent Mode This mode reduces operating noise of this machine. Use this mode if the operating noise of this machine is annoying. 1 Display the Machine Default screen. (See How to Display the Machine Default Screen on page 6-13.) Machine - Kyocera TASKalfa 181 | 181/221 Operation Guide Rev-2 - Page 179
If you should forget the management code, contact your service representative. The management code at the factory default setting is 1800 for the 18 ppm model and 2200 for the 22 ppm model. Machine Default : Auto Clear Time Silent Mode MachineAdminCode : 90 Sec. : On : 1234 1 Display the Machine - Kyocera TASKalfa 181 | 181/221 Operation Guide Rev-2 - Page 180
displayed. Proceed to Paper Type described below. Selecting a Size from Other Regular Sizes Sizes that can be set: Inch Specification - A3, B4, B5R, B5, A5R, B6R, A6R, HAGAKI, Folio, Executive, ISO B5, Envelope DL, select MP Tray Setting, and then press the Enter key. 6-28 OPERATION GUIDE - Kyocera TASKalfa 181 | 181/221 Operation Guide Rev-2 - Page 181
to 432 mm in 1 mm increments]. 6 Press the Enter key. The MP Tray Paper type screen is displayed. Proceed to Paper Type described below. OPERATION GUIDE 6-29 - Kyocera TASKalfa 181 | 181/221 Operation Guide Rev-2 - Page 182
Tray Paper type : * Plain Transparency Preprinted Press U or V to select the paper type, and then press the Enter key. The message display returns to the copier basic screen. 6-30 OPERATION GUIDE - Kyocera TASKalfa 181 | 181/221 Operation Guide Rev-2 - Page 183
Output Count Scan Count Output Count : End Copy Printer : 1.234 copier basic screen. NOTE: Ensure that A4/Letter size paper is set in the cassette when printing the counter report. System Menu / Counter: Language MP Tray Setting Counter Check Counter Check : Output Count Scan Count Print - Kyocera TASKalfa 181 | 181/221 Operation Guide Rev-2 - Page 184
System Menu 4 Press the Reset key. The message display returns to the copier basic screen. 6-32 OPERATION GUIDE - Kyocera TASKalfa 181 | 181/221 Operation Guide Rev-2 - Page 185
the System Menu/Counter key. 2 Press U or V to select Print Report, and then press the Enter key. 3 Press U or V to select the report to print, and then press the Enter key. The report is printed. 4 Press the Reset key. The message display returns to the copier basic screen. OPERATION GUIDE 6-33 - Kyocera TASKalfa 181 | 181/221 Operation Guide Rev-2 - Page 186
that can be selected: Inch Specification - English, French (Français), Spanish (Español), and Japanese ( ) Metric Specification - English, German (Deutsch), French The message display returns to the copier basic screen, and the language for the message display is changed. 6-34 OPERATION - Kyocera TASKalfa 181 | 181/221 Operation Guide Rev-2 - Page 187
the job accounting functions of this machine. The principal functions that can be set are shown below. • Job Accounting Mode 7-2 • All Account Management 7-10 • Individual Account Management 7-11 • Enabling Job Accounting 7-12 • Default Settings 7-13 • Using Job Accounting 7-17 OPERATION - Kyocera TASKalfa 181 | 181/221 Operation Guide Rev-2 - Page 188
managing accounts, you must change Copier Job Accounting and Printer Job Accounting from Off to On in the default settings. If the optional network scanner kit or fax kit is installed, set Scanner Job Accounting or Fax Job Accounting in the default settings to On. (See Default Settings on page 7-13 - Kyocera TASKalfa 181 | 181/221 Operation Guide Rev-2 - Page 189
Print Report Job Accounting 2 Press U or V to select Job Accounting, and then press the Enter key. Enter Pin Code using # key. 3 Enter the four-digit management code using the numeric keys. The management code at the factory default registration, and then press the Enter key. OPERATION GUIDE 7-3 - Kyocera TASKalfa 181 | 181/221 Operation Guide Rev-2 - Page 190
already input, an error occurs. Enter another use : End Copy Printer : Able use : printing. 7-6 No limit: Does not set the limit of count. Counter limit: Set the limit of count (0 to 999,999). Set the limit of count of scanner transmission if the optional 7-6 network scanner kit is installed - Kyocera TASKalfa 181 | 181/221 Operation Guide Rev-2 - Page 191
transmission if the optional fax kit is 7-7 installed. No limit: Does printing respectively. For details, refer to the KM-NET for Accounting Operation Guide. Copy Restriction You can select whether to permit or prohibit copying. NOTE: This item is displayed if Copier Job Accounting in the default - Kyocera TASKalfa 181 | 181/221 Operation Guide Rev-2 - Page 192
You can set the limit of count of scanner transmission if the optional network scanner kit is installed. NOTE: This item is displayed if Scanner Job Accounting in the default settings is set to On. (See page 7-14.). Limit in use : Printer Output Limit Scanner TX : Able use : Able use : No limit - Kyocera TASKalfa 181 | 181/221 Operation Guide Rev-2 - Page 193
kit is installed. 7 NOTE: This item is displayed if Fax Job Accounting in the default settings is set to On. (See page 7-15.). Limit in use : Output Limit Scanner Enter key. If you have selected Counter limit, the Counter limit Default Value screen is displayed. Proceed to the next step. 4 Enter - Kyocera TASKalfa 181 | 181/221 Operation Guide Rev-2 - Page 194
in managing accounts, you must set Copier Job Accounting and Printer Job Accounting in the default settings from Off to On. If the optional network scanner kit or fax kit is installed, set Scanner Job Accounting or Fax Job Accounting in the default settings to On. (See Default Settings on page 7-13 - Kyocera TASKalfa 181 | 181/221 Operation Guide Rev-2 - Page 195
on page 7-4. Change limit in use : End 11111111 22222222 : 123.456 : 000.234 6 Press U or V to select End, and then press the Enter key. OPERATION GUIDE 7-9 - Kyocera TASKalfa 181 | 181/221 Operation Guide Rev-2 - Page 196
End Print Report Counter clear 1. 234. 567 3 To output the to select Print Report, and then press the Enter key. The report is printed. Job Accounting Total : End Print Report Counter clear key. Job Accounting Total : End Print Report Counter clear 0. 000. 000 6 Press U or V to - Kyocera TASKalfa 181 | 181/221 Operation Guide Rev-2 - Page 197
: 000.234 4 Press U or V to select Yes, and then press the Enter key. 5 Press U or V to select End, and then press the Enter key. OPERATION GUIDE 7-11 - Kyocera TASKalfa 181 | 181/221 Operation Guide Rev-2 - Page 198
screen is displayed. Enter Account ID . :Confirm 4 Press the Reset key. If you have selected On, the ID-code input screen is displayed. 7-12 OPERATION GUIDE - Kyocera TASKalfa 181 | 181/221 Operation Guide Rev-2 - Page 199
default settings. • Copier Job Accounting (page 7-13) • Printer Job Accounting (page 7-14) • Scanner Job Accounting (page 7-14) • Fax Job Accounting (page 7-15) • Operation against Excess over Limit (page 7-15) Copier Job Accounting Default Setting End Default Setting End Copy Job Account . - Kyocera TASKalfa 181 | 181/221 Operation Guide Rev-2 - Page 200
or not to enable job accounting for the scanner functions. NOTE: This item is displayed if the optional network scanner kit is installed. Job Accounting : [ On ] Each Job Accounting TL Edit Job Accounting Job Accountg Def . Set. Job Accounting Default Setting Copy Job Account . : On Prnt Job - Kyocera TASKalfa 181 | 181/221 Operation Guide Rev-2 - Page 201
Default Setting End Copy Job Account . : On Prnt Job Account . : On 5 Press U or V to select End, and then press the Enter key. Fax Job Accounting You can select whether or not to enable job accounting for the fax functions. NOTE: This item is displayed if the optional fax kit is installed - Kyocera TASKalfa 181 | 181/221 Operation Guide Rev-2 - Page 202
: [ On ] Each Job Accounting TL Edit Job Accounting Job Accountg Def . Set. Job Accounting Default Setting Scanner Job Accnt : On Fax Job Accountng : On Excess limit Set . : Prohibit Excess limit Setting : 5 Press U or V to select End, and then press the Enter key. 7-16 OPERATION GUIDE - Kyocera TASKalfa 181 | 181/221 Operation Guide Rev-2 - Page 203
an error sound is emitted. Input the correct ID- code. 7 2 Perform normal copier operation. 3 After copying is complete, press the Logout key. Printer Operation Under job accounting, operation on the computer is required for printing. For details, refer to the KX Printer Driver Operation Guide - Kyocera TASKalfa 181 | 181/221 Operation Guide Rev-2 - Page 204
Job Accounting 7-18 OPERATION GUIDE - Kyocera TASKalfa 181 | 181/221 Operation Guide Rev-2 - Page 205
8 Maintenance This chapter describes cleaning and toner replacement. • Cleaning 8-2 • Toner Container and Waste Toner Box Replacement ...8-6 OPERATION GUIDE 8-1 - Kyocera TASKalfa 181 | 181/221 Operation Guide Rev-2 - Page 206
Maintenance Cleaning Clean the machine regularly to ensure optimum output quality. CAUTION: For safety, always unplug the power cord before cleaning the machine water, soap or solvents for cleaning. To remove adhesive material or ink, apply alcohol to a cloth and wipe lightly. 8-2 OPERATION GUIDE - Kyocera TASKalfa 181 | 181/221 Operation Guide Rev-2 - Page 207
a b Maintenance 1 Open the document processor and wipe the slit glass (a). 2 Wipe the white guide (b) on the document processor. Separator Clean the separator regularly (at least monthly) to ensure optimum output quality. 8 1 Open the front cover. 2 Remove cleaning brush (blue - Kyocera TASKalfa 181 | 181/221 Operation Guide Rev-2 - Page 208
Maintenance Transfer Roller 8-4 3 Pull up and open left cover. 4 As shown in the figure, clean dirt from the separator by moving the brush from the specified position of the front cover and left cover to close. 1 Open the front cover. 2 Remove the cleaning brush (blue colored). OPERATION GUIDE - Kyocera TASKalfa 181 | 181/221 Operation Guide Rev-2 - Page 209
3 Pull up and open left cover. Maintenance 4 As shown in the figure, clean dirt from the transfer roller by moving the brush from side to side along the the roller. 5 Put away the cleaning brush, press the specified position of the front cover and left cover to close. 8 OPERATION GUIDE 8-5 - Kyocera TASKalfa 181 | 181/221 Operation Guide Rev-2 - Page 210
or region. If the toner container for another destinations is installed, the printer will stop printing. NOTE: Information Collection on Memory Chips - The memory chip attached to the toner container is designed to improve convenience for the end user; to support the recycling operation of empty - Kyocera TASKalfa 181 | 181/221 Operation Guide Rev-2 - Page 211
Maintenance WARNING: High voltage is present in the charger section. Take sufficient care when working in this area, as there is a danger of electrical shock. IMPORTANT: Do not invert the old waste toner box. 3 Use the cap attached to the center of the old waste toner box to cover the opening. 4 - Kyocera TASKalfa 181 | 181/221 Operation Guide Rev-2 - Page 212
Maintenance 6 Place the old toner container in the plastic bag remove its cap. Fit the grid cleaner to the notch and install it into the main body. IMPORTANT: When installing the grid cleaner, confirm that there is no gap between into the main body. Copying trouble may occur. 8-8 OPERATION GUIDE - Kyocera TASKalfa 181 | 181/221 Operation Guide Rev-2 - Page 213
Maintenance elapsed. Installing Toner Container and Waste Toner Box 1 Take the new toner container out of the toner kit. 2 Hold the new toner container toner container up and down five times or more. 8 Turn the toner container upside down and shake it five times or more. 4 Hold the toner - Kyocera TASKalfa 181 | 181/221 Operation Guide Rev-2 - Page 214
Maintenance 5 Insert the new toner container, and push it with both hands until it is locked. 6 Install the new waste toner box. 7 Close the front cover. NOTE: Return the exhausted toner container and waste toner box to your dealer or service representative. The collected toner container and waste - Kyocera TASKalfa 181 | 181/221 Operation Guide Rev-2 - Page 215
9 Troubleshooting This chapter explains how to solve problems with the machine. • Solving Malfunctions 9-2 • Responding to Error Messages 9-5 • Clearing Paper Jams 9-12 OPERATION GUIDE 9-1 - Kyocera TASKalfa 181 | 181/221 Operation Guide Rev-2 - Page 216
? When changing the default density level, adjust the density manually and choose the desired level. Shake the toner container from side to side about several times. Replace the toner container. Replace the paper with new paper. Disable EcoPrint mode. - 8-9 8-9 2-14 4-18 9-2 OPERATION GUIDE - Kyocera TASKalfa 181 | 181/221 Operation Guide Rev-2 - Page 217
Density mode? Use the Image Quality key to set 4-4 the correct density level. When changing the default density - level, adjust the density manually and choose the desired level. Copies have a moire pattern (dots grouped together in patterns and not aligned uniformly). Is the original a printed - Kyocera TASKalfa 181 | 181/221 Operation Guide Rev-2 - Page 218
lights up. Connect a shielded type printer cable. Check that the printer driver and application software settings are set properly. Check the panel lock setting in COMMAND CENTER and change the setting if necessary. 2-5 3-2 - 2-5 - KYOCERA COMMAND CENTER Operation Guide 9-4 OPERATION GUIDE - Kyocera TASKalfa 181 | 181/221 Operation Guide Rev-2 - Page 219
power switch and - an error at startup. on again. If the same message appears, contact your service representative or authorized service center. Check paper size. There is no paper loaded Check the paper. - of a size that can be used in the currently selected mode. OPERATION GUIDE 9-5 - Kyocera TASKalfa 181 | 181/221 Operation Guide Rev-2 - Page 220
Troubleshooting Error set in the department management mode and copying is no longer possible with that code. Format error Memory The memory card inserted GO An error has occurred in Press the Print key, select GO, and - writing to or reading from then press the Enter key. The error the - Kyocera TASKalfa 181 | 181/221 Operation Guide Rev-2 - Page 221
the printer memory is recommended. For the addition of the printer memory, contact your service representative or authorized service center. For details, refer to. If the auto continue setting has been turned on, printing will automatically resume after a preset period of time. OPERATION GUIDE 9-7 - Kyocera TASKalfa 181 | 181/221 Operation Guide Rev-2 - Page 222
Troubleshooting Error Message Checkpoints Memory card error Insert again. The memory card is accidentally removed during printer setting. Corrective Actions Insert the memory card. Reference Page - NOTE: Finisher, lower optional finisher. Process Tray and remove paper. 9-8 OPERATION GUIDE - Kyocera TASKalfa 181 | 181/221 Operation Guide Rev-2 - Page 223
displayed, the page protect mode will be automatically turned On. RAM disk error Press GO An error has occurred in Press the Print key, select GO, and - writing to or reading from then press the Enter key. The error the RAM disk. will be cleared. Ready to Copy Toner remaining in the Prepare - Kyocera TASKalfa 181 | 181/221 Operation Guide Rev-2 - Page 224
Troubleshooting Error Message Checkpoints Corrective Actions Reference Page Remove paper from Top tray. Press GO The output tray capacity is exceeded during printing the optional finisher is installed. Replace Waste Toner The waste toner box is full. Replace the waste toner box with a GUIDE - Kyocera TASKalfa 181 | 181/221 Operation Guide Rev-2 - Page 225
spilling the toner, and install it again. This message is displayed Follow the procedure below. - when a malfunction due to noise or the like or a 1 Turn the main power switch off. If communication error printer output is being performed, during printer processing cancel printing on the - Kyocera TASKalfa 181 | 181/221 Operation Guide Rev-2 - Page 226
Troubleshooting Clearing Paper Jams Paper misfeed in cassette 1. Remove paper . JAM11 If a paper jam occurs, copying or printing stops. At this time, jam location indicators are displayed as well as an error component in the machine. Clearing instructions will also be displayed. Paper GUIDE - Kyocera TASKalfa 181 | 181/221 Operation Guide Rev-2 - Page 227
Troubleshooting After you remove the jam, the machine will warm up again and the error A page affected by a paper jam will be printed again. CAUTION: High voltage is present in the a danger of getting burned. CAUTION: The fixing unit is extremely hot. Take sufficient care when working in GUIDE 9-13 - Kyocera TASKalfa 181 | 181/221 Operation Guide Rev-2 - Page 228
Troubleshooting 3 Push cassette 1 back in place securely. NOTE: Check to see if paper is out of position in the cassette. If the paper is out of position, set the paper properly. If JAM21 is displayed, remove the jammed paper referring to Left Cover on page 9-17. 9-14 OPERATION GUIDE - Kyocera TASKalfa 181 | 181/221 Operation Guide Rev-2 - Page 229
Troubleshooting Cassette 2 to 4 If Paper misfeed in cassette 2 (to 4). Remove paper [Misfeed in paper cassette 2 (to 4). Remove paper] and Paper misfeed. Open paper does happen to tear, remove any loose scraps from inside the machine. 3 Close the left cover of the cassette. OPERATION GUIDE 9-15 - Kyocera TASKalfa 181 | 181/221 Operation Guide Rev-2 - Page 230
Troubleshooting 4 Pull out the cassette. 5 Remove the jammed paper without tearing it. NOTE: If the paper does happen to tear, remove any loose scraps from the MP tray. Paper misfeed in stack MP Tray . Remove paper . JAM10 1 Remove all of the paper remaining in the MP tray. 9-16 OPERATION GUIDE - Kyocera TASKalfa 181 | 181/221 Operation Guide Rev-2 - Page 231
Troubleshooting 2 Reset the paper in the MP tray. The error left cover and remove paper . 9 JAM30 IMPORTANT: The drum section inside the main body is sensitive to scratches and contaminants cover. CAUTION: The fixing unit is extremely hot. Take sufficient care when working in this area, - Kyocera TASKalfa 181 | 181/221 Operation Guide Rev-2 - Page 232
Troubleshooting 2 Remove the jammed paper without tearing it. 3 If the optional duplex unit is installed, raise the duplex unit and remove any paper. NOTE: If the paper does happen to tear, remove any loose scraps from inside the machine. 4 Close the left cover. 9-18 OPERATION GUIDE - Kyocera TASKalfa 181 | 181/221 Operation Guide Rev-2 - Page 233
Troubleshooting Paper Output Slot If Paper misfeed the paper output slot. Paper misfeed in Eject Section Remove paper . JAM50 IMPORTANT: The drum section inside the main body is sensitive to scratches and contaminants. When removing paper, be machine. 4 Close the left cover. OPERATION GUIDE 9-19 - Kyocera TASKalfa 181 | 181/221 Operation Guide Rev-2 - Page 234
Troubleshooting Optional Document Processor If Misfeed in DP. Remove original(s) appears and the jam location indicator shown in the illustration blinks, from inside the document processor. Failure to do so may cause another paper jam later. A 4 Raise the paper feed unit A. 9-20 OPERATION GUIDE - Kyocera TASKalfa 181 | 181/221 Operation Guide Rev-2 - Page 235
Troubleshooting 5 Remove the jammed originals without tearing them. NOTE: If the original does happen to tear, remove any loose scraps from inside the the jammed original. 7 Close the left cover to its original position. Reset all the originals and start copying again. 9 OPERATION GUIDE 9-21 - Kyocera TASKalfa 181 | 181/221 Operation Guide Rev-2 - Page 236
Troubleshooting Optional Finisher If Paper misfeed in Finisher, lower Process optional finisher. Paper misfeed in Finisher ,lower Process Tray and remove paper . JAM80 IMPORTANT: The drum section inside the main body is sensitive to scratches and contaminants. When removing paper, be careful not - Kyocera TASKalfa 181 | 181/221 Operation Guide Rev-2 - Page 237
4 Remove the finisher tray. Troubleshooting 5 Pull the left cover handle up to open the left cover. 6 Remove the jammed paper. NOTE: If the paper does happen to tear, remove any loose scraps from inside the machine. 9 7 Close the left cover. 8 Reattach the finisher tray. OPERATION GUIDE 9-23 - Kyocera TASKalfa 181 | 181/221 Operation Guide Rev-2 - Page 238
Troubleshooting Optional Job Separator If Paper misfeed at optional job separator. Paper misfeed at Job Separator . Remove paper . JAM51 IMPORTANT: The drum section inside the main body is sensitive to scratches and contaminants. When removing paper, be 4 Close the left cover. 9-24 OPERATION GUIDE - Kyocera TASKalfa 181 | 181/221 Operation Guide Rev-2 - Page 239
Appendix • Optional Equipment Appendix-2 • Paper Appendix-10 • Specifications Appendix-18 • Glossary Appendix-24 OPERATION GUIDE Appendix-1 - Kyocera TASKalfa 181 | 181/221 Operation Guide Rev-2 - Page 240
Equipment The following optional equipment is available for the machine. Additional Memory Hard Disk Document Processor Key Counter Duplex Unit Finisher Job Separator Appendix-2 Fax Kit Network Scanner Kit Paper Feeder Network Interface Card Memory Card (CompactFlash) OPERATION GUIDE - Kyocera TASKalfa 181 | 181/221 Operation Guide Rev-2 - Page 241
Document Processor Paper Feeder Duplex Unit Automatically scans originals. Also you can perform duplex copying copies can be made if the duplex unit is installed. Two-sided copies of sizes from A3 to A5-R, Folio, 11 × 17" (Ledger) to 5 1/2 × 8 1/2" (Statement), 8K, 16K (64 to 80 g/m²) can be made. - Kyocera TASKalfa 181 | 181/221 Operation Guide Rev-2 - Page 242
of sheets that can be stored in the finisher and the specifications of stapling are shown below. Tray capacity and paper sizes Non tray 3 Process tray extension 4 Finisher tray extension 5 Paper output guide 1 6 Paper output guide 2 NOTE: Sorted copies are output onto the finisher tray. NOTE - Kyocera TASKalfa 181 | 181/221 Operation Guide Rev-2 - Page 243
NOTE: The paper sizes are marked on the finisher tray extension. Open paper output guide 1 or 2 according to the paper size. NOTE: When stapling large paper such as A3, B4, 11 × 17 toward your side. 2 Pull out the staple holder. 3 Remove the empty staple cartridge from the staple holder. Appendix-5 - Kyocera TASKalfa 181 | 181/221 Operation Guide Rev-2 - Page 244
NOTE: The arrow on the staple cartridge indicates the insertion direction. 5 Push the staple cartridge all the way into the holder and remove the paper tape around the staple cartridge by pulling it. 6 Insert the the staple holder with your fingers and raise the plate. Appendix-6 OPERATION GUIDE - Kyocera TASKalfa 181 | 181/221 Operation Guide Rev-2 - Page 245
tray for copy or print jobs. Or, specify as the default output tray for printing from the copy screen, printing from the PC, and printing of the received fax eject unit. If the ejected paper slips or stacks unevenly, turn the paper in the cassette over and try again. OPERATION GUIDE Appendix-7 - Kyocera TASKalfa 181 | 181/221 Operation Guide Rev-2 - Page 246
usage. network scanner kit is installed in this machine, you can use this machine as a network scanner. For details, refer to Network Scanner Kit Operation Guide. Network Interface Card (IB-23) The network interface card supports TCP/IP, IPX/SPX, NetBEUI and AppleTalk protocols, so that the printer - Kyocera TASKalfa 181 | 181/221 Operation Guide Rev-2 - Page 247
be scanned (A4 originals with of 6 % coverage, Text + Photo mode) 16 MB 32 MB 64 MB 128 MB 289 sheets (179 sheets) 392 sheets (282 sheets) 597 sheets (487 sheets) 1006 sheets (896 sheets) The values within ( ) are those for the machine with the optional network scanner kit installed. Memory - Kyocera TASKalfa 181 | 181/221 Operation Guide Rev-2 - Page 248
and Optional paper feeder Supported types Plain paper (64 to 105 g/m2) Recycled paper (64 to 105 g/m2) Supported paper sizes A3, B4 Specifications This machine is designed to print on standard copy paper as used in regular ('dry') copiers and page printers such as laser printers. It also supports - Kyocera TASKalfa 181 | 181/221 Operation Guide Rev-2 - Page 249
copiers or laser printers. The printing quality will be affected by the quality of paper. Poor quality paper may result in unsatisfactory output. Basic Paper Specifications The following table lists the specifications of paper that is supported it may damage the drum or fusing unit. Ingredient Do not - Kyocera TASKalfa 181 | 181/221 Operation Guide Rev-2 - Page 250
is supported by one square meter in area. In the United States, basis weight is the weight in pounds the standard size (or trade size) for a specific grade of paper. Paper that is too heavy other printing problems if the toner fails to adhere correctly. The recommended basis weight is between 64 and - Kyocera TASKalfa 181 | 181/221 Operation Guide Rev-2 - Page 251
problems toner tighten and weakening print contrast. Wavy . Other Paper Specifications Porosity: The density fixing unit, it curls printing, paper is electrostatically charged so that the toner these problems, be printing onto the following types of paper, even if it conforms to the basic specifications - Kyocera TASKalfa 181 | 181/221 Operation Guide Rev-2 - Page 252
satisfactory. General precautions when printing onto special paper are given below. Note that we are not responsible for any harm to the user or damage to the machine caused by moisture or specifications of special paper. Select a cassette or MP tray for special paper. Appendix-14 OPERATION GUIDE - Kyocera TASKalfa 181 | 181/221 Operation Guide Rev-2 - Page 253
Specifications Must withstand at least 190°C 0.100 to 0.110 mm Polyester ±0.7 mm 90° ±0.2° To avoid problems before loading. Printing onto curled structure of envelopes, printing evenly over the to ensure the print quality. Storing window. If paper jams occur, load fewer envelopes at once. OPERATION - Kyocera TASKalfa 181 | 181/221 Operation Guide Rev-2 - Page 254
that stick to the drum or rollers and peeled labels remaining in the machine may cause a failure. When printing onto labels, you must be liable for the print quality and possible trouble. Top sheet Adhesive output. Allowed Not allowed Top sheet Carrier sheet Appendix-16 OPERATION GUIDE - Kyocera TASKalfa 181 | 181/221 Operation Guide Rev-2 - Page 255
. Recycled Paper Recycled paper must conform to the specifications listed on the page 2 of the Appendix; however, its whiteness may be considered separately. NOTE: Before purchasing recycled paper in volume, try testing a sample to ensure that the print quality. OPERATION GUIDE Appendix-17 - Kyocera TASKalfa 181 | 181/221 Operation Guide Rev-2 - Page 256
Specifications NOTE: Specifications are subject to change without notice. Machine Item Type Printing Method Supported Original Types Original Feed System Paper Weight Cassette MP Tray Paper Type Cassette MP Tray Paper Size Cassette MP Tray Zoom Level Printing Speed A4/Letter A4R/ - Kyocera TASKalfa 181 | 181/221 Operation Guide Rev-2 - Page 257
× 607 mm 72.8 lb/33 kg 88.2 lb/40 kg 40 7/8 × 25 13/64" (Using MP tray) 1038 × 640 mm 120 V AC, 60 Hz, 9.7 A/220 to 240 V AC, 50 Hz, 5.1 A Document processor, Paper feeder, Document finisher, Job separator, Key counter, FAX kit, Network scanner kit, Expansion memory OPERATION GUIDE Appendix-19 - Kyocera TASKalfa 181 | 181/221 Operation Guide Rev-2 - Page 258
Printer Item Printing Speed First Print Time (A4, feed from Cassette) Resolution Operating System Interface Standard Memory Standard Maximum Page Description Language Same as Copying Speed. 5.7 seconds or less Description 600 × 600 dpi Windows 2000 (Service Pack 2 or later), Windows XP, - Kyocera TASKalfa 181 | 181/221 Operation Guide Rev-2 - Page 259
Unit (option) Item Paper Size Supported Paper Dimensions (W) × (D) × (H) Weight Description Ledger, Legal, Oficio II, Letter, Letter-R, Statement, A3, B4, A4, A4-R, B5, B5-R, A5-R, Folio, 8K, 16K Paper weight: 64 - 80 g/m2 Media types: standard, recycled 14 19/64 × 2 9/64 × 7 9/64" 363 × 54 × 181 - Kyocera TASKalfa 181 | 181/221 Operation Guide Rev-2 - Page 260
sheets A4, A4-R, B5, Letter, Letter-R: 50 sheets Dimensions (W) × (D) × (H) 12 51/64 × 17 23/32 × 6 1/2" 325 × 450 × 165 mm Weight Approx. 17.6 lbs. A4-R, B5, B5-R, A5R, Folio Paper weight: 64 - 105 g/m2 Paper type: standard, recycled 21 15/32 × 17 23/32 × 2 49/64" 545 × 450 × 70 mm Approx. 3.3 - Kyocera TASKalfa 181 | 181/221 Operation Guide Rev-2 - Page 261
mode (default setting) Recovery time from Low Power mode Recovery time from Sleep mode Duplexing Paper supply capability Description 1 minutes 1 minutes 10 seconds or less 17.2 seconds or less Option 100% recycled paper may be used. NOTE: Consult your dealer or service OPERATION GUIDE Appendix-23 - Kyocera TASKalfa 181 | 181/221 Operation Guide Rev-2 - Page 262
it relieves individual clients including printers from the IP address being assigned. dpi(dots per inch) A unit for resolution, representing the number of dots printed per inch (25.4 mm). EcoPrint Mode A printing mode that helps save toner. Copies made in this mode are thus lighter than normal - Kyocera TASKalfa 181 | 181/221 Operation Guide Rev-2 - Page 263
Mita's original smoothing function. It uses software to enhance the printer's resolution and produce high-quality printing. The default setting is On. KPDL (Kyocera Page Description Language) Kyocera's PostScript page description language compatible with Adobe PostScript Level 3. Low power mode - Kyocera TASKalfa 181 | 181/221 Operation Guide Rev-2 - Page 264
as the memory capacity, total number of prints and scans, and paper source settings. Subnet Mask The subnet mask is a way of augmenting the network address section of an IP address. A subnet mask represents all network address sections as 1 and all host address sections as 0. The number of bits in - Kyocera TASKalfa 181 | 181/221 Operation Guide Rev-2 - Page 265
Copier basic screen 1-4 Copy Auto Image Rotation 4-29 Border Erase 4-23 Collate 4-8 Combine 4-19 Continuous Scan 4-28 Duplex Copying 4-25 EcoPrint 4-18 Interrupt Mode 4-30 Margin Mode Supported Originals 2-27 Part Names 2-26 dpi Appendix-24 Duplex 4-25 Duplex Print Mode 5-42 OPERATION GUIDE Index-1 - Kyocera TASKalfa 181 | 181/221 Operation Guide Rev-2 - Page 266
Account Management 7-11 Initial mode 1-3 Installing Toner Container 8-9 Wate Toner Box 8-9 Interface 5-11 IP Address Appendix-24 IP address 5-13 IPP Appendix-25 J Job Available Status 7-2 Index-2 Job Accounting 7-1 Job accounting Default Settings 7-13 Job Accounting Mode 7-2 K KC-GL Pen Thickness - Kyocera TASKalfa 181 | 181/221 Operation Guide Rev-2 - Page 267
IP Address 5-13 NetWare 5-11 Subnet Mask 5-14 TCP/IP 5-12 Network Cable 2-4 Connecting 2-5 Network Interface 2-4 Network interface connector 1-8 Network 2-1 Preparing Cables 2-4 Print EcoPrint Setting 5-30 MP Tray Mode 5-41 Network Status Page 5-15 Other Settings 5-45 OPERATION GUIDE Index-3 - Kyocera TASKalfa 181 | 181/221 Operation Guide Rev-2 - Page 268
Machine Appendix-18 Paper Feeder Appendix-21 Printer Appendix-20 Stapling Error Detection 5-50 Status Page Appendix-26 Subnet Mask Appendix-26 Switching the Language 2-7 System Menu 6-1 System menu Browsing and Printing the Total Counter 6-31 Copier Default Settings 6-2 Language Setting 6-34 Machine - Kyocera TASKalfa 181 | 181/221 Operation Guide Rev-2 - Page 269
W Waste Toner Box Replacement 8-6 Waste toner box 1-7 Wide A4 5-27 Z Zoom Copying Auto Zoom 4-5 Manual Zoom 4-5 Preset Zoom 4-6 Zoom Mode Copy 4-5 Index OPERATION GUIDE Index-5 - Kyocera TASKalfa 181 | 181/221 Operation Guide Rev-2 - Page 270
Index Index-6 OPERATION GUIDE - Kyocera TASKalfa 181 | 181/221 Operation Guide Rev-2 - Page 271
- Kyocera TASKalfa 181 | 181/221 Operation Guide Rev-2 - Page 272
- Kyocera TASKalfa 181 | 181/221 Operation Guide Rev-2 - Page 273
A1 - Kyocera TASKalfa 181 | 181/221 Operation Guide Rev-2 - Page 274
- Kyocera TASKalfa 181 | 181/221 Operation Guide Rev-2 - Page 275
- Kyocera TASKalfa 181 | 181/221 Operation Guide Rev-2 - Page 276
Rev. 2 2010.1 Printed in China 302KH56012
-
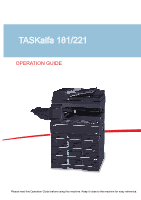 1
1 -
 2
2 -
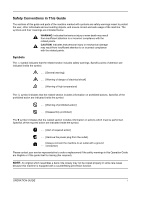 3
3 -
 4
4 -
 5
5 -
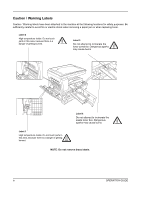 6
6 -
 7
7 -
8
-
9
-
10
-
11
-
12
-
13
-
14
-
15
-
16
-
17
-
18
-
19
-
20
-
21
-
22
-
23
-
24
-
25
-
26
-
27
-
28
-
29
-
30
-
31
-
32
-
33
-
34
-
35
-
36
-
37
-
38
-
39
-
40
-
41
-
42
-
43
-
44
-
45
-
46
-
47
-
48
-
49
-
50
-
51
-
52
-
53
-
54
-
55
-
56
-
57
-
58
-
59
-
60
-
61
-
62
-
63
-
64
-
65
-
66
-
67
-
68
-
69
-
70
-
71
-
72
-
73
-
74
-
75
-
76
-
77
-
78
-
79
-
80
-
81
-
82
-
83
-
84
-
85
-
86
-
87
-
88
-
89
-
90
-
91
-
92
-
93
-
94
-
95
-
96
-
97
-
98
-
99
-
100
-
101
-
102
-
103
-
104
-
105
-
106
-
107
-
108
-
109
-
110
-
111
-
112
-
113
-
114
-
115
-
116
-
117
-
118
-
119
-
120
-
121
-
122
-
123
-
124
-
125
-
126
-
127
-
128
-
129
-
130
-
131
-
132
-
133
-
134
-
135
-
136
-
137
-
138
-
139
-
140
-
141
-
142
-
143
-
144
-
145
-
146
-
147
-
148
-
149
-
150
-
151
-
152
-
153
-
154
-
155
-
156
-
157
-
158
-
159
-
160
-
161
-
162
-
163
-
164
-
165
-
166
-
167
-
168
-
169
-
170
-
171
-
172
-
173
-
174
-
175
-
176
-
177
-
178
-
179
-
180
-
181
-
182
-
183
-
184
-
185
-
186
-
187
-
188
-
189
-
190
-
191
-
192
-
193
-
194
-
195
-
196
-
197
-
198
-
199
-
200
-
201
-
202
-
203
-
204
-
205
-
206
-
207
-
208
-
209
-
210
-
211
-
212
-
213
-
214
-
215
-
216
-
217
-
218
-
219
-
220
-
221
-
222
-
223
-
224
-
225
-
226
-
227
-
228
-
229
-
230
-
231
-
232
-
233
-
234
-
235
-
236
-
237
-
238
-
239
-
240
-
241
-
242
-
243
-
244
-
245
-
246
-
247
-
248
-
249
-
250
-
251
-
252
-
253
-
254
-
255
-
256
-
257
-
258
-
259
-
260
-
261
-
262
-
263
-
264
-
265
-
266
-
267
-
268
-
269
-
270
-
271
-
272
-
273
-
274
-
275
-
276
 |
 |
