Kyocera TASKalfa 2550ci File Management Utility Operation Guide Rev 2.10
Kyocera TASKalfa 2550ci Manual
 |
View all Kyocera TASKalfa 2550ci manuals
Add to My Manuals
Save this manual to your list of manuals |
Kyocera TASKalfa 2550ci manual content summary:
- Kyocera TASKalfa 2550ci | File Management Utility Operation Guide Rev 2.10 - Page 1
- Kyocera TASKalfa 2550ci | File Management Utility Operation Guide Rev 2.10 - Page 2
this guide is prohibited. The information in this guide is subject to change without notice. We cannot be held liable for any problems arising their respective companies. Examples of the operations given in this guide support the Windows 7 printing environment. Essentially the same operations are - Kyocera TASKalfa 2550ci | File Management Utility Operation Guide Rev 2.10 - Page 3
Table of Contents Chapter 1 File Management Utility Starting the Application ...1-1 Add Devices ...1-1 Adding Devices ...1-1 Communication Settings ...1-2 Specifying Communication Settings 1-2 Delete a Device ...1-2 Preferences ...1-2 Chapter 2 Receiving Folder Add a Receiving Folder ...2-1 - Kyocera TASKalfa 2550ci | File Management Utility Operation Guide Rev 2.10 - Page 4
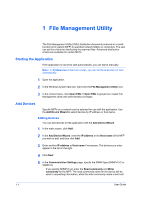
MFPs. Starting the Application If the application is not set to start automatically, you can start it manually. Note: In Preferences in the main screen, you can set the application to start automatically. 1 used in requesting information, while the write community name is sent will 1-1 User Guide - Kyocera TASKalfa 2550ci | File Management Utility Operation Guide Rev 2.10 - Page 5
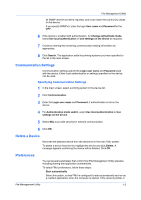
Utility all SNMP receive and send requests, and must match the community values on the device. If you specify SNMPv3, enter the login User name and Password for the MFP. 6 If the device is enabled with authentication, for Change authenticate mode, select Use local authentication or Use settings on - Kyocera TASKalfa 2550ci | File Management Utility Operation Guide Rev 2.10 - Page 6
reason, the application will not distribute files. Then, the error folder must be created and the path to the folder must be established. Restart FMU. 1-3 User Guide - Kyocera TASKalfa 2550ci | File Management Utility Operation Guide Rev 2.10 - Page 7
entered as the Share name. 4 Change the Share name, if desired. 5 Enter the User name and Domain name for accessing the receiving folder. Click Add. User domains displays the receiving folder as: user name (user name@domain). If no domain name is specified, the receiving folder is shown as - Kyocera TASKalfa 2550ci | File Management Utility Operation Guide Rev 2.10 - Page 8
shared folder to open its properties. In Network sharing and security under Sharing, check the Allow network users to change my files check box. Editing a Receiving Folder 1 In the main screen, click File file will be deleted. Click OK. 4 Click Close to return to the main screen. 2-2 User Guide - Kyocera TASKalfa 2550ci | File Management Utility Operation Guide Rev 2.10 - Page 9
host name in the list box below this button. To delete a host name from the list, select the name and click Delete. User defined Enter a description for the user-defined information input on the MFP panel. You can create up to five settings. When the workflow is executed, the information entered in - Kyocera TASKalfa 2550ci | File Management Utility Operation Guide Rev 2.10 - Page 10
5 If the distribution folder requires authentication, enter the User name and Password. 6 Click Add to save the distribution folder settings. needed. These settings apply to files scanned from MFP systems that support workflow functions. 9 Select the action that is performed when the User Guide - Kyocera TASKalfa 2550ci | File Management Utility Operation Guide Rev 2.10 - Page 11
Distribution Folder Edit or Delete Distribution Settings 1 In the main screen, click File distribution. The File distribution folders list shows the current distribution folders, and the Folder settings tab is active. 2 To delete a distribution folder, select the ID and click Delete. A message is - Kyocera TASKalfa 2550ci | File Management Utility Operation Guide Rev 2.10 - Page 12
Adding a Workflow To add a workflow while the device is enabled with authentication, the Login user name and Password for the MFP must be correctly set in Communication settings. The maximum number of workflows that destination folder, the file name is changed using date information. 4-1 User Guide - Kyocera TASKalfa 2550ci | File Management Utility Operation Guide Rev 2.10 - Page 13
10 In Login user name, enter the user name for SMB transfer, to a maximum of 64 characters. Then in Login password, enter the login password for the SMB transfer distribution paths for handling scanned documents. The workflow guides the user to enter information that the application uses to - Kyocera TASKalfa 2550ci | File Management Utility Operation Guide Rev 2.10 - Page 14
the Color mode for scanning an image if the device is a color scanner model. If you select Auto color, the default image mode on the device image, or Quality. If the File type is set to High Compression PDF, this article has three levels. 5 In the File separation section, select . 4-3 User Guide - Kyocera TASKalfa 2550ci | File Management Utility Operation Guide Rev 2.10 - Page 15
Workflow 5 On the Check your settings page, click Save to file to save the content of the source device as a XML file. Click End to copy the settings from the source device or file to the target device selected in list on the Workflow dialog box. The settings are copied or replaced and you are - Kyocera TASKalfa 2550ci | File Management Utility Operation Guide Rev 2.10 - Page 16
the Clear History icon. A message is displayed confirming that all distribution files will be deleted. Click OK. 4 Click Close to return to the main screen. 5-1 User Guide - Kyocera TASKalfa 2550ci | File Management Utility Operation Guide Rev 2.10 - Page 17
Rev. 2.1 2012.1
-
 1
1 -
 2
2 -
 3
3 -
 4
4 -
 5
5 -
 6
6 -
 7
7 -
8
-
9
-
10
-
11
-
12
-
13
-
14
-
15
-
16
-
17
 |
 |