Kyocera TASKalfa 3500i File Management Utility Operation Guide - Page 4
File Management Utility, Starting the Application, Add Devices - user guide
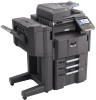 |
View all Kyocera TASKalfa 3500i manuals
Add to My Manuals
Save this manual to your list of manuals |
Page 4 highlights
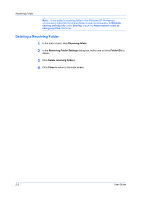
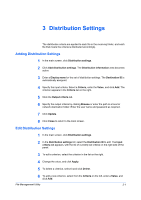
1 File Management Utility The File Management Utility (FMU) distributes documents scanned on a multifunction print system (MFP) to specified network folders or computers. The user can set the criteria for distributing the scanned files. Advanced distribution criteria are available for certain MFPs. Starting the Application If the application is not set to start automatically, you can start it manually. 1 Open the application. 2 In the task bar, right-click on the File Management Utility icon. 3 In the context menu, click Open FMU. If Open FMU is grayed out, restart File Management Utility with administrator privileges. Note: In Preferences, you can set the application to start automatically. Add Devices Specific MFPs on a network can be selected for use with the FMU. Use the Add Device Wizard to select devices by IP address or host name. Adding Devices You can add devices for the application with the Add Device Wizard. 1 In the main screen, click Add device. 2 In the Add Device Wizard, enter the IP address or the Host name of the MFP to add, and then click Add to add the device to the list. 3 Enter another IP address or Host name if necessary. 4 Click Next. 5 If the device is enabled with authentication, for Change authenticate mode, select Use local authentication or Use settings on the device as required. 6 In the Communication Settings page, specify the SNMP type, and enter the Login user name and Password for the MFP. 1-1 User Guide
-
 1
1 -
 2
2 -
 3
3 -
 4
4 -
 5
5 -
 6
6 -
 7
7 -
 8
8 -
 9
9 -
 10
10 -
11
-
12
-
13
-
14
 |
 |
