Kyocera TASKalfa 3551ci Printing System (11),(12),(13),(14) Welcome Guide (Fie - Page 10
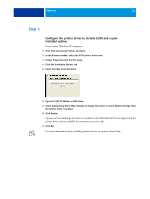
Browse to the English\Prntdrvr\Ps_drvr\Win_2K_XP_VISTA folder on the User Software DVD.
 |
View all Kyocera TASKalfa 3551ci manuals
Add to My Manuals
Save this manual to your list of manuals |
Page 10 highlights
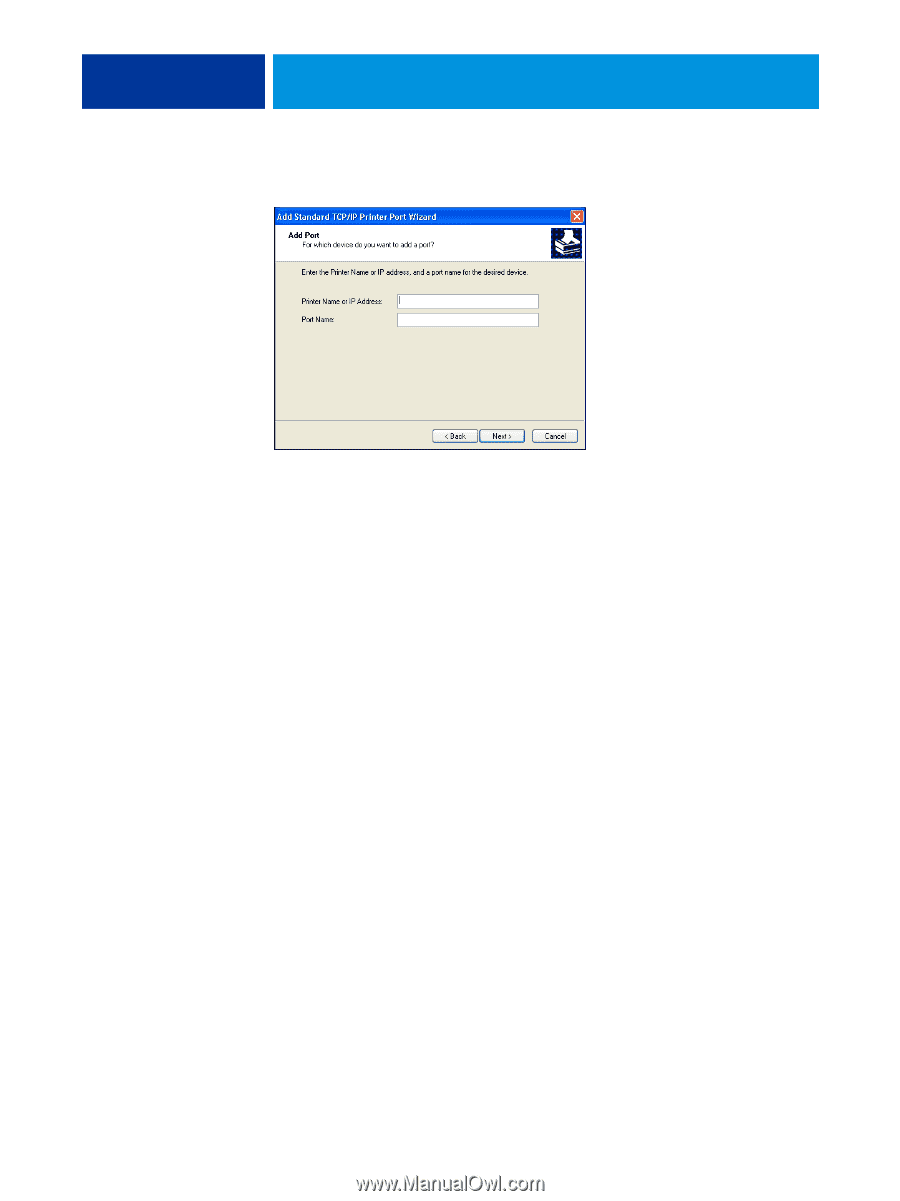
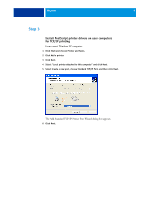
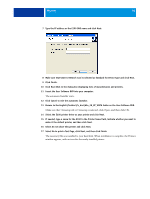
WELCOME 10 7 Type the IP address or the E100 DNS name and click Next. 8 Make sure that Generic Network Card is selected as Standard for Device Type and click Next. 9 Click Finish. 10 Click Have Disk in the dialog box displaying lists of manufacturers and printers. 11 Insert the User Software DVD into your computer. The automatic Installer starts. 12 Click Cancel to exit the automatic Installer. 13 Browse to the English\Prntdrvr\Ps_drvr\Win_2K_XP_VISTA folder on the User Software DVD. Make sure that Oemsetup.inf or Oemsetup is selected, click Open, and then click OK. 14 Select the E100 printer driver as your printer and click Next. 15 If needed, type a name for the E100 in the Printer Name field, indicate whether you want to make it the default printer, and then click Next. 16 Select Do not share this printer and click Next. 17 Select No to print a Test Page, click Next, and then click Finish. The necessary files are installed to your hard disk. When installation is complete, the Printers window appears, with an icon for the newly installed printer.
-
 1
1 -
2
-
3
-
4
-
 5
5 -
 6
6 -
 7
7 -
 8
8 -
 9
9 -
 10
10 -
 11
11 -
 12
12 -
 13
13 -
 14
14 -
 15
15
 |
 |