Kyocera TASKalfa 500ci KM-NET Viewer Operation Guide Rev-5.2-2010.10 - Page 14
Map View, Importing a Map Background, Adjusting the Map Size, Firmware View, Asset View, Accounting - fax
 |
View all Kyocera TASKalfa 500ci manuals
Add to My Manuals
Save this manual to your list of manuals |
Page 14 highlights
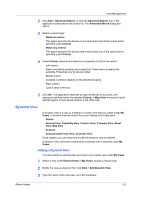
View Management Displays the device counters for total printed pages, copier printed pages, printer printed pages, FAX/i-FAX printed pages, black & white printed pages, single color printed pages, full color printed pages, total scanned pages, copier scanned pages, fax scanned pages, and other scanned pages. Firmware View Displays firmware information, including system firmware, engine firmware, scanner firmware, fax firmware (Ports 1 and 2), panel firmware, and NIC firmware version. Asset View Displays asset information, including MAC address, serial number, and asset number. Map View Displays printing devices on a background map of your office. The following default Accounting views are available: Accounting Devices View Displays general information and counters for devices that support accounting. Accounts View Displays account information for managed devices, such as counter totals for print, copy, fax, and scan. Map View Use Map View to display printing devices on a background map of your office. Printing device properties can be viewed and managed from Map View. The use of an office map helps to visualize the location of devices throughout an office. Under Default Views, click Map View. The initial map view displays all devices as icons against a white background. You can import an image of your office layout to appear in the background, then click and drag each device icon to its office location. The map is shared by all map views in the current workspace. Information about a device can be viewed by moving the pointer over the icon. Importing a Map Background You can import an image of your office layout to appear in the map view background. After an image is imported, you can replace it with another image by following the same procedure. 1 Under Default Views, select Map View. 2 Click Device > Import Map Background. 3 Click Browse to select an image file (.BMP or .JPG). 4 Click OK in the Import Map Background dialog box. Adjusting the Map Size You can change the size of the map image within the view window. Use any of the following methods to change the image size: Click Zoom In to increase the size of the image one step. 2-2 User Guide
-
 1
1 -
2
-
3
-
4
-
5
-
6
-
7
-
8
-
 9
9 -
 10
10 -
 11
11 -
 12
12 -
 13
13 -
 14
14 -
 15
15 -
 16
16 -
 17
17 -
 18
18 -
 19
19 -
20
-
21
-
22
-
23
-
24
-
25
-
26
-
27
-
28
-
29
-
30
-
31
-
32
-
33
-
34
-
35
-
36
-
37
-
38
-
39
-
40
-
41
-
42
-
43
-
44
-
45
-
46
-
47
-
48
-
49
-
50
-
51
-
52
-
53
-
54
-
55
-
56
-
57
-
58
-
59
-
60
-
61
-
62
-
63
-
64
-
65
-
66
-
67
-
68
-
69
-
70
-
71
-
72
-
73
-
74
-
75
-
76
-
77
-
78
-
79
 |
 |