LG 43UH5F-H Owners Manual - Page 55
[Network], Power Indicator], Power On/Off History], Wired Connection Ethernet], Wi-Fi Connection]
 |
View all LG 43UH5F-H manuals
Add to My Manuals
Save this manual to your list of manuals |
Page 55 highlights
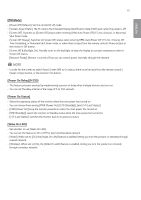
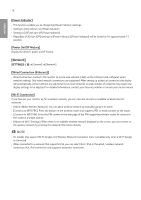
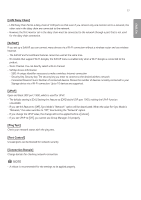
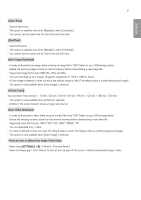
16 ENGLISH [Power Indicator] •• This function enables you to change the [Power Indicator] settings. •• Setting to [On] will turn on [Power Indicator]. •• Setting to [Off] will turn off [Power Indicator]. •• Regardless of [On] or [Off] settings in [Power Indicator], [Power Indicator] will be turned on for approximately 15 seconds. [Power On/Off History] Display the device's power on/off history. [Network] [General] [Network] [Wired Connection (Ethernet)] •• Wired Connection: Connects the monitor to a local area network (LAN) via the LAN port and configures wired network settings. Only wired network connections are supported. After setting up a physical connection, the display will automatically connect without any adjustments on most networks. A small number of networks may require the display settings to be adjusted. For detailed information, contact your Internet provider or consult your router manual. [Wi-Fi Connection] If you have set your monitor up for a wireless network, you can view and connect to available wireless Internet networks. •• [Add a Hidden Wireless Network]: You can add a wireless network by manually typing in its name. •• [Connect via WPS PBC]: Press the button on the wireless router that supports PBC to easily connect to the router. •• [Connect via WPS PIN]: Enter the PIN number in the web page of the PIN-supporting wireless router to connect to the router in a simple manner. •• [Advanced Wi-Fi Settings]: When there is no available wireless network displayed on the screen, you can connect to the wireless network by entering the network information directly. NOTE •• On models that support Wi-Fi dongles, the Wireless Network Connection menu is enabled only when a Wi-Fi dongle is connected. •• When connected to a network that supports IPv6, you can select IPv4 / IPv6 in the wired / wireless network connection. But, IPv6 connection only supports automatic connection.
-
 1
1 -
2
-
3
-
4
-
5
-
6
-
7
-
8
-
9
-
10
-
11
-
12
-
13
-
14
-
15
-
16
-
17
-
18
-
19
-
20
-
21
-
22
-
23
-
24
-
25
-
26
-
27
-
28
-
29
-
30
-
31
-
32
-
33
-
34
-
35
-
36
-
37
-
38
-
39
-
40
-
41
-
42
-
43
-
44
-
45
-
46
-
47
-
48
-
49
-
 50
50 -
 51
51 -
 52
52 -
 53
53 -
 54
54 -
 55
55 -
 56
56 -
 57
57 -
 58
58 -
 59
59 -
 60
60 -
61
-
62
-
63
-
64
-
65
-
66
-
67
-
68
-
69
-
70
-
71
-
72
-
73
-
74
-
75
-
76
-
77
-
78
-
79
-
80
-
81
-
82
-
83
-
84
-
85
-
86
-
87
-
88
-
89
-
90
-
91
-
92
-
93
-
94
-
95
-
96
-
97
-
98
-
99
-
100
-
101
-
102
-
103
-
104
-
105
-
106
-
107
-
108
-
109
-
110
-
111
-
112
-
113
-
114
-
115
-
116
-
117
-
118
-
119
-
120
-
121
-
122
-
123
-
124
-
125
-
126
-
127
-
128
-
129
 |
 |
