LG CG300 Owner's Manual (English) - Page 21
battery with the corresponding connectors on
 |
View all LG CG300 manuals
Add to My Manuals
Save this manual to your list of manuals |
Page 21 highlights
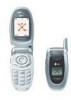
Getting Started 3. Slide the SmartChip into the SmartChip socket so that it locks the card into place. Make sure that the notched corner is bottom left and the gold contacts of the card face into the phone. 4. To insert the battery, align the golden contacts of the battery with the corresponding connectors on the battery compartment. Press down on the opposite end of the battery until it snaps into place. 2 1 n Note When you need to remove the SmartChip, slide it, as shown, and take it out of the socket. 5. Attach back cover by sliding up into position until it clicks. 4 3 17
-
 1
1 -
2
-
3
-
4
-
5
-
6
-
7
-
8
-
9
-
10
-
11
-
12
-
13
-
14
-
15
-
 16
16 -
 17
17 -
 18
18 -
 19
19 -
 20
20 -
 21
21 -
 22
22 -
 23
23 -
 24
24 -
 25
25 -
 26
26 -
27
-
28
-
29
-
30
-
31
-
32
-
33
-
34
-
35
-
36
-
37
-
38
-
39
-
40
-
41
-
42
-
43
-
44
-
45
-
46
-
47
-
48
-
49
-
50
-
51
-
52
-
53
-
54
-
55
-
56
-
57
-
58
-
59
-
60
-
61
-
62
-
63
-
64
-
65
-
66
-
67
-
68
-
69
-
70
-
71
-
72
-
73
-
74
-
75
-
76
-
77
-
78
-
79
-
80
-
81
-
82
-
83
-
84
-
85
-
86
-
87
-
88
-
89
-
90
-
91
-
92
-
93
-
94
-
95
-
96
-
97
-
98
-
99
-
100
-
101
-
102
-
103
-
104
 |
 |

3.
Slide the SmartChip into the SmartChip socket so
that it locks the card into place. Make sure that the
notched corner is bottom left and the gold contacts
of the card face into the phone.
n
Note
When you need to remove the SmartChip, slide it, as shown,
and take it out of the socket.
4.
To insert the battery, align the golden contacts of the
battery with the corresponding connectors on the
battery compartment. Press down on the opposite
end of the battery until it snaps into place.
5.
Attach back cover by sliding up into position until it
clicks.
17
Getting Started
2
1
3
4