LG DLG2602W Owner's Manual (English) - Page 41
Key Dimensions And Specifications, Stacking Kit Installation
 |
View all LG DLG2602W manuals
Add to My Manuals
Save this manual to your list of manuals |
Page 41 highlights
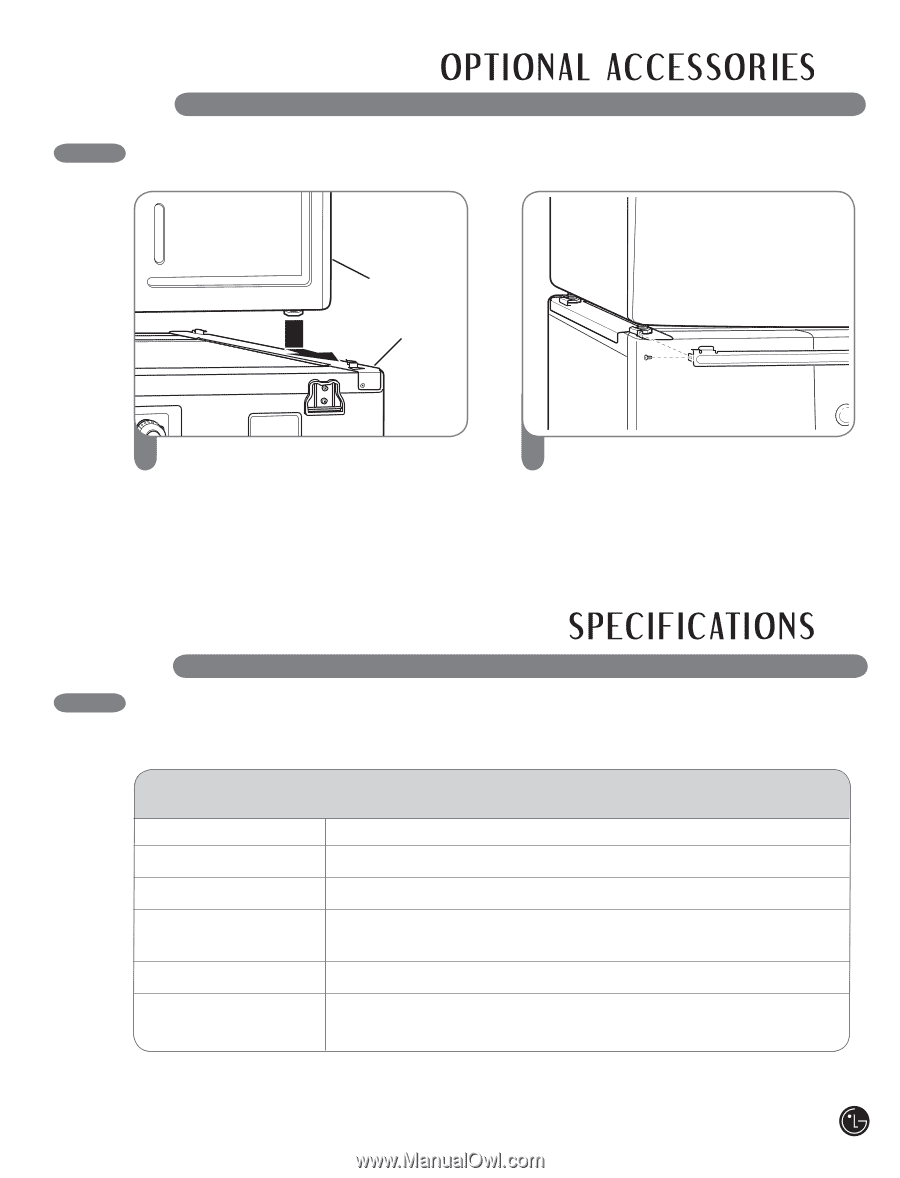
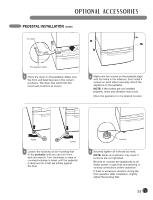
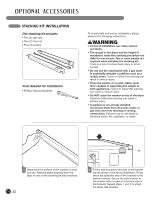
STACKING KIT INSTALLATION (cont.) Dryer Washer 3 Place the dryer on top of the washer by fitting the dryer feet into the side brackets as illustrated. Avoid finger injuries; do not allow fingers to be pinched between the washer and dryer. Slowly slide the dryer toward the back of the washer until the side bracket stoppers catch the dryer feet. 4 Insert the front rail between the bottom of the dryer and the top of the washer. Push the front rail toward the back of the washer until it comes in contact with the side rail stoppers. Install the two remaining screws to secure the front rail to the side rails. KEY DIMENSIONS AND SPECIFICATIONS The appearance and specifications listed in this guide may vary due to constant product improvements. Dryer Models DLE2601W, DLE2601R, DLE2601L, DLE2601S, DLG2602W, DLG2602R, DLG2602L and DLG2602S Description Dryer Electrical Requirements* Please refer to the rating label regarding detailed information. Gas Requirements* NG: 10-13 in. WC/LP: 10-13 in. WC (Gas Models only) Dimensions 27" (W) X 30" (D) X 3811/16" (H), 51" (D with door open) 68.6 cm (W) X 76.1 cm (D) X 98.3 cm (H), 129.7 cm (D with door open) Net Weight 126.8 lbs. (57.5 kg) Drying Capacity - Normal Cycle IEC 7.4 cu.ft. (22.5 lbs./10.2 kg) *Refer to the rating plate on your dryer. 41
-
 1
1 -
2
-
3
-
4
-
5
-
6
-
7
-
8
-
9
-
10
-
11
-
12
-
13
-
14
-
15
-
16
-
17
-
18
-
19
-
20
-
21
-
22
-
23
-
24
-
25
-
26
-
27
-
28
-
29
-
30
-
31
-
32
-
33
-
34
-
35
-
 36
36 -
 37
37 -
 38
38 -
 39
39 -
 40
40 -
 41
41 -
 42
42 -
 43
43 -
 44
44 -
 45
45 -
 46
46 -
47
-
48
-
49
-
50
-
51
-
52
-
53
-
54
-
55
-
56
-
57
-
58
-
59
-
60
-
61
-
62
-
63
-
64
-
65
-
66
-
67
-
68
-
69
-
70
-
71
-
72
-
73
-
74
-
75
-
76
-
77
-
78
-
79
-
80
-
81
-
82
-
83
-
84
-
85
-
86
-
87
-
88
-
89
-
90
-
91
-
92
-
93
-
94
-
95
-
96
-
97
-
98
-
99
-
100
-
101
-
102
-
103
-
104
-
105
-
106
-
107
-
108
-
109
-
110
-
111
-
112
-
113
-
114
-
115
-
116
-
117
-
118
-
119
-
120
-
121
-
122
-
123
-
124
-
125
-
126
-
127
-
128
 |
 |