LG GCC-H21N Installation Instructions
LG GCC-H21N Manual
 |
View all LG GCC-H21N manuals
Add to My Manuals
Save this manual to your list of manuals |
LG GCC-H21N manual content summary:
- LG GCC-H21N | Installation Instructions - Page 1
system encounters interface problems after installing the new drive, try swapping the jumpers or move one drive to another IDE channel. Method A DAIGUDITIAOL AANUADLIOOG DG R G L CS M S LA 39 40 INTERFACE POWER 1 2 +5 GND +12 CD Rewriter/DVD-ROM Drive CD Rewriter/DVD-ROM Drive Method - LG GCC-H21N | Installation Instructions - Page 2
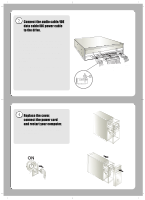
connection is normally not required. ❷ Connect the IDE data cable to the back of the drive. ❸ Connect a 4-pin power supply cable from the computer to the drive. MarMkainrkgingLL--RR Sound Card ❶ Audio Audio Cable Cable ❷ IDEECCaablbele D❸C DPoCweProCwabelre Cable Replace the cover, connect - LG GCC-H21N | Installation Instructions - Page 3
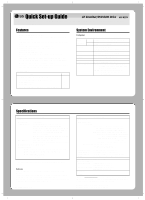
Quick Set-up Guide CD Rewriter/DVD-ROM Drive GCC-H21N To install of your product, please read this guide manual carefully and completely. For the detailed owner's manual of the drive, please refer to the CD manual. Features • Enhanced-IDE (ATAPI) interface. • Power tray loading and ejection of - LG GCC-H21N | Installation Instructions - Page 4
LG. O uso dos controles ou a execução de procedimentos diferentes que não sejam os especificados neste manual CD Rewriter/DVD-ROM Drive is for use only with UL listed personal computers that have installation instructions detailing user-installation of card cage accessory. ■ Microsoft® and Windows
-
 1
1 -
 2
2 -
 3
3 -
 4
4
 |
 |
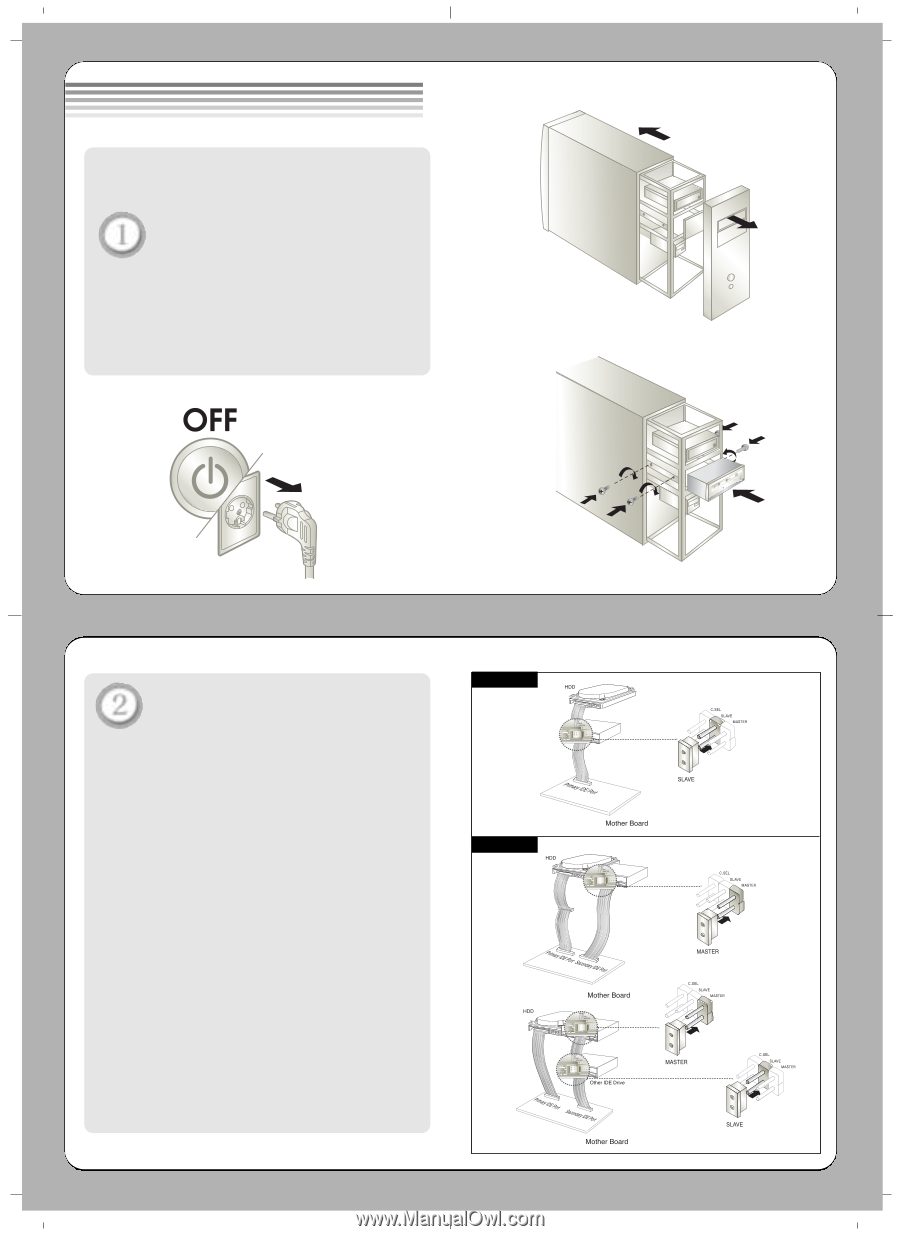
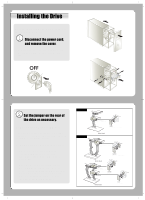
Before installing the drive, turn off
the system power.
Disconnect the power cord,
and remove the cover.
• Remove a vacant 5.25” drive bay panel from
the computer. Slide the drive into the drive
bay.
Set the jumper on the rear of
the drive as necessary.
A. When using a Primary IDE port
If you need to connect your drive to the same
primary IDE channel as the hard drive, the drive
should be set to SLAVE position.
B. When using a Secondary IDE port
If there is no device connected to the
secondary IDE channel, connect the
drive to this channel and set the jumper
to MASTER.
When two drives are connected, set one
drive to MASTER and the other drive to
SLAVE. If your operating system encounters
interface problems after installing the new
drive, try swapping the jumpers or move
one drive to another IDE channel.
Installing the Drive
Method A
Method B
CD Rewriter/DVD-ROM Drive
CD Rewriter/DVD-ROM
Drive
CD Rewriter/DVD-ROM Drive
First Drive
Second Drive
CD Rewriter/DVD-ROM
Drive
CD Rewriter/DVD-ROM
Drive