LG GP08LU10 Owner's Manual (English) - Page 2
Location and function of controls - dvd rewriter
 |
UPC - 048231306454
View all LG GP08LU10 manuals
Add to My Manuals
Save this manual to your list of manuals |
Page 2 highlights
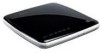
Location and function of controls This following is the general figure of the design of the drive. The drive's appearance and specifications may change without prior notice. Front 1. Disc Tray 2. Drive activity indicators The LED used to indicate the operation of External Super Multi DVD Rewriter. 3. Eject Button 4. Emergency Eject Hole Rear 1. Power Connector This connector is used to connect to the USB power cable. (DC-jack type) Or, this connector is used to connect to the AC Power adapter cord (5V, 2A, outside diameter: 4mm, inside diameter: 1.75mm) (Not supplied). 2. USB Connector This connector is used to connect to the USB 2.0 cable. 1 23 4 12 Removing the USB converter cable (For Windows) The drive supports the plug and play(not swap) function of Windows, and can be removed and inserted by performing the following operation. 1. Stop the application software being currently used. 2. Click the icon " " of the taskbar located on your screen's bottom right side. 3. Click "Safely Remove USB Mass Storage Device-Drive[x:]". 4. Click "Ok" and then remove the USB converter cable. NOTE Don't remove the USB 2.0 cable when the busy indicator on the drive blinks, or during computer startup. The removing procedure varies depending on your OS.
-
 1
1 -
 2
2 -
 3
3 -
 4
4
 |
 |
