LG L1200 Owner's Manual - Page 3
Quick Reference Guide - Using Camera - phone
 |
View all LG L1200 manuals
Add to My Manuals
Save this manual to your list of manuals |
Page 3 highlights
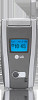
Quick Reference Guide - Using Camera Take and Send Photo 1. Press the Camera key ( ). 2. In the preview screen, press the left and right navigation keys to adjust brightness, and press the up and down navigation keys to adjust zoom. 3. Press the Camera Key ( ), or left soft key [Capture]. 4. After capture, the photo saved automatically. To send it via MMS (Multimedia Message), press the left soft key [Send]. To go to preview screen, press the key. Take Address Book photo(Photo ID) and add to Address Book 1. To take Address Book photo (Photo ID), adjust image size to "48x80". (In the preview screen, go to options, select "Image Size" menu and select "48x80" size.) 2. In the "New Contact" or "Edit" of the Address Book, you can find "Picture" field. Press the left and right navigation keys to select Address Book photo (Photo ID). (Photos are displayed just when the Address Book photo is saved to the phone.) 3. Press the left soft key [Save] and finish add contact. Choose the Alert Type 1. In standby mode, press up navigation key, (Volume) and (Ringtone). 2. Select an option: Silent All, Vibration All, Volume 1~5, Vol5&Vib. 3. Press the left and right navigation keys. 4. Press the key. Key tones This menu option allows you to select a tone that the phone sounds when you press a key. You can select an option from Beep and Voice. 1. Press the left soft key [Menu]. 2. Press . o o ne ne one MCDD0001401 (1.0)
-
 1
1 -
 2
2 -
 3
3 -
 4
4 -
 5
5 -
 6
6 -
 7
7 -
 8
8 -
 9
9 -
10
-
11
-
12
-
13
-
14
-
15
-
16
-
17
-
18
-
19
-
20
-
21
-
22
-
23
-
24
-
25
-
26
-
27
-
28
-
29
-
30
-
31
-
32
-
33
-
34
-
35
-
36
-
37
-
38
-
39
-
40
-
41
-
42
-
43
-
44
-
45
-
46
-
47
-
48
-
49
-
50
-
51
-
52
-
53
-
54
-
55
-
56
-
57
-
58
-
59
-
60
-
61
-
62
-
63
-
64
-
65
-
66
-
67
-
68
-
69
-
70
-
71
-
72
-
73
-
74
-
75
-
76
-
77
-
78
-
79
-
80
-
81
-
82
-
83
-
84
-
85
-
86
-
87
-
88
-
89
-
90
-
91
-
92
-
93
-
94
-
95
-
96
-
97
-
98
-
99
-
100
-
101
-
102
-
103
-
104
-
105
-
106
-
107
-
108
-
109
-
110
-
111
-
112
-
113
-
114
-
115
-
116
-
117
-
118
-
119
-
120
-
121
-
122
-
123
-
124
-
125
-
126
-
127
-
128
-
129
-
130
-
131
-
132
-
133
-
134
-
135
-
136
-
137
-
138
-
139
-
140
-
141
 |
 |
