LG L246WHX-BN Owner's Manual - Page 8
Connecting to External Devices, When Connecting to your PC - dvi
 |
View all LG L246WHX-BN manuals
Add to My Manuals
Save this manual to your list of manuals |
Page 8 highlights
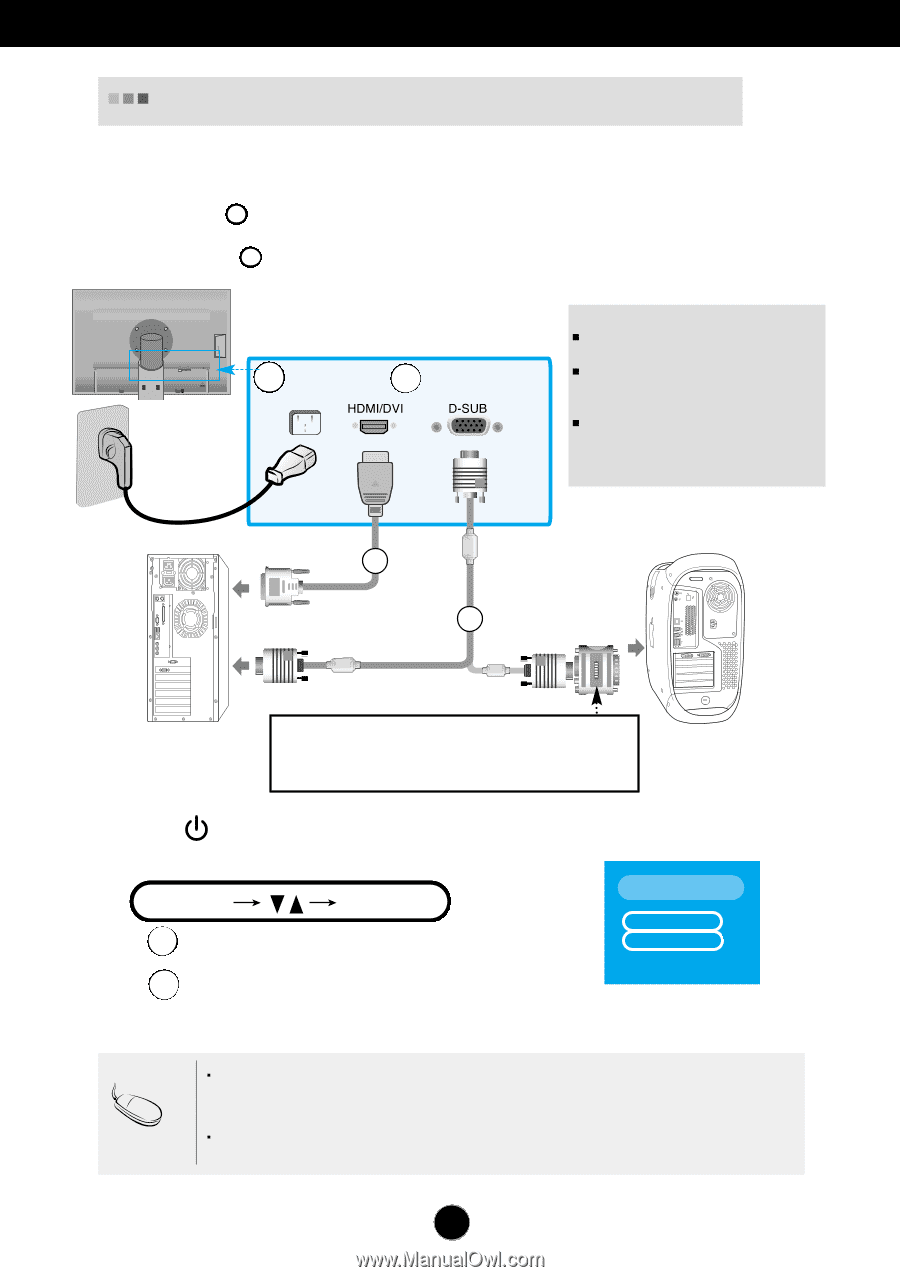
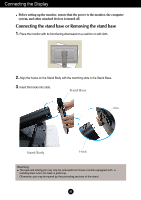
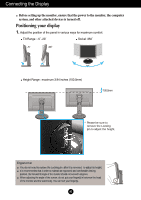
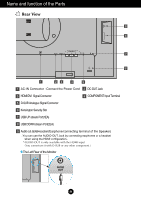
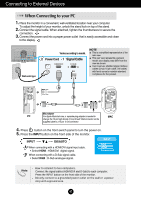
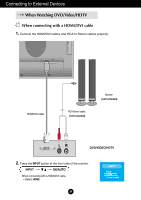
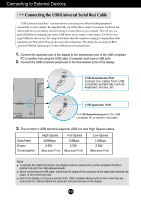
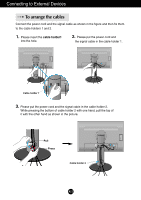
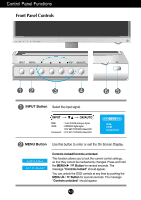
Connecting to External Devices When Connecting to your PC 1. Place the monitor in a convenient, well-ventilated location near your computer. To adjust the height of your monitor, unlock the stand lock on top of the stand. 2. Connect the signal cable. When attached, tighten the thumbscrews to secure the 3. connection. Connect the 1 power cord into a proper power outlet that is easily accessible and close to the display. 2 DC-OUT HDMI/DVI COMPONENT Y PB PR D-SUB Wall-outlet type 1 2 AUDIO OUT Varies according to model. 2 Power Cord 1 Signal Cable NOTE This is a simplified representation of the rear view. This rear view represents a general model; your display may differ from the view as shown. User must use shielded signal interface cables (D-sub 15 pin cable, DVI cable) with ferrite cores to maintain standard compliance for the product. A B Mac adapter PC For Apple Macintosh use, a separate plug adapter is needed to MAC change the 15 pin high density (3 row) D-sub VGA connector on the supplied cable to a 15 pin 2 row connector. 4. Press button on the front switch panel to turn the power on. 5. Press the INPUT button on the front side of the monitor. INPUT OK/AUTO A When connecting with a HDMI/DVI signal input cable. • Select HDMI : HDMI/DVI digital signal. B When connecting with a D-Sub signal cable. • Select RGB : D-Sub analogue signal. INPUT RGB HDMI Component Note How to connect to two computers. Connect the signal cables (HDMI/DVI and D-Sub) to each computer. Press the INPUT button on the front side of the monitor. Directly connect to a grounded power outlet on the wall or a power strip with a ground wire. A7
-
 1
1 -
2
-
 3
3 -
 4
4 -
 5
5 -
 6
6 -
 7
7 -
 8
8 -
 9
9 -
 10
10 -
 11
11 -
 12
12 -
 13
13 -
14
-
15
-
16
-
17
-
18
-
19
-
20
-
21
-
22
-
23
-
24
-
25
-
26
-
27
-
28
-
29
-
30
-
31
-
32
 |
 |