LG L246WP User Guide - Page 34
How to Install the VESA Standard wall mounting
 |
UPC - 719192183087
View all LG L246WP manuals
Add to My Manuals
Save this manual to your list of manuals |
Page 34 highlights
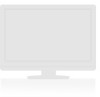
How to Install the VESA Standard wall mounting This monitor meets VESA-compliant mounting interface pad specifications. 1. After moving the product to face downward, make sure to place it on a soft cloth or a cushion to avoid surface damage. OUT AUDIO 2 1 DC-OUT HDMI/DVI COMPONENT Y PB PR D-SUB 2. Separate the head and the stand with the use of a screwdriver. OUT AUDIO 2 1 DC-OUT HDMI/DVI COMPONENT Y PB PR D-SUB DC-OUT HDMI/DVI COMPONENT Y PB PR D-SUB 1 2 AUDIO OUT 3. Set up the VESA standard Stand Base. VESA wall mounting Connected to another object (stand type and wall-mounted type. This monitor accepts a VESA-compliant mounting interface pad.This has to be purchased separately if required.) For further information, refer to the VESA Wall Mounting Instruction Guide. Kensington Security Slot Connected to a locking cable that can be purchased separately at most computer stores. A33
-
 1
1 -
2
-
3
-
4
-
5
-
6
-
7
-
8
-
9
-
10
-
11
-
12
-
13
-
14
-
15
-
16
-
17
-
18
-
19
-
20
-
21
-
22
-
23
-
24
-
25
-
26
-
27
-
28
-
 29
29 -
 30
30 -
 31
31 -
 32
32 -
 33
33 -
 34
34 -
 35
35
 |
 |
