LG LB1000ER Owners Manual - Page 22
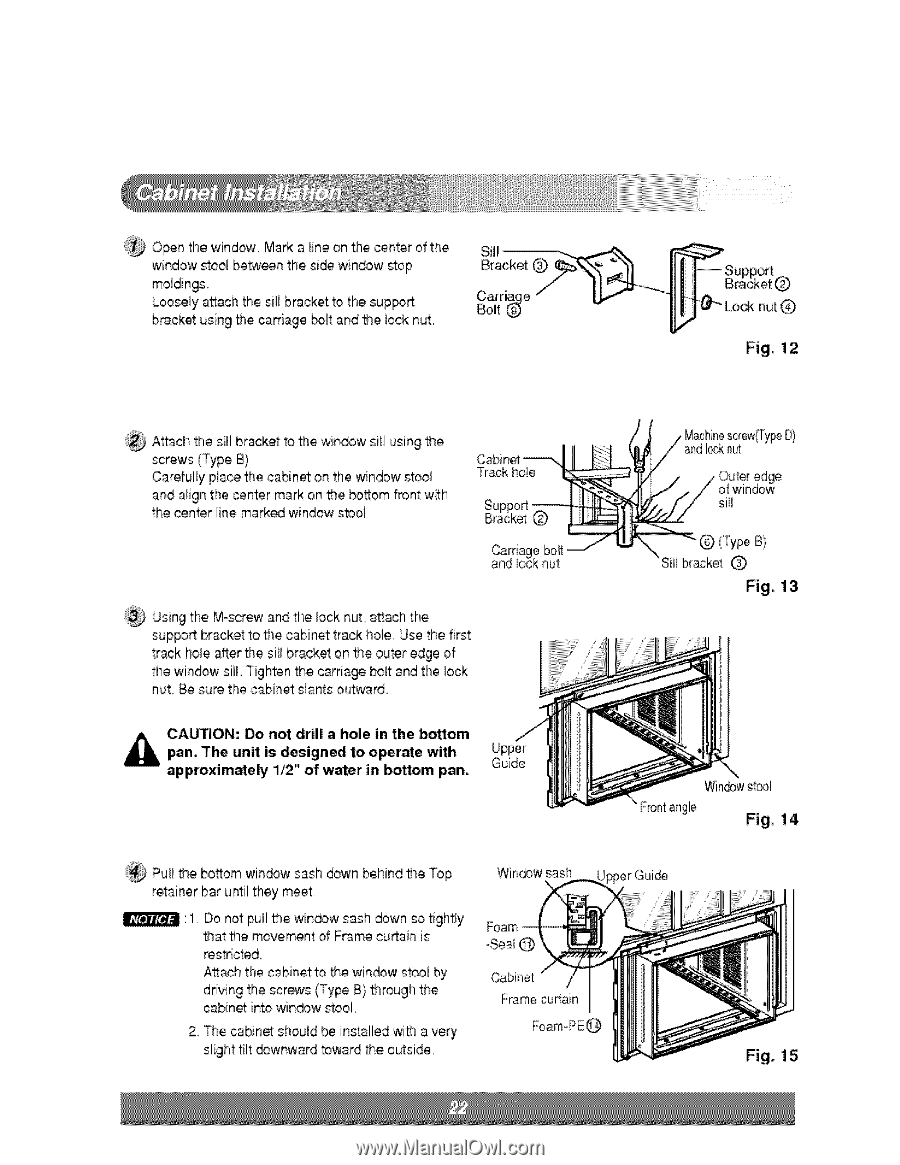
thewindow., Marka_ine, onthecenter, ofthe, window, stool, t_een, thesi_ window, moldings., Loosely,
 |
View all LG LB1000ER manuals
Add to My Manuals
Save this manual to your list of manuals |
Page 22 highlights
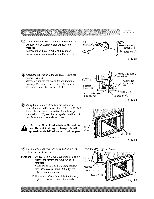
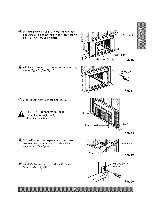
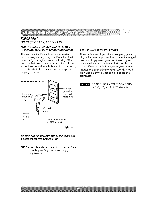
_O_n thewindowM. arka _inoenthecenteor fthe windowstoobl eltb_,eetnhesi_ windowstop moldings. Looselayttachthesillbracketot thesup_ brackeutsing _e carnage _:_itand the lock nut. A_aclhthe si_lbracket to the window sill using _e screws (Type B).. Carefuliy place the cabinet on the window stooi and a!ign the center mark on _e bosom _ont with the center line maAed window stool.. C_inet Trackho_e Using the M-screw and the lock nut, a_ach the suppo_ bracket to _e cabinet track hole. Use the first track hole after the sill bracket on the outer edge of the window sill. Tighten #'_ecarria_ b@t and the lock nut. Be _ure the cabinet slants ,o_ard CAUTION: Oo not dril| a holle in the bottom _n. The unit is designed to o_rate with ap,proximate|y 1/2" of water in bottom par=, Guide si_ (Type B} Silblracket Fig,. 13 Pu_l_e bosom win®w sash down behind the Top retainer bar u_il they meier :1. Do not pull _-_ewin®w sash down so tighfly _at the movement d Frame cu_ain is rest_cted. Aftach the cabinet t:o_e win_w stool by driving the screws (Type B} _rough the cabinet i_o win®w stool. 2. The cabinet shouid be installed wi_ a very slight tilt @wnward toward _e outside, Cabinet Framecu4ain
-
 1
1 -
2
-
3
-
4
-
5
-
6
-
7
-
8
-
9
-
10
-
11
-
12
-
13
-
14
-
15
-
16
-
 17
17 -
 18
18 -
 19
19 -
 20
20 -
 21
21 -
 22
22 -
 23
23 -
 24
24 -
 25
25 -
 26
26 -
 27
27
 |
 |