LG LBC22520SB Owner's Manual - Page 22
Frozen Meat Compartment/ Chef Fresh, Snack Pan In Some Models, Crisper Humidity Control, Optibin - replacement shelf
 |
UPC - 048231783071
View all LG LBC22520SB manuals
Add to My Manuals
Save this manual to your list of manuals |
Page 22 highlights
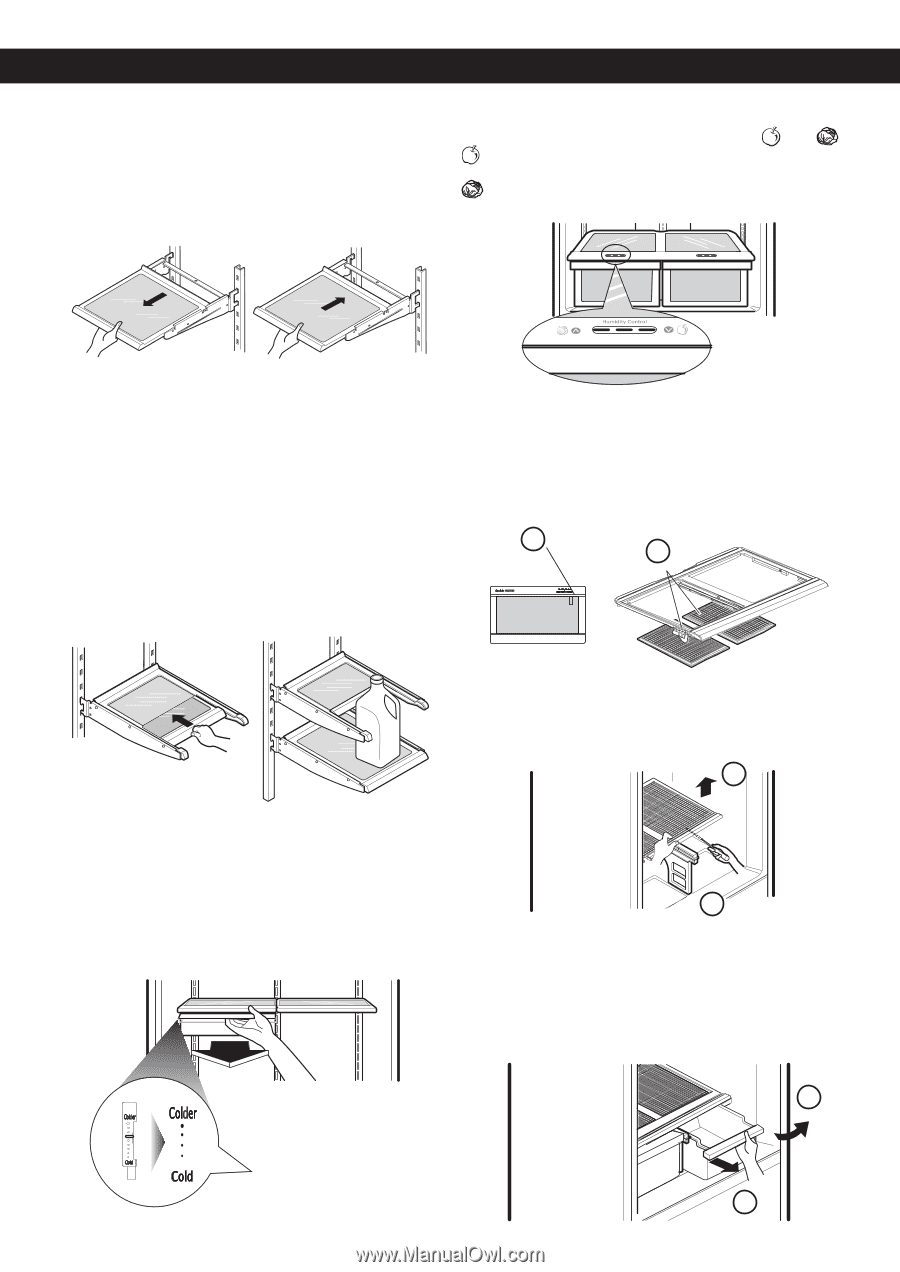
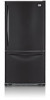
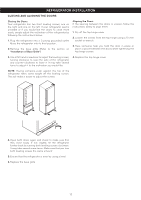
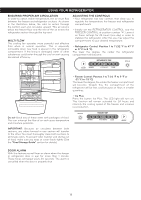
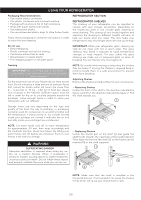
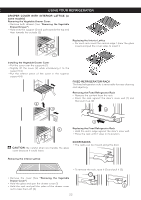
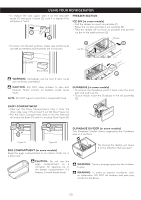
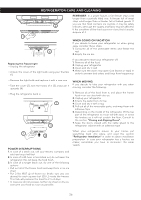
USING YOUR REFRIGERATOR Sliding Shelves (in some models) You can slide some of the shelves in your refrigerator towards inside or outside like explained below. • To slide the shelf towards the outside: Pull towards you, figure A. • To slide the shelf towards the inside: Push until it stops, figure B. CRISPER HUMIDITY CONTROL You can adjust the humidity inside the drawers by adjusting the control in a position between and . For better preservation of the fruits allow air to leave the vegetable drawer. For a better conservation of vegetables allow the maximum air in the drawer. Figure A Figure B In order to remove a shelf from a metal frame • Pull the shelf until it stops. • Incline the front of the shelf towards the top and pull forward. • Lift the shelf in the manner it moves across the support openings. To put back into place just reverse these steps. Functional Shelves (Folding Shelves, in some models) You can store tall articles like gallons or bottles just by simply folding the shelf in half. OPTIBIN CRISPERS The OptiBin crisper maintains fruits and vegetables fresh allowing you to easily control the humidity inside the drawers. The Optibin crispers include 1) a front humidity control and 2) a system that allows you to preserve or avoid humidity. 1 2 Removing the glass • Lift the opening of the drawers and use a flat head screw driver (1). • Pull towards the top and then out (2). 2 FROZEN MEAT COMPARTMENT/ CHEF FRESH SNACK PAN (in some models) To remove the Frozen Meat Compartment • Pull the frozen meat compartment forward while holding it with your other hand, slightly lift and pull. • To replace the frozen meat compartment just follow the steps in reverse. 1 Removing the Vegetable Drawer / Crisper • Slip out the drawer towards the outside until it stops (1). • Slightly lift the front part and pull the rest (2), in order to completely remove the drawer. • To relocate the drawer slip out towards the front until it stops. 2 On some models applies an independent temperature control 1 21
-
 1
1 -
2
-
3
-
4
-
5
-
6
-
7
-
8
-
9
-
10
-
11
-
12
-
13
-
14
-
15
-
16
-
 17
17 -
 18
18 -
 19
19 -
 20
20 -
 21
21 -
 22
22 -
 23
23 -
 24
24 -
 25
25 -
 26
26 -
 27
27 -
28
-
29
-
30
-
31
-
32
-
33
-
34
-
35
 |
 |