LG LHB755W Owners Manual - English - Page 25
System Setting, Initial Setup
 |
View all LG LHB755W manuals
Add to My Manuals
Save this manual to your list of manuals |
Page 25 highlights
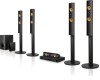
System Setting 25 Initial Setup When you turn on the unit for the first time, the initial setup wizard appears on the screen. Set the display language and network settings on the initial setup wizard. 1. Press 1 (POWER). The initial setup wizard appears on the screen. 2. Use W/S/A/D to select a display language and press ENTER (b). 5. Use W/S/A/D to select the IP mode between [Dynamic] and [Static]. Normally, select [Dynamic] to allocate an IP address automatically. 6. Select [Next] and press ENTER (b) to apply network settings. 3 System Setting 3. After checking the Terms of Service, select [Agree] to use the Premium Service and SW Updates. Read and prepare the preparations for the network settings and then press ENTER (b) while [Start] is highlighted. Network connection status is displayed on the screen. For details on network settings, refer to "Connecting to your Home Network" on page 20. 7. Select [Next] and press ENTER (b). 8. Press ENTER (b) to verify the test tone signals of the speakers. If wired network is connected, the network connection setting will automatically be finished. 4. All available networks are displayed on the screen. Use W/S to select [Wired Network] or desired SSID of wireless network and press ENTER (b). After verifying the test tone signals, press ENTER (b) while [Stop] is highlighted. Select [Next] and press ENTER (b). If you have security on your access point, you need to input the security code as necessary.
-
 1
1 -
2
-
3
-
4
-
5
-
6
-
7
-
8
-
9
-
10
-
11
-
12
-
13
-
14
-
15
-
16
-
17
-
18
-
19
-
 20
20 -
 21
21 -
 22
22 -
 23
23 -
 24
24 -
 25
25 -
 26
26 -
 27
27 -
 28
28 -
 29
29 -
 30
30 -
31
-
32
-
33
-
34
-
35
-
36
-
37
-
38
-
39
-
40
-
41
-
42
-
43
-
44
-
45
-
46
-
47
-
48
-
49
-
50
-
51
-
52
-
53
-
54
-
55
-
56
-
57
-
58
-
59
-
60
-
61
-
62
-
63
-
64
-
65
-
66
-
67
-
68
-
69
-
70
-
71
-
72
-
73
-
74
-
75
-
76
-
77
-
78
-
79
-
80
 |
 |
