LG LRBP1031T User Guide - Page 13
EspaÑol, FranÇais - warranty
 |
UPC - 048231778305
View all LG LRBP1031T manuals
Add to My Manuals
Save this manual to your list of manuals |
Page 13 highlights
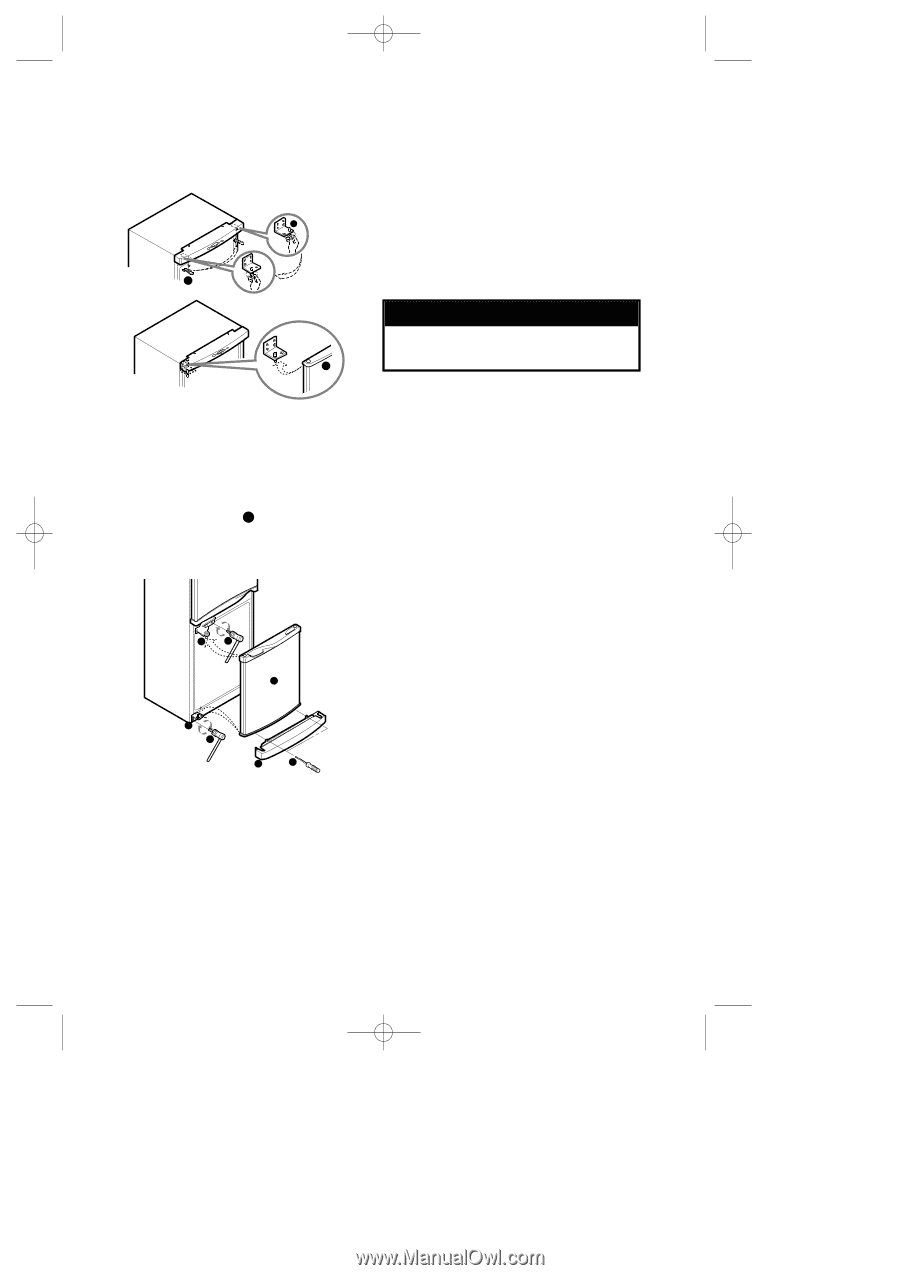
ENGLISH 2. Remove bolt µ and hinge-C ¸ and take off refrigerator door ¹. Move cap Ƹ to the side not used. Move door bracket ƻ and screw Ƽ to the side you wish and reinstall. 14 15 12 After Completing the job s Make sure that the four corners of the door gasket are not folded. It is recommended to apply a small amount of silicon grease on them. s Adjust the leveling screw on the bottom to the highest level so that the front side of the refrigerator is higher than the rear side. s If you need assistance after switching the direction of the door opening as shown above, call a service center. NOTE Reversing the doors is not covered by the warranty. 3. Move hinge-U pin ƹ and top cover cap ƺ. Assemble the refrigerator door ¹. Assemble hinge-C ¸ and bolt µ. Assemble freezer door 21 . Assemble the hinge-L ´ and bolt ¿. Assemble base cover ³ and screw ·. 11 10 21 5 4 1 2 FRANÇAIS ESPAÑOL 13
-
 1
1 -
2
-
3
-
4
-
5
-
6
-
7
-
 8
8 -
 9
9 -
 10
10 -
 11
11 -
 12
12 -
 13
13 -
 14
14 -
 15
15 -
 16
16 -
 17
17 -
 18
18 -
19
-
20
-
21
-
22
-
23
-
24
-
25
-
26
-
27
-
28
-
29
-
30
-
31
-
32
-
33
-
34
-
35
-
36
-
37
-
38
-
39
-
40
-
41
-
42
-
43
-
44
-
45
-
46
-
47
-
48
-
49
-
50
-
51
-
52
 |
 |