LG LRDM1240W 01 Owners Manual - Page 11
Setting, Clock
 |
View all LG LRDM1240W 01 manuals
Add to My Manuals
Save this manual to your list of manuals |
Page 11 highlights
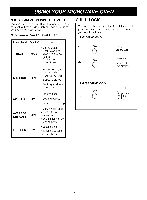
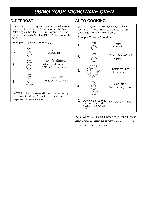
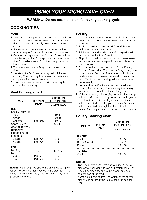
SETTING THE CLOCK When your oven is plugged in or after a power interruption, 0 shows on the display. You can set the clock by 2 mode(12 or 24 hrs). Example: To set the clock for 11:11. Use 24hrs mode. Stop/ Clear 1. Touch Stop/Clear Clock Touch Clock It will display "24H" Rotate the knob to 11 hr. Clock 4. Touch Clock NOTE: When you use this function,each time you touch AUTO COOK or AUTO DEFROST,you can add or minus 10 seconds to the cooking time, TIMED COOKING This feature lets you program a specific cook time and power. For best results, there are 5 power level settings in addition to HIGH power (100%). Refer to the Microwave Power Level Chart on page 12 for more information. NOTE: If you do not select a power level, the oven will automatically cook at HIGH (100%) power. Example: To cook at 80% power. Stop/ Clear = Touch Stop/Clear Rotate the knob to 11 minutes. = Clock 6. You have set 11:11 clock completely. Power' 2, to set a Touch Power 2 times,it will display "P-80" on the screen. coof o8k0 d_o. wer NOTE: If you don't want to set the clock by 24 hrs mode, you can touch Clock 2 times and it will display 12H on the screen. EZ ON This time-saving feature lets you cook at 100% power for up to 9 minutes, 59 seconds. 30 seconds are added to the cook time each time you press EZ On. Example: To cook for 2 minutes. Stop/ 1. c,oor Touch Stop/Clear Rotate the knob to select cooking time. Start/ Ez-On = to start oven. Touch Start Time counting down. 5. At the end of the cook time, four tones will sound. The oven will stop. It will display "End" . Stab/ Ez-On 2. Touch Ez-On4 times. Time counting down. 3. At the end of the cook time, four tones will sound. The oven will stop. It will display "End" . 11
-
 1
1 -
2
-
3
-
4
-
5
-
 6
6 -
 7
7 -
 8
8 -
 9
9 -
 10
10 -
 11
11 -
 12
12 -
 13
13 -
 14
14 -
 15
15 -
 16
16 -
17
-
18
-
19
-
20
-
21
-
22
-
23
-
24
 |
 |
