LG LT1030HR Owners Manual - Page 14
tnstatiation - wall sleeve
 |
View all LG LT1030HR manuals
Add to My Manuals
Save this manual to your list of manuals |
Page 14 highlights
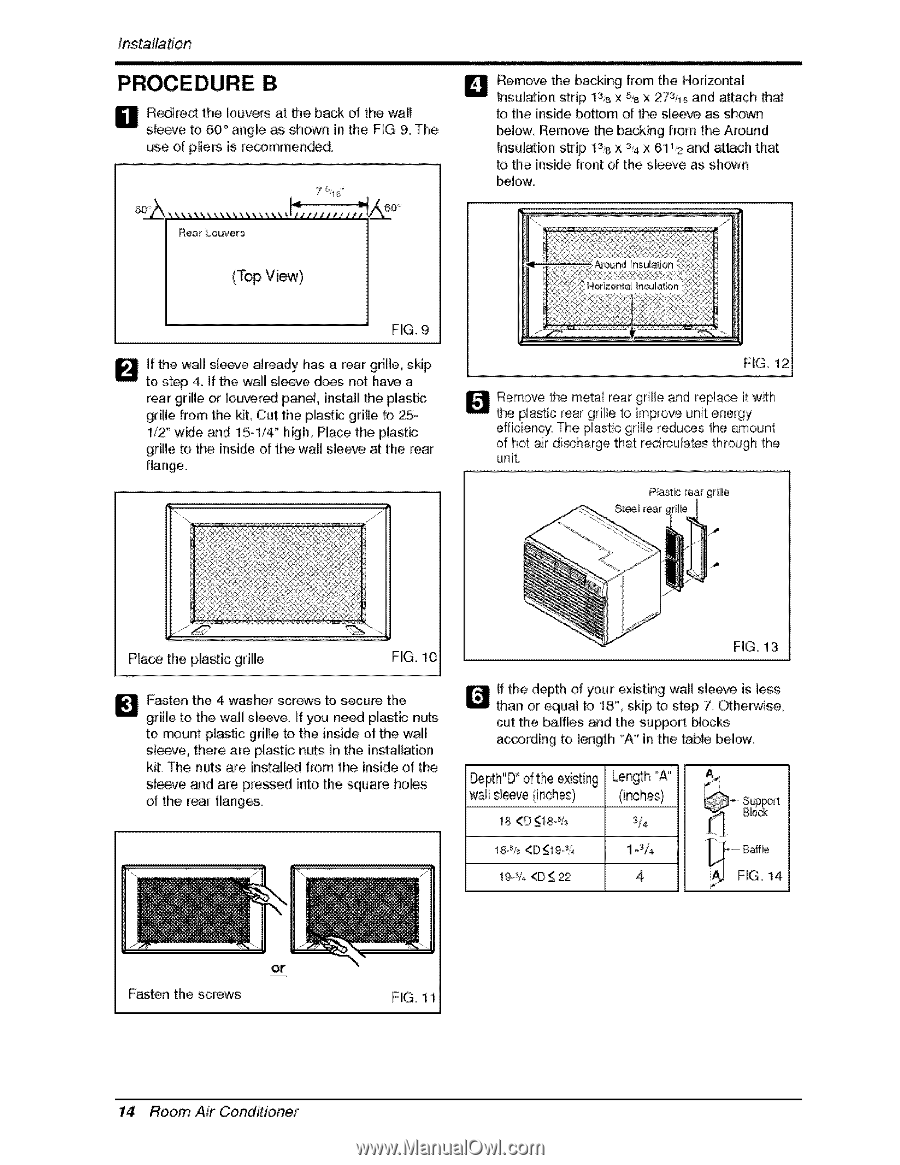
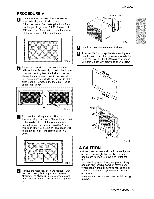
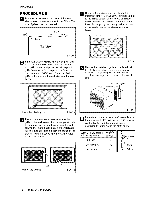
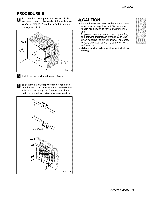
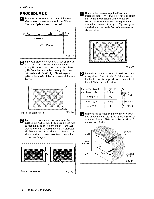
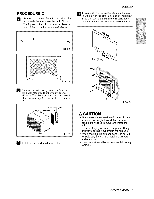
tnstatiation PROCEDURE Bi 0 edired the Ilouvers at the back of the wail sleeve to 60 ° angle as, sho,wn in the FIG 9,,The use ,o| pliers is recommended, D Remove the backiin9 from the Horizontal Insulation strip 1_'_rX 5,1_X 273_ and attach that: to the insNe bottom of the slee_m as shown below: Remo_ the backing from the Around Insulatbn strip 1% x 3,,'4x 61_2 and _tach that to the insNe front elf the sl_ve as shown below: Rear Lo_ve_s (Top View) FI!G, 9 lf the walil sleeve already has a rear gdlle, sNp to sitep 4. if the wali[Isl[eeve does not have a rear grille or Iou_[_ pane_, ilr_stallt!he plastic gdlile #ore the kit, Cut the plastic griWleto 25,!/2" wMe and 15o!/4" h_h, Place the plastic ,grille to the inside of the wall sleeve iat the rear Hange,_ FIG t2 _ ,emove the meta_ rear gril!e and replace it with the piastic rear grille to improve unit energy efficiency, The p_astic gri#e reduces the amount of hot air discharge that r_irou_ates through the unit Place the plastic grille IF_'G1o0 _ Fasten the, 4 washer s_s to secure the grille to the walli sleeve, if you ne_ p,[astic nuts to mount pl_tic grille to the inside of the waJll s[_ve, there are plastic nuts in the instaJlation kiL The nuts are instaJl_ from the inside of the sl_ve and are pressed into the square ho_s ot the rear flianges FIG, 13 t: the depth of your existing wall sleeve is less than or equaJ to 18" skip to step 7. OtherMse_ cut the baffles _d the su_o, rt blocks according to length "A '_ in the _le below. _pth"D _of the existing w,_!s_e (inches) 18
-
 1
1 -
2
-
3
-
4
-
5
-
6
-
7
-
8
-
 9
9 -
 10
10 -
 11
11 -
 12
12 -
 13
13 -
 14
14 -
 15
15 -
 16
16 -
 17
17 -
 18
18 -
 19
19 -
20
-
21
-
22
-
23
 |
 |