LG LW8019ER Owners Manual - Page 11
How to Install the Unit, Window Requirements, Preparation of Cabinet, CAUTION
 |
View all LG LW8019ER manuals
Add to My Manuals
Save this manual to your list of manuals |
Page 11 highlights
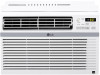
ENGLISH INSTALLATION 11 How to Install the Unit 1 To prevent vibration and noise, make sure the unit is installed securely and firmly. 2 Install the unit where the sunlight dose not shine directly on the unit. 3 The outside of the cabinet must extend outward for at least 12" and there should be no obstacles, such as a fence or wall, within 20" from the back of the cabinet because it will prevent heat radiation of the condenser. Restriction of outside air will greatly reduce the cooling efficiency of the air conditioner. Awning Fence Cooled air Heat radiation Preparation of Cabinet 1 Remove 4 screws which fasten the cabinet at both sides and at the back. (Keep the screws for later use.) Shipping Screws CAUTION ● All side louvers of the cabinet must remain exposed to the outside of the structure. 4 Install the unit slightly tilted so the back is slightly lower than the front (about 1/2"). This will force condensed water to flow to the outside. 5 Install the unit with the bottom between 30" ~60" above the floor level. Window Requirements ● This unit is designed for installation in standard double hung windows with actual opening widths from 27" to 39". The top and bottom window sashes must open 16" from the bottom of the upper sash to the inside sill. ● The height offset between the inside sill and outside sill must be less than 1 ¼". 2 Slide the unit from the cabinet by gripping the base pan handle and pulling forward while bracing the cabinet. CAUTION ● The unit is heavy. To prevent injury, use proper lifting techniques when pulling unit forward from cabinet. Obtain assistance from another person if possible. 3 Cut the window sash seals (Foam-PE) to the proper length. Peel off the backing and attach the adhesive-backed foam to the underside of the window sash and the bottom of the window frame. 27" to 39" 16" min NOTE ● wood, masonry, or metal. Foam-PE (Adhesive backed)
-
 1
1 -
2
-
3
-
4
-
5
-
 6
6 -
 7
7 -
 8
8 -
 9
9 -
 10
10 -
 11
11 -
 12
12 -
 13
13 -
 14
14 -
 15
15 -
 16
16 -
17
-
18
-
19
-
20
-
21
-
22
-
23
-
24
-
25
-
26
-
27
-
28
-
29
-
30
-
31
-
32
-
33
-
34
-
35
-
36
-
37
-
38
-
39
-
40
-
41
-
42
-
43
-
44
-
45
-
46
-
47
-
48
-
49
-
50
-
51
-
52
 |
 |
