LG LWHD1200HR Owners Manual - Page 13
Pull each Frame - installation manual
 |
View all LG LWHD1200HR manuals
Add to My Manuals
Save this manual to your list of manuals |
Page 13 highlights
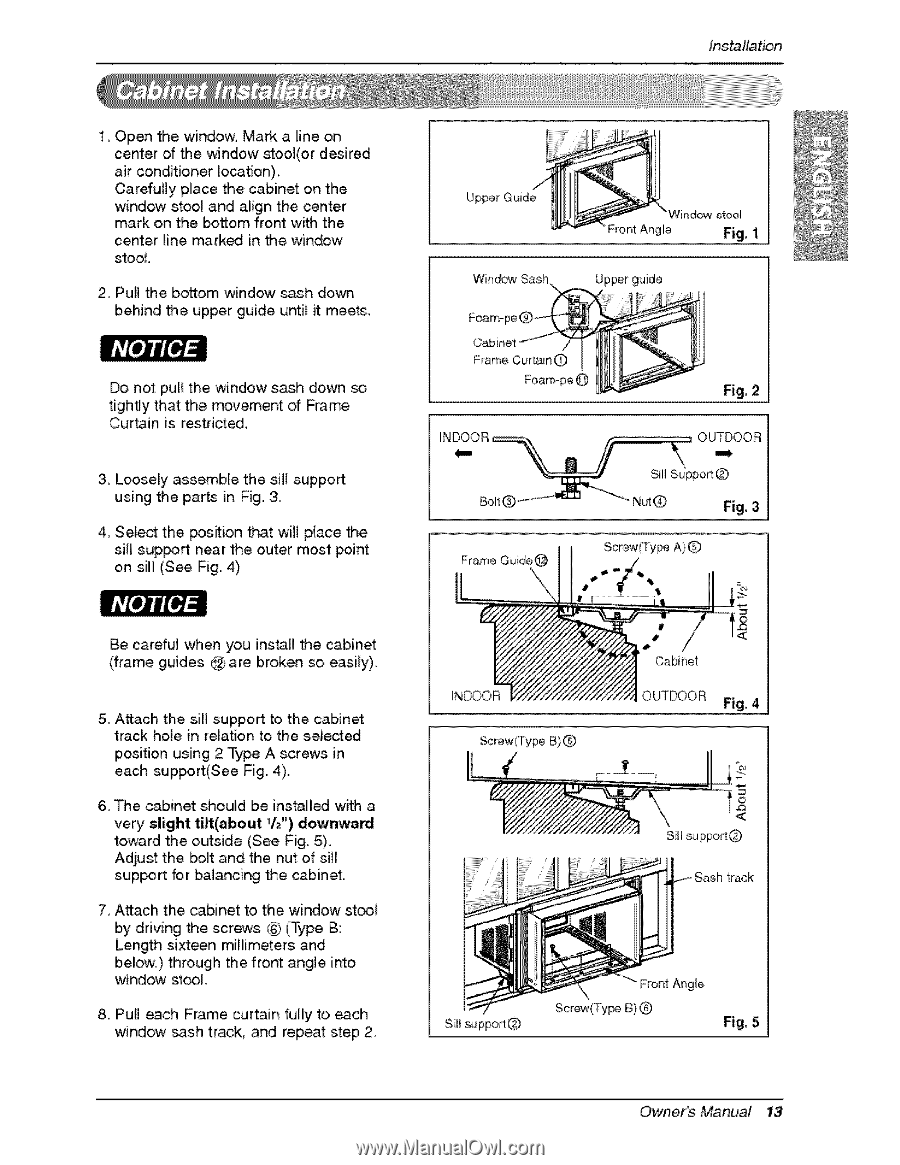
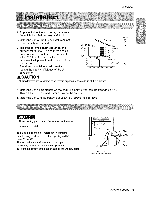
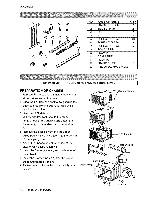
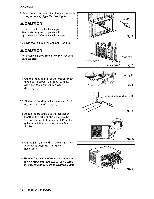
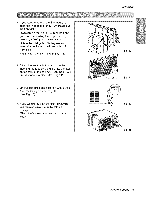
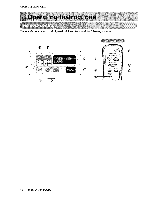
installation 1_ Open the window, Mark a line on center of the window stool(or desired air conditioner Io_tion)_ Carefully place the cabinet on the window stool and align the center mark o,n the r_o,m front with the center line marked in the window stool 2, Pull the bottom window sash down behind the upper guide until it meeLs, Do not pul_ the window sash ,down so tightiy that the movement of Frame Cur_in is restfi_ed. 3, L_sely assemMe the sill support ,using the parts in Fig, 3, 4, Select the position that will place the sill sup,po_ near the outer most _int o,n sill (See Fig.. 4) Be careful when you instal] the cabinet (frame guides @ are broken so easily). 5, Attach the sill support to the cabinet track hole in relation to the selected position using 2 Type A screws, in each sup_rt(See Fig. 4),. 6. The cabinet should be installed with a very slight tilt(abo_ V_") downward toward the outside (,See Fig. 5). Adiust the bolt and the nut of sill support for balancing the cabinet. 7, Attach the cabinet to the window st_ iby driving the screws ® (Type IB: Length sixteen millimeters and below.) through the front angle into window stool, 8. Pull each Frame curtain fully to eaclh window sash track, and repeat step 2_ Up_r Gude Win_w Sash Wind_ stool Fror_t Angle Fig, 1 Frame Cu_ain_ INDOOR Frame Guide@ I Fig, 2 OUTDOOR Si!l NL_® Fig!,3 Screw(Tyi_ A} @ INDOOR Screw(Type B)@ # °# / Cabinet OUTDOOR Sash track Screw(Ty_ Front _91e B)@ Fig° 5 Own,erb Manual 13
-
 1
1 -
2
-
3
-
4
-
5
-
6
-
7
-
 8
8 -
 9
9 -
 10
10 -
 11
11 -
 12
12 -
 13
13 -
 14
14 -
 15
15 -
 16
16 -
 17
17 -
 18
18 -
19
-
20
-
21
 |
 |