LG LWHD2400HR Owners Manual - Page 13
Screwdriver, Ruler, Kn|fe, Hammer, Pencil
 |
View all LG LWHD2400HR manuals
Add to My Manuals
Save this manual to your list of manuals |
Page 13 highlights
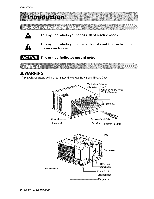
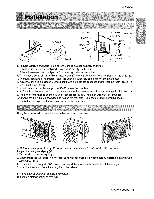
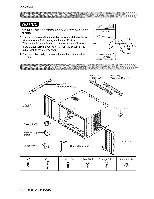
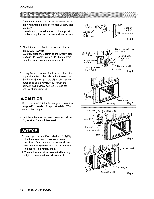
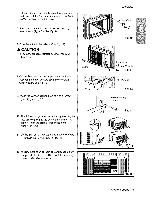
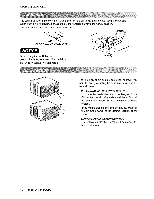
installation SCREWDRIVER(+, -), RULER, KN|FE, HAMMER, PENCIL, LEVEL PREPARATION OF CHASSIS 1. Remove the _rews whiich _asten the cabinet at both _des ,and at the back, Shipping screws 2. Slide the unit out from the cabiinet by grippingl the base pan handle and p,uBingb_ard while bracing the cabinet. 3. C_ the window sash _a] to the proper length,, Peel off the backing and ,attach the FoamoPE to the un_rside of the window sash. Fig. 1 4.. Remove the backing from Foam-PE with 3. holes and attach it to. the _ttom o_the Top retainer bar. 5. Attach the Top retainer bar on the top of the cabinet w_ 3 screws (Type A) 6. In_rt the Frame guides into,the bottom of the cabineL 7. Inert the Frame Curtain into the Top retainer bar and Frame guides. Foam-PE .F...op relaiBer bar 8. Fasten the curtains to the, unit wi_h 10 screws (Type A) at _th sides. Screw (Type A) Top telainer bar Screw(Ty_ A) Owner_ Manual 13
-
 1
1 -
2
-
3
-
4
-
5
-
6
-
7
-
 8
8 -
 9
9 -
 10
10 -
 11
11 -
 12
12 -
 13
13 -
 14
14 -
 15
15 -
 16
16 -
 17
17 -
 18
18 -
19
-
20
-
21
 |
 |
