LG MHEC1737D INSTALLATION - Page 5
Installation
 |
View all LG MHEC1737D manuals
Add to My Manuals
Save this manual to your list of manuals |
Page 5 highlights
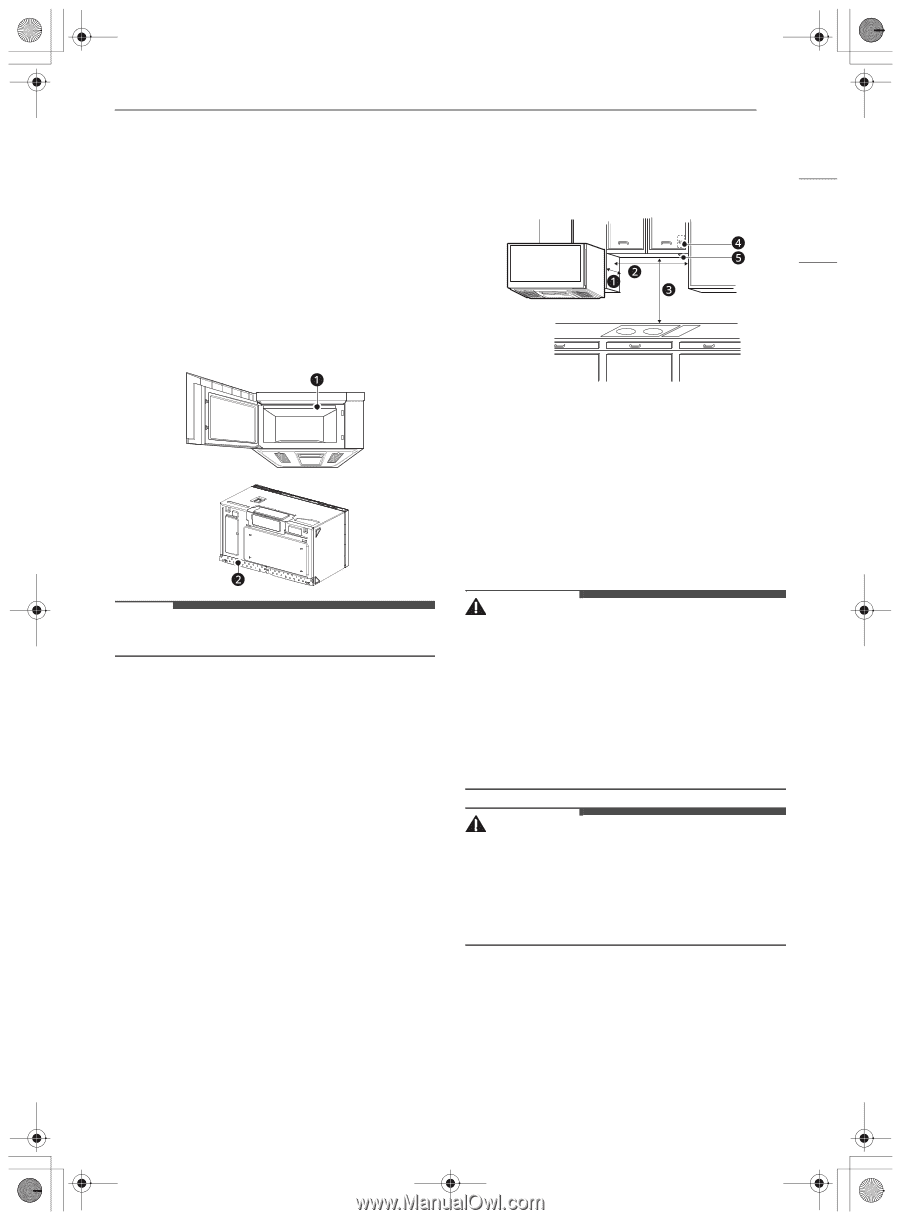
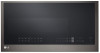
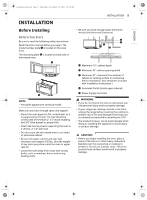
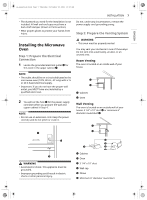
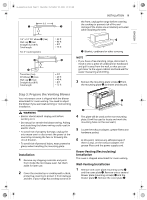
us_main.book.book Page 5 Thursday, November 25, 2021 10:15 AM ENGLISH INSTALLATION Before Installing Before You Start Be sure to read the following safety instructions Read the entire manual before you begin. The model number plate a is located on the oven front. The mounting plate b is located on back side of microwave oven. INSTALLATION 5 • Be sure you have enough space (minimum vertical and horizontal clearance). NOTE • Vent grille appearance varies by model. Make sure you have enough space and support. • Mount the oven against a flat, vertical wall, so it is supported by the wall. The wall should be constructed of minimum 2" x 4" wood studding and 3/8" thick drywall or plaster/lath. • Attach the two lag screws supporting the oven to a vertical, 2" x 4" wall stud. • Do not mount the microwave oven to an island or peninsula cabinet. • Be sure the upper cabinet and rear wall structures can support 150 lbs., plus the weight of any items you place inside the oven or upper cabinet. • Locate the oven away from areas with strong drafts, such as windows, doors, and strong heating vents. a Maximum 13": cabinet depth b Minimum 30": cabinet opening width c Minimum 30": clearance from bottom of cabinet to cooking surface or countertop before installation. (Use templates included with installation instructions.) d Grounded Outlet (inside upper cabinet) e Power Supply Cord Hole WARNING • If you do not mount the oven as instructed, you risk personal injury and/or property damage. • If your range has cooktop controls in the front, unplug the range before covering the cooktop to prevent risk of fire and damage if the knobs are accidentally activated while installing the OTR. • The product is heavy. Use at least 2 people when lifting or installing the appliance to avoid injury or product damage. CAUTION • Before you begin installing the oven, place a piece of the carton or other heavy material (a blanket) over the countertop or cooktop to protect it. Do not use a plastic cover. Failure to protect these surfaces could result in property damage.
-
 1
1 -
 2
2 -
 3
3 -
 4
4 -
 5
5 -
 6
6 -
 7
7 -
 8
8 -
 9
9 -
 10
10 -
 11
11 -
12
-
13
-
14
-
15
-
16
 |
 |