LG WM3499HVA Specification - Page 2
Quick Install & Clearances - installation
 |
View all LG WM3499HVA manuals
Add to My Manuals
Save this manual to your list of manuals |
Page 2 highlights
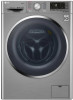
IMPORTANT HOME APPLIANCES LG LAUNDRY WM3499HVA Compact Front Load Washer & Dryer Combo QUICK INSTALL & CLEARANCES For full installation directions/clearances please refer to the corresponding User Manual and Installation Guide. DIMENSIONS/CLEARANCES/WEIGHTS A Width B Height C Depth D Depth with Door Open Carton Dimensions (WxHxD) ENERGY / RATINGS IMEF IWF Electrical Requirements 24" 33 1/2" 25 1/4" 45" 26 5/32" x 34 1/2" x 27 7/8" 2.0 6.0 120V, 10 Amps ELECTRICAL REQUIREMENTS • The washer should be plugged into a 120-VAC, 60-Hz grounded 3-prong outlet. Plug in the washer. Improper connection of the equipment-grounding conductor can result in risk of electric shock. Check with a qualified electrician or service technician if you are in doubt as to whether the appliance is properly grounded. Do not modify the plug provided with the appliance. If it does not fit the outlet, have a proper outlet installed by a qualified electrician. Failure to follow these warnings can cause serious injury, fire, electrical shock, or death. • The power outlet must be within 60 inches (1.5 m) of either side of the washer. • The appliance and outlet must be positioned so that the plug is easily accessible. • Do not overload the outlet with more than one appliance. • The outlet must be grounded in accordance with current wiring codes and regulations. • Time-delay fuse or circuit breaker is recommended. • It is the personal responsibility and obligation of the product owner to have a proper outlet installed by a qualified electrician. DIMENSIONS AND CLEARANCES B C 4" 1" A 1" D • Install the washing machine on a solid floor that is strong and rigid enough to support the weight of the washing machine, even when fully loaded, without flexing or bouncing. If the floor has too much flex, you may need to reinforce it to make it more rigid. If the floor is not solid, it may cause severe vibration and noise. CONNECTING THE WATER LINES • LG recommends the use of LG hoses. Any leaking, property damage, or damage to the washing machine caused by an improper installation or by the use of non-LG hoses is not covered under the terms of the LG warranty and is the sole responsibility of the customer and/or an installer. • Water supply pressure must be between 20 psi and 120 psi (138~827 kPa). If the water supply pressure is more than 120 psi, a pressure reducing valve must be installed. • Inspect the threaded fitting on each hose and make sure there is a rubber seal in place in both ends of • each hose. Connect the water supply hoses to the HOT and COLD water faucets tightly by hand and then tighten another 2/3 turn with pliers. • Always run a gallon or two of water through each inlet hose to flush dirt, scale and other debris out of the water lines. Doing so will help prevent future problems with clogged filter screens, and will also allow you to • verify which water line is hot and which is cold. Attach the hot water line to the hot water inlet on the back of the washer. Attach the cold water line to the cold water inlet on the back of the washer. Tighten the fittings securely. Turn ON both faucets all the way and check for leaks at both ends of the hoses. RubberSeal RubberSeal Water Hose (to water inlet on washer) Water Hose (to tap) Water Faucet Hot water inlet Cold water inlet CONNECTING THE DRAIN HOSE • The drain hose should always be properly secured. Failure to properly secure the drain hose can result in flooding and property damage. • The drain must be installed in accordance with any applicable local codes and regulations. • Make sure that the drain hose is not stretched, pinched, crushed, or kinked. • Normal height of the end of the hose Drain Hose •STANDPIPE Option Do not insert the end of the drain hose into the standpipe more than 8 inches (20cm). Doing so can cause siphoning, odors, or improper draining. should be approximately 35"~47" (0.9~1.2 m) from the floor. • Do not install the end of the drain hose lower than 8"(20 cm) Tie Strap 39" (99 cm) 39" (99 cm) 29 in. (73.7 cm) or higher than 96 in. Tie Strap Tie Strap (243.8 cm) above the bottom of the washer or more than 60 in. • (152.4 cm) away from the washer. Never create an airtight seal between the hose and the drain with tape or •LAUNDRY TUB Option Do not use this drain hose with a floor drain. other means. If no air gap is present, The end of the drain hose water can be siphoned out of the must be at least 29 inches tub resulting in poor wash/rinse above the floor for proper performance or clothing damage. draining to occur. © 2018 LG Electronics USA, Inc. All rights reserved. "LG Life's Good" is a registered trademark of LG Corp. All other product and brand names are trademarks or registered trademarks of their respective owners. Design, features and specifications are subject to change without notice. Non-metric weights and measurements are approximate. Some features may require Internet access. Content and services may vary by product and are subject to change without notice. 8/3/18
-
 1
1 -
 2
2
 |
 |
