Lacie Rugged Hard Disk User Manual - Page 17
Step 3.1, Connect the Interface cable to your LaCie Rugged and to your computer - not recognized
 |
View all Lacie Rugged Hard Disk manuals
Add to My Manuals
Save this manual to your list of manuals |
Page 17 highlights
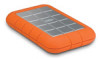
3. Installing Your LaCie Drive Step 3.1 - Connect the Interface cable to your LaCie Rugged and to your computer There are three interface connectivity options when connecting your LaCie Rugged Drive with Triple Interface to your computer: FireWire 400, FireWire 800 and Hi-Speed USB 2.0. 1 Connect the interface cable to your drive through the host connector. (FireWire 400, FireWire 800 or USB 2.0). 2 Connect the cable to your computer. After a few seconds, your LaCie Rugged Drive will mount on your computer. Important Note: This LaCie drive is preformatted in HFS+. Windows users see section 4.1.2. for information about reformatting. FireWire 400 FireWire 800 1 1 2 2 USB 2.0 Tech Note: Please refer sections 5.3.1. FireWire Ports and Performance and 6. FireWire Questions and Answers for important information on disconnecting FireWire devices 1 and ensuring optimum performance. Please refer to sections 5.3.2. USB Ports and Performance and 7. USB Questions and Answers for important information on disconnecting USB 2.0 devices and ensuring optimum performance. To achieve USB 2.0 speeds, your drive must be connected to a USB 2.0 host port. If it is connected to a USB 1.1 port, your 2 drive will operate at USB 1.1 speeds. For more details, see 5.3.2. Advice for Optimizing USB 2.0 Connections. Important Note: Windows Users: It may take a few seconds for your computer to recognize the drive and assign it a letter. Mac Users: It may take a few seconds for the drive to appear on your desktop. Mac OS 9.x Mac OS 10.x user manual | page 17
-
 1
1 -
2
-
3
-
4
-
5
-
6
-
7
-
8
-
9
-
10
-
11
-
 12
12 -
 13
13 -
 14
14 -
 15
15 -
 16
16 -
 17
17 -
 18
18 -
 19
19 -
 20
20 -
 21
21 -
 22
22 -
23
-
24
-
25
-
26
-
27
-
28
-
29
-
30
-
31
-
32
-
33
-
34
-
35
-
36
-
37
-
38
-
39
-
40
-
41
-
42
-
43
-
44
-
45
-
46
-
47
 |
 |
