Lantronix SLB Lantronix SLB - Quick Start Guide - Page 2
Ip Addressing, Configuring Network Ip Settings, Installing The Slb - default password
 |
View all Lantronix SLB manuals
Add to My Manuals
Save this manual to your list of manuals |
Page 2 highlights
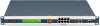
SLB Branch Office Manager Quick Start Guide 2 INSTALLING THE SLB 1. Install the unit in a 19-inch rack if desirable. Warning: Be careful not to block the air vents on the sides of the unit. If you mount it in an enclosed rack, we recommend that the rack have a ventilation fan. 2. Connect the SLB directly to the network through the top Ethernet port #1. 3. Connect up to eight serial console devices to the numbered device ports on the front of the unit using the appropriate cables and adapters. 4. To manage a device's power, plug its power cord into one of the eight power outlets. 5. If you are using the modem, connect it to the phone line. 6. Attach single-phase power cords to the primary AC input connector and secondary AC input connector (optional) and apply power. 7. Wait about a minute and a half for the boot process to end. When the boot process ends, the status of each power outlet displays on the LCD display. Detected faults or process messages may also display. 3 IP ADDRESSING Both of the SLB network ports (Eth1 and Eth2) default to DHCP-assigned IP addresses. If you want to assign a different IP address, it must be within a valid range, unique to your network, and with the same subnet mask as your workstation. To configure the SLB, you need the following information: IP address (if not already assigned Subnet mask (if not already assigned Gateway DNS 4 CONFIGURING NETWORK (IP) SETTINGS The fastest way to set basic network parameters is by using the front panel keypad and display. Note: If you prefer, you can get started by following a Quick Setup script on the command line interface using Telnet or SSH, or by connecting a terminal directly to the console (RS-232) port. The web page interface also provides a Quick Setup page. See Quick Setup in the User Guide for instructions. • Use the right and left arrow buttons to navigate from one option to another. • Use the up and down arrow buttons to navigate between parameters within an option or to increase or decrease a numerical value. • Use the Enter button in the center to enter or exit editing mode and to save changes. Note: If no buttons are pressed for 30 seconds, the front panel display times out without accepting unsaved changes and returns to displaying the hostname and clock. For example, to change the IP settings: 1. Press the right arrow button to display the Network Settings option and the current IP address. 2. Press the Enter button to go into editing mode. 3. Use the up and down arrow buttons to increment or decrement the IP address indicated by the cursor. 4. Use the right and left arrow buttons to move to and change the remaining digits of the IP address. Press the Enter button to exit editing mode when finished. 5. Press the down arrow button to display the Subnet Mask setting. 6. Edit the Subnet Mask in the same fashion as the IP address and press the down arrow. 7. Edit the Gateway and DNS settings. 8. Press the down arrow after the DNS 3 setting to go to the Save settings Yes/No prompt. 9. Select Yes at the prompt and press Enter to save changes. Repeat steps 1-8 for the other options (console port and date/time). Note: Another option, is to restore factory defaults. The default password for this action is 999999. See the SLB User Guide for more details. After you save the values for your console manager, changes take effect immediately. 2
-
 1
1 -
 2
2 -
 3
3 -
 4
4 -
 5
5 -
 6
6
 |
 |
