Lantronix SpiderDuo Lantronix SpiderDuo - Quick Start Guide - Page 7
Installation And Network Settings Continued - ip address
 |
View all Lantronix SpiderDuo manuals
Add to My Manuals
Save this manual to your list of manuals |
Page 7 highlights
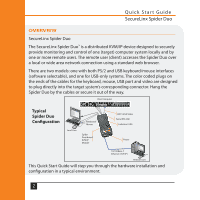
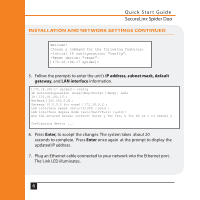
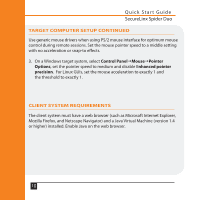
INSTALLATION AND NETWORK SETTINGS CONTINUED 1. Plug the RJ45 end of the included serial cable into the Spider Duo's serial port. Plug the DB9F end into the serial (COM) port of a PC/laptop running a terminal emulation (e.g. HyperTerminal). The default serial port settings are 9600 bits per second, 8 data bits, no parity, 1 stop bit, no flow control. Plug the power adaptor into the Spider Duo's power connector. 2. Insert color coded plugs into connectors with matching border on the Spider Duo. Plug the Video, USB, and PS/2 keyboard/mouse (if applicable) cables into the target computer. For transparent local access, connect cables to local keyboard, video and mouse. The blue Sys OK LED will illuminate and flashes to indicate that it is booting up. Bootup is complete within approximately one minute. The blue LED stops flashing and remains illuminated. 3. Upon bootup, the terminal window displays the IP Configuration screen. . At the command prompt type config and press Enter. 4. To change the default IP auto configuration from DHCP to a static IP address, at the IP autoconfiguration prompt type none and press Enter. W W W. L A N T R O N I X . CO M 5
-
 1
1 -
 2
2 -
 3
3 -
 4
4 -
 5
5 -
 6
6 -
 7
7 -
 8
8 -
 9
9 -
 10
10 -
 11
11 -
 12
12 -
13
-
14
-
15
-
16
-
17
-
18
-
19
-
20
 |
 |