Lantronix TN-SFP-OC3S8-Cxx Series TN-SFP-xxx User Guide Rev G - Page 7
Installing an SFP Module, TN-SFP-xxx User Guide, Rev. G, of 15
 |
View all Lantronix TN-SFP-OC3S8-Cxx Series manuals
Add to My Manuals
Save this manual to your list of manuals |
Page 7 highlights
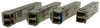
Lantronix TN-SFP-xxx User Guide Installing an SFP Module 1. Attach an ESD-preventive wrist strap to your wrist and to the ESD ground connector or a bare metal surface on your chassis. 2. Remove the SFP transceiver module from its protective packaging. Note: Do not remove the optical bore dust plugs until directed to do so in a later procedure. 3. Check the slot orientation. Note that for some devices (e.g., S4224) some slots are "upside down" compared to other slots. 4. Position the SFP device at the desired installation slot, with the label facing correctly. 5. Carefully slide the SFP device into the slot, aligning it with the internal installation guides. Label side top of SFP module Switch Switch Bale Clasp SFP Module Triangle indicates bottom of SFP cage Fully Inserted SFP 6. Ensure that the SFP device is firmly seated against the internal mating connector. To verify that the SFP is seated and latched properly: a) Grasp the SFP by the sides and try to remove it without releasing the latch. b) If the SFP can not be removed, it is installed and seated properly. If the SFP can be removed, reinsert it and press harder with your thumb; repeat if necessary until it is latched securely into the socket. 7. Connect the fiber cable to the fiber port connector of the SFP device. Make sure the SFP release latch is in the up (closed) position when you insert the cable connector into the SFP. 8. Remove the dust plug from the connector. Save the dust plug for future use. 9. Attach an appropriate cable into the SFP module port. 10. Attach the other end of the cable into the other device. 11. Observe the status LED(s). See the related manual for details. 33477 Rev. G https://www.lantronix.com/ Page 7 of 15
-
 1
1 -
 2
2 -
 3
3 -
 4
4 -
 5
5 -
 6
6 -
 7
7 -
 8
8 -
 9
9 -
 10
10 -
 11
11 -
 12
12 -
13
-
14
-
15
 |
 |
